Klaviyo
Klaviyo is a marketing automation platform that automates SMS and email marketing to help businesses acquire, retain, and grow their customers.
Klaviyo stores your customers' data and lets you build experiences across email and other channels, and measure the results in revenue.
Activate Klaviyo on Kameleoon
You must enable Klaviyo. To do this:
- Log in to your Kameleoon app.
- Click Admin > Integrations > Install the tool.
- Select the projects on which you want to configure Klaviyo.
- Click Validate.
You will then see an ON toggle on the right of the tool’s line, and the number of projects the tool is configured on.
The data will be automatically pushed to Klaviyo if it is installed on your pages.
If you need to change the behavior of our native bridge, you can create a custom analytics bridge and use the Klaviyo sample code on our Github repository.
Associate Klaviyo with a Kameleoon campaign
In the Graphic/Code editor
When finalizing your experiment:
- Click Integrations > Klaviyo.
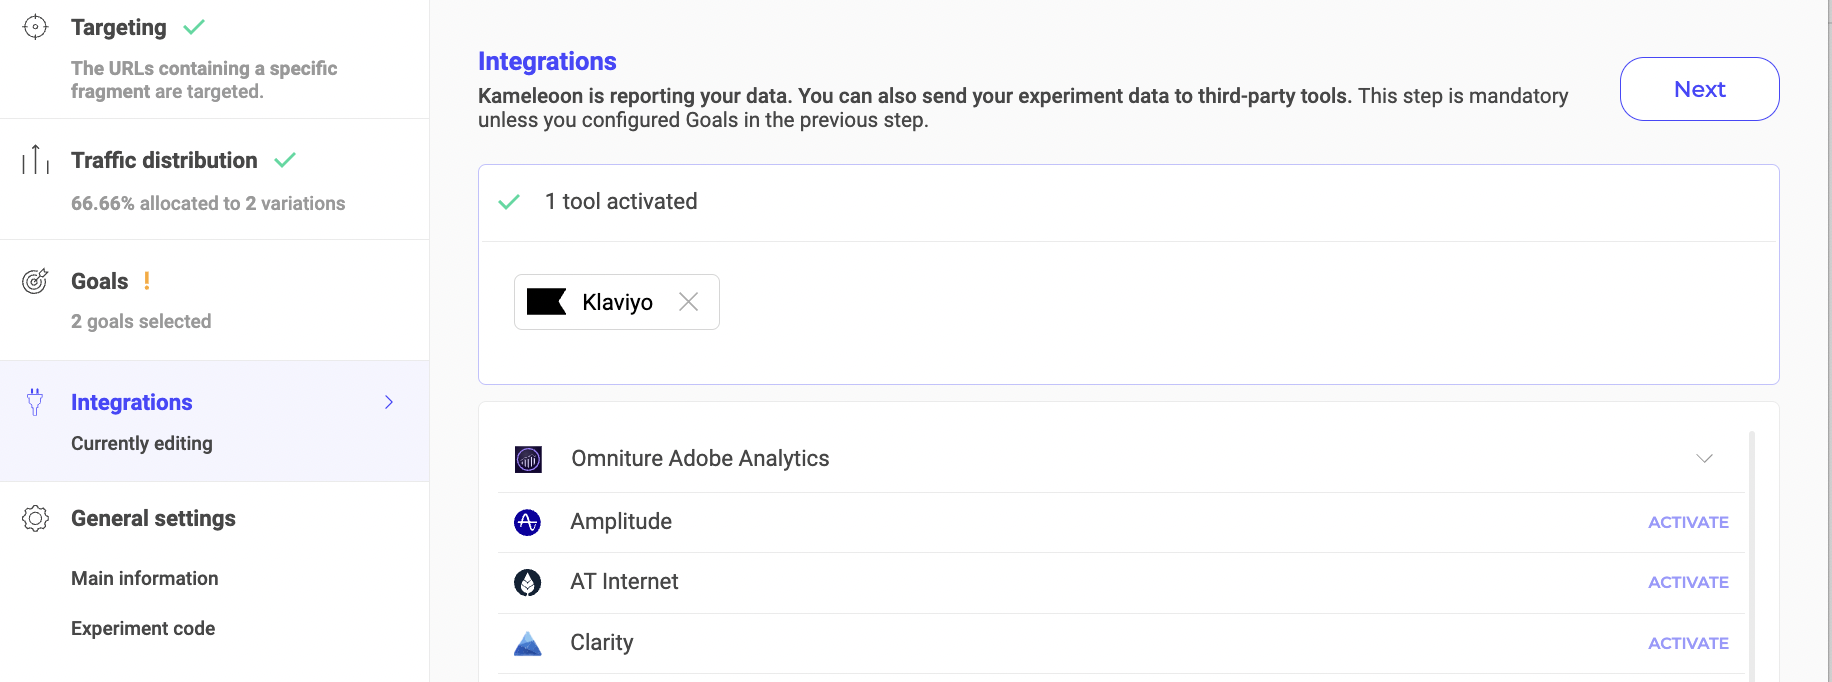
Klaviyo will be mentioned in the summary pop-in before going live. Kameleoon will automatically transmit the data to Klaviyo and you can view your results directly in the tool.
On the personalization creation page
You can select Klaviyo as a tool for a personalization the same way you would in an A/B test.
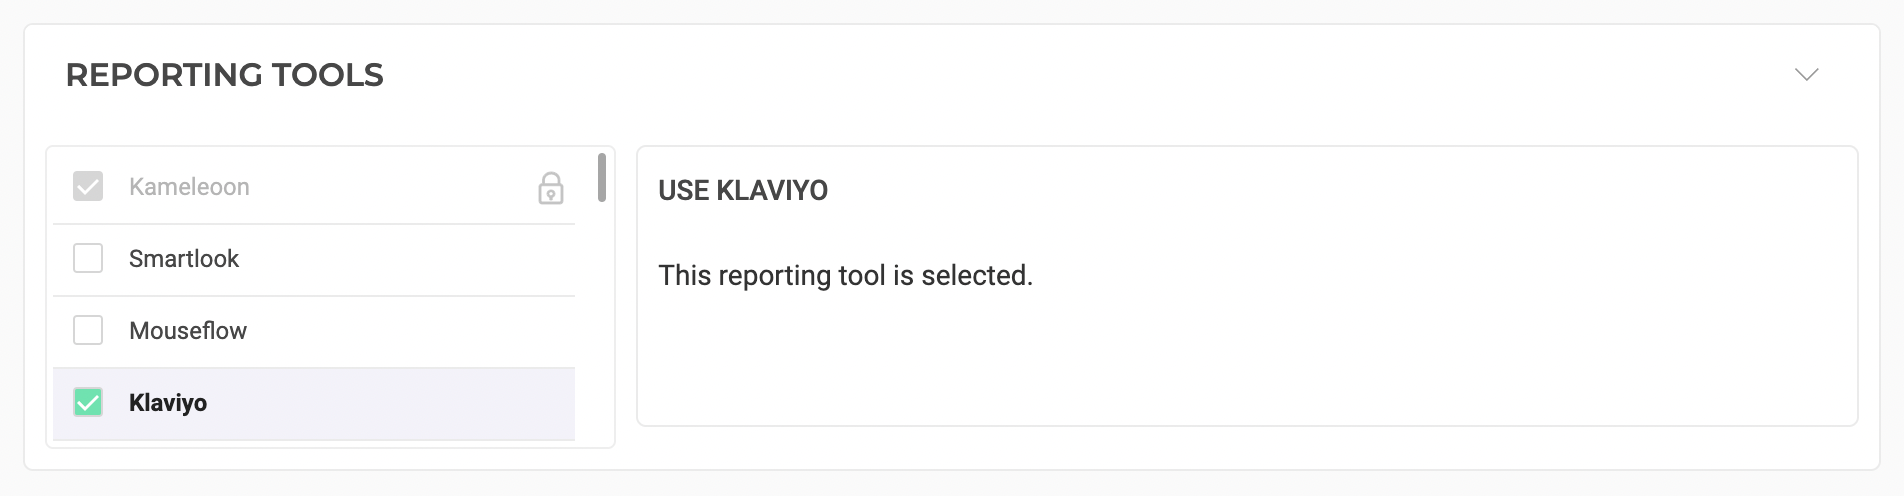
On the Results page
Once Klaviyo is set as a reporting tool for an experiment, you can select (or unselect) it via the Kameleoon Results page. To do this:
- Click Reporting Tools > Edit.
- Select or deselect Klaviyo.
- Click Validate.
Fetch Klaviyo segment data in Kameleoon
You must first create a Private API Key for Kameleoon and provide it to your Kameleoon CSM/TAM. Here are Klaviyo's guidelines for creating a Private API Key.
Next, you need to create a new custom data in Kameleoon.
Use the Custom Javascript Code acquisition method. This code should be placed in the custom code section of the custom data:
if (window.localStorage.hasOwnProperty('_ply_visitor')) {
let { email } = JSON.parse(window.localStorage.getItem('_ply_visitor'));
let { siteCode } = 'q8qxwhag8x';
const xhr = new XMLHttpRequest();
xhr.onreadystatechange = function () {
if (this.readyState === 4) {
const k_response = JSON.parse(xhr.response).split(/;/g);
k_response.forEach((element) => {
if (element !== '') Kameleoon.API.Data.setCustomData('KlaviyoSegment', element);
});
}
};
xhr.open('GET', https://customers.kameleoon.com/kameleoon/klaviyoSegment/?sitecode=${siteCode}&id=${email}, false);
xhr.send();
}
return;
Replace the variable siteCode
with your Kameleoon project sitecode key.
In this example the information, such as the customer's email, is in the localStorage
. We will retrieve the email to make a call on our Webservice.
Optionally, you can insert this snippet into the Save the values for the targeting condition associated with the custom data point of the same custom data (last step).
const segmentKlaviyoList = [];
const xhr = new XMLHttpRequest();
xhr.onreadystatechange = function () {
if (this.readyState === 4) {
JSON.parse(xhr.response)
.forEach(element => {
segmentKlaviyoList.push({ value: element.list_name, label: element.list_name });
});
}
};
xhr.open('GET', `[https://customers.kameleoon.com/kameleoon/klaviyoSegment/list?sitecode=YOUR_SITECODE](https://customers.kameleoon.com/kameleoon/klaviyoSegment/list?sitecode=YOUR_SITECODE)`, false);
xhr.send();
return segmentKlaviyoList;
Replace "YOUR_SITECODE" with your Kameleoon project siteCode
.
Use a Klaviyo segment in a Kameleoon segment
After the custom data for the Klaviyo segments has been set up, you can build segments in the Kameleoon segment builder. Choose the custom data and select is among the values. A list of every segment in Klaviyo is displayed. Selecting one or more Klaviyo segments will enable targeting in personalizations and experiments.
External Segment Sync for Server-side
If you would like to use Klaviyo segment data with one of our SDKs, you will need to follow the guidelines provided in each SDK and use the method getRemoteData()
.