Web Experimentation installation guide
This page includes step-by-step instructions for installing Kameleoon, including creating a project for your website, mobile app, or both, and configuring your project settings.
Overview
Before launching experiments on your website or mobile app, you must install the Kameleoon script. This script, containing your unique project code, must be added to the <head> tag of your source code.
If your package allows, you can manage multiple sites or apps from your Kameleoon account, which is useful for testing in staging or pre-production environments.
Several setup options are available. Their sequence follows this pattern:

Project configuration
In the Kameleoon app, you’ll see a list of your projects. By default, you’ll have a project card for the website or mobile app you entered when you signed up.
Configuring an existing project
To modify a project’s settings:
- Click Setup on the project’s card.
- Review the project’s configuration and click Modify setup.
- In the pop-in that appears, click Modify again to access your settings.
Creating a new project
To create a new project:
- Click New project.
- Enter your site URL and, optionally, a name and description.
- Click Add.
A new page will appear to guide you through installation.
Your ability to create additional projects depends on your Kameleoon package.
Choose your implementation settings
When setting up a new project, you’ll be asked to choose implementation settings. For technical details, including how to install Kameleoon using a tag manager or implement custom script types, please refer to this article.
Consent
Before installing the Kameleoon script on your website, ensure your setup complies with your organization's consent management policy.
If you use a Consent Management Platform (CMP), you can integrate it with Kameleoon to control when experiments and data collection are activated.
For details, refer to Kameleoon's consent management article.
Domain configuration
You can define which domains and subdomains can load the Kameleoon script and access its features.
- Under Domain configuration, click Add a domain/subdomain to whitelist domains for cross-domain tracking.
- This lets you use Kameleoon’s Graphic editor and store/retrieve visitor data across domains.
- If you try to use Kameleoon on a domain not listed, loading will fail due to browser security policies (CORS).
Cross-domain tracking
Cross-domain tracking lets you:
- Track the same visitor across different domains and subdomains (for example,
example.comandexample.org). - Avoid reclassifying users as “new visitors” when they move between domains.
- Offer consistent personalization and experiment experiences across properties.
You should enable cross-domain tracking if you plan to unify session data across multiple domains.
Authorizations
If you’re targeting subdomains, you must configure the following HTTP headers:
Learn more about Apple’s Intelligent Tracking Prevention (ITP), which restricts cross-site tracking in Safari, in this ITP documentation.
Resource hosting
You can choose whether Kameleoon hosts its public resources or if you prefer to self-host them.
- Select an option from the dropdown menu in the setup page.
- If you choose self-hosting, provide the URL of your Content Delivery Network (CDN).
Learn more about resource hosting here.
Install the Kameleoon script
After defining your site’s URL, Kameleoon generates a script for installation.
- Copy the provided code snippet.
- Paste it immediately after the
<head>tag in your site’s source code. - Save and upload your updated page(s) to your server.
- Click Validate in Kameleoon.
For best results, install the script as early as possible in the page’s loading process.
If Kameleoon can’t detect the script, ensure it’s been correctly added. You can choose to skip verification if you’re confident the script is present.
Preventing flickering
When a webpage loads, users may briefly see the original version before the variation is applied. This momentary flash is called the flicker effect or flickering. Flickering occurs when the variation's changes are delayed, creating a visible switch between the original and modified content. Flickering can affect user experience and experiment reliability, especially in A/B testing.
Guidelines to avoid flickering
Implementation
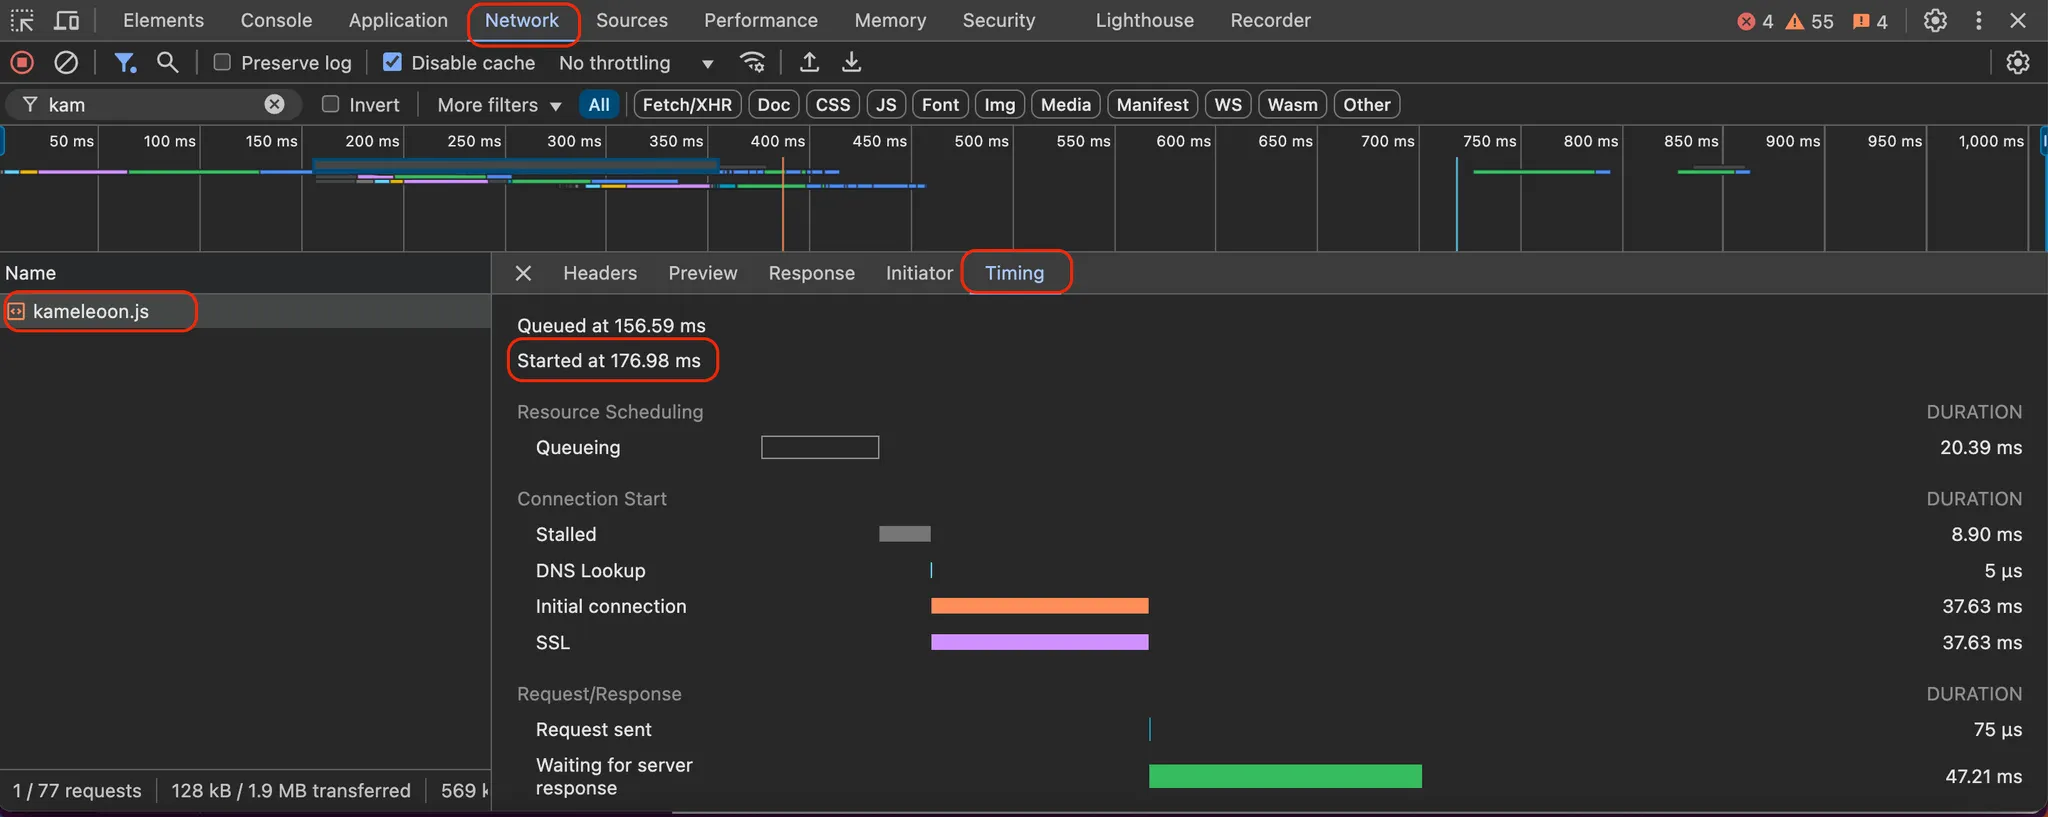
Place the Kameleoon script as high as possible in the <head> tag. Ensure the script loads in under one second, ideally below 500 ms. To check Kameleoon's loading time, use the Network tab in your browser's developer tools.
The most effective way of ensuring fast loading is installing Kameleoon directly in your HTML source code, rather than using a tag manager like Google Tag Manager.
Optionally, you can use the anti-flicker script as an additional layer of protection against flickering. For more information, refer to Kameleoon's developer documentation.
If you enable this option, you'll have several configurations to control how Kameleoon behaves if the timeout occurs. The timeout duration is configurable within the installed script and is set to 1,000 ms by default.
To explore the available options, refer to the screenshot below.
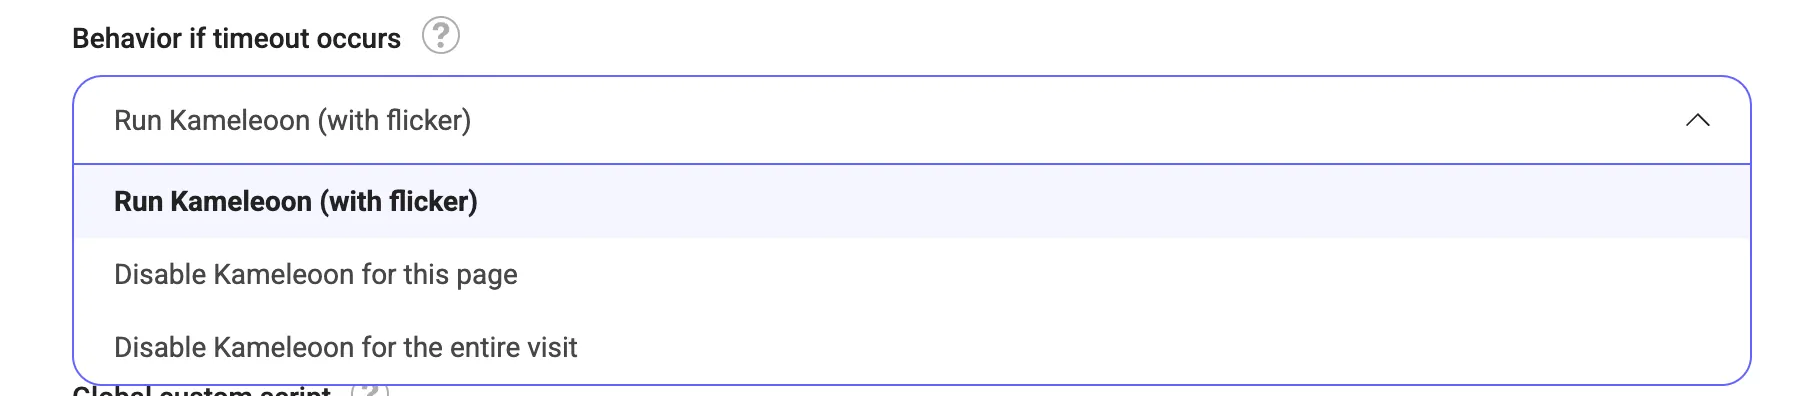
You can access the Behavior if timeout occurs dropdown by clicking Admin > Configuration > General.
If Kameleoon loads late, the page may be displayed before the variation code is applied. In that case, the optimizations described below will be ineffective.
Consent
If your consent policy is set to consent required, flickering may occur on the first page view when the visitor has not yet given their consent. This flickering happens if you choose to partially or completely block Kameleoon when consent is unknown.
To prevent flickering, you should not block Kameleoon, so experiments can be displayed before consent is given on the visitor's landing page. This approach is fully compliant with privacy regulations such as GDPR, CCPA, and other major frameworks in the UK, Canada, and the US, as no tracking or data storage (cookies/localStorage) occurs before consent is granted.
To explore available options, refer to the screenshot below.
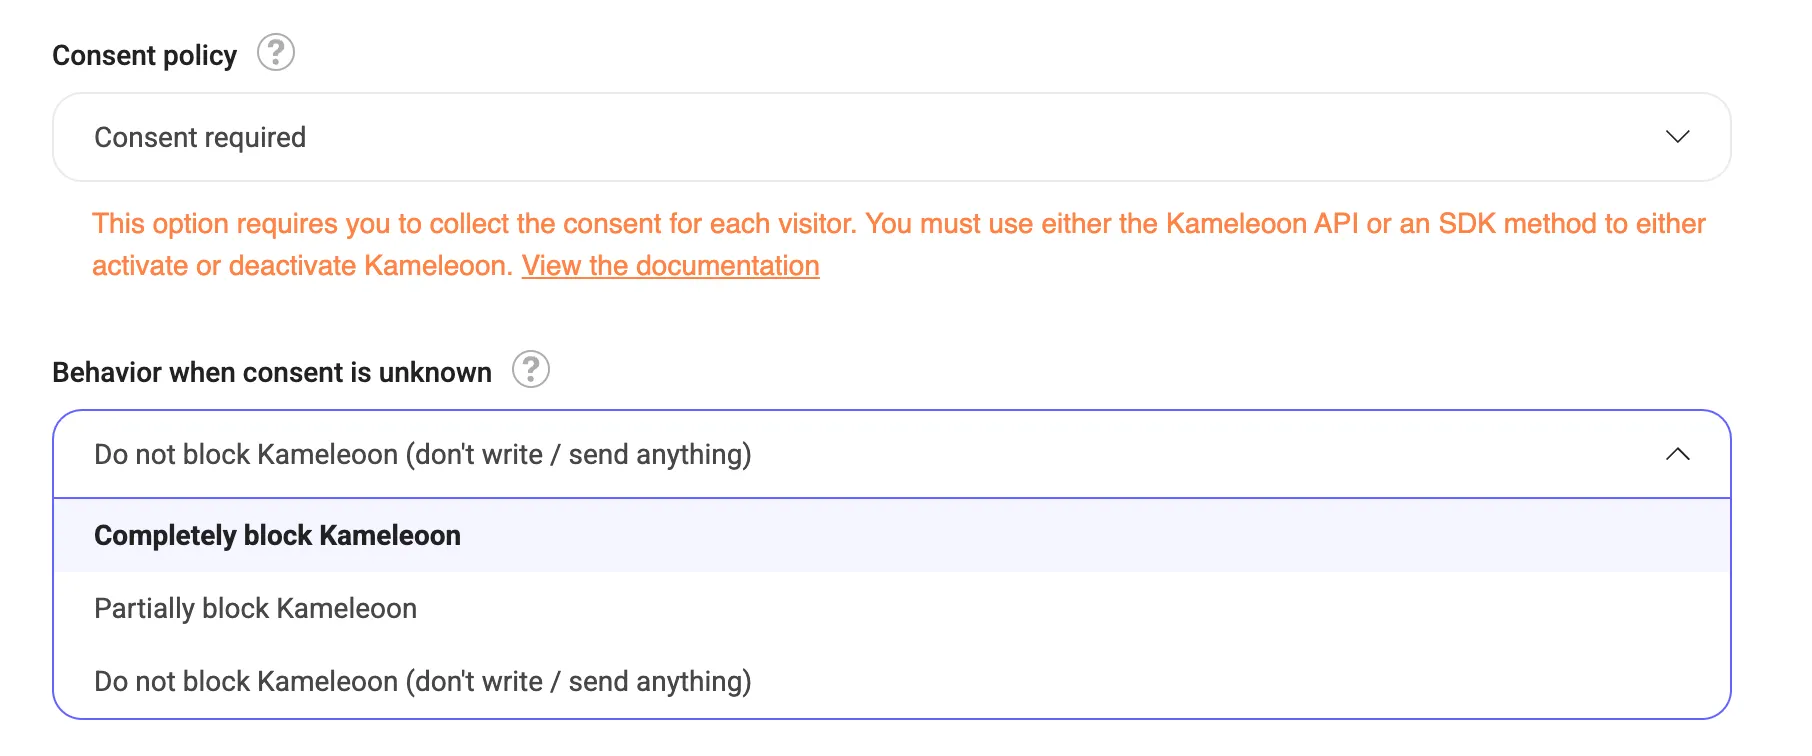
To access the Behavior when consent is unknown dropdown, click Admin > Configuration > Experiment/Personalization.
Targeting
Use early-loading information
For the best performance, base targeting on data that is available immediately upon page load, such as:
- Page URL
- Browser type
- Device type
cookies/localStorage
When possible, avoid targeting elements that load late, such as the dataLayer variables. Since these may load asynchronously, using them for targeting can delay variation execution. If a segment relies on a custom JS condition or custom data that itself depends on the dataLayer, flickering may occur as well.
To minimize flickering, ensure that any conditions used for targeting are resolved as early as possible in the page lifecycle.
To learn more about all targeting conditions in the Segment Builder, refer to this article.
Variation code
Use CSS instead of JavaScript for visual changes
Using CSS instead of JavaScript ensures faster and smoother rendering. CSS should be used for:
- Hiding or modifying elements
- Swapping blocks
- Changing styles or text
Optimize JavaScript execution with the Activation API
If JavaScript is necessary, use Kameleoon's Activation API to ensure variations are applied at the right moment:
runWhenConditionTrue: Executes the code when a specific condition is met.runWhenElementPresent: Ensures that the variation displays as soon as the targeted element is loaded on the page. Using these methods avoids delays caused by elements that load asynchronously.
Handling single-page applications
If your experiment runs on a single-page application (SPA) or a dynamically updating page, special implementation steps are required. Follow this guide on setting up an experiment on an SPA for best practices.