Create a goal
Visit our academy for a video tutorial on setting up goals.
To measure the efficiency of an experiment, it must be linked to one or several goals. This goal is what you want to improve with your campaign.
All your goals created with Kameleoon are available in the Goals page of the Settings menu.
Access the Goals page
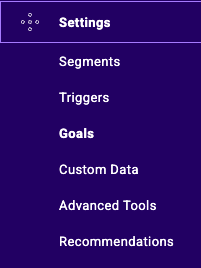
To access your goals, click Settings > Goals.
By default, the Retention rate goal is included for all sites associated with your Kameleoon account. This goal records the number of visitors who open at least one other page after the landing page.
Create a new goal
To create a new goal, go to Configure > Goals in the left-hand menu.
Click on the New goal button to set up your new goal.
The following pop-in will open. Name your goal, select its associated site, and choose its type.
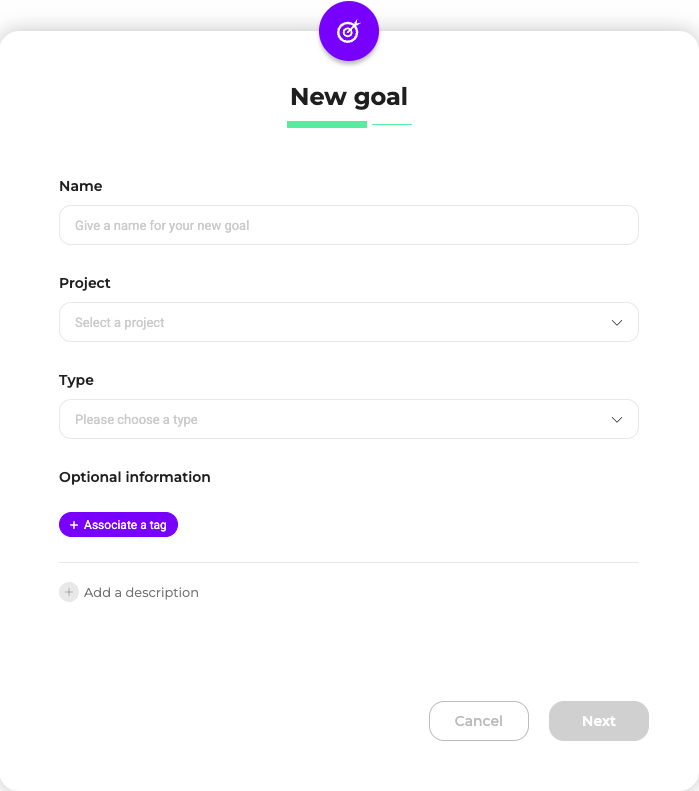
You can choose between seven types of goals:
- Click tracking
- Scroll tracking
- Access to a page
- Custom goal
- Time spent
- Number of pages viewed
- Retention rate
If you have protected your website using an iframe, the creation of a goal in the app may not be possible.
Click tracking
Visitors achieve the Click tracking goal by clicking a specific element on your website.
To set up this goal, select Click tracking from the dropdown menu and click Next. The window expands to display the setup options.
![]()
Enter the URL you want to use to select your target element. Then, click the element you want to track or enter its CSS selector.
Kameleoon tracks clicks on the selected element across your entire website. The page you use to configure the tracker does not limit where the goal can convert. If multiple pages feature elements with the same CSS selector, Kameleoon records a conversion whenever a visitor clicks any of those elements. To track clicks on an element on a specific page only, you must use a CSS selector unique to that page.
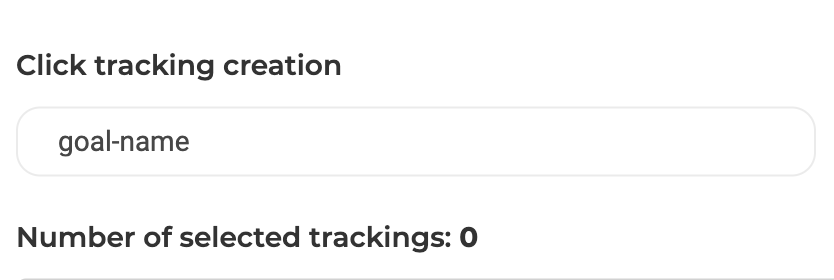
Once you choose an element, an orange pointer appears to confirm that the click tracking has been added. You can apply click tracking to several elements.
The number of selected click trackings is indicated above the window.
You can also choose navigation mode to browse on your pages.

If your website is protected from being shown in an iframe (the X-Frame-Options header is used in the server settings), your URL won't be displayed in this pop-in, and you can't add click tracking. You must change your server settings and add an exception for the kameleoon.com domain and subdomains.
If you want to access advanced setup options, click Advanced settings in the bottom left-hand corner of the pop-in.
Click Create to create your goal.
Scroll tracking
Scroll tracking lets you determine the percentage of visitors who scroll to a specified section of your page.
To set up this goal, choose Scroll tracking in the dropdown menu of the pop-in and click Next. The pop-in now shows the setup options for the goal.
Indicate the URL of the page you want to apply the scroll tracking to.
![]()
If your website is protected from being shown in an iframe (the X-Frame-Options header is used in the server settings), your URL won't be displayed in this pop-in, and you can't add click tracking. You must change your server settings and add an exception for the kameleoon.com domain and subdomains.
The scroll tracking level is established by the limit between the shaded and non-shaded area. To meet the goal, the visitor must scroll down to the shaded part of the page.
There are three different ways to define scroll tracking depth:
- A precise percentage: The percentage is applied to the entire website. It’s defined with regard to the top of the page: 0% places the level at the very top, 50% in the middle and 100% at the very bottom of the page.
- A height in pixels: Zero pixels is the very top of the page. The lower the level is set on your page, the higher the number of pixels. The maximum height in pixels correlates with the page size.
- The selected element: Visualize the elements of your page by hovering over them and clicking on the element of your choice. The level will be positioned directly below the selected element.
If you choose a percentage or a height in pixels to determine the scroll tracking level, you can easily move it by dragging it into the position of your choice.
If you want to access advanced setup options, click Advanced settings in the bottom left-hand corner of the pop-in.
Access to a page
The Access to a page goal is met when the visitor accesses the page you defined.
To set up this goal, choose Access to a page in the dropdown menu of the pop-in and click on Next.
The pop-in now will now show the setup options for the goal.
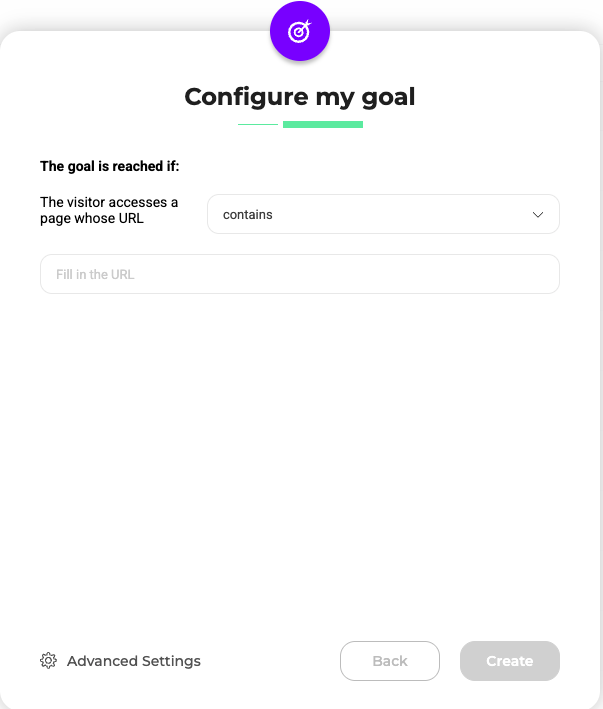
Indicate the page the visitor must visit to reach the goal.
There are three options:
- Choose contains to target all the pages sharing the same URL fragment.
- Choose matches exactly to target only the page with the exact URL you entered.
- Choose matches the regular expression to target a URL and its variations according to the regular expressions you are using. Refer to this article for help creating regular expressions.
URL fragments and regular expressions are case-sensitive.
Example:
Your product page URLs are typically structured like this: https://www.mysite.com/products/product-1
Here's how to apply your Access to a page goal for different scenarios:
- To a specific product page:
- Select matches exactly and enter the full, precise URL. For example:
https://www.mysite.com/products/product-1
- Select matches exactly and enter the full, precise URL. For example:
- To all product pages:
- Select contains and type in
/products/. Your goal will then apply to all pages that include the/products/fragment in their URL.
- Select contains and type in
- For URLs with common variations (for example, "product" vs. "products"):
- If your product page URLs sometimes contain "product" instead of "products", use a regular expression. For instance,
https://www.mysite.com/products*will match URLs containing either "products" or "product" at that point.
- If your product page URLs sometimes contain "product" instead of "products", use a regular expression. For instance,
If you want to access advanced setup options, click Advanced settings in the bottom left-hand corner of the pop-in.
Ratio Metrics
For more information on creating a Ratio Metrics goal, refer to the Ratio Metrics article.
Custom goal
To set up a custom goal, select Custom goal in the Type dropdown and click Next.
The pop-in will now show the available setup options.
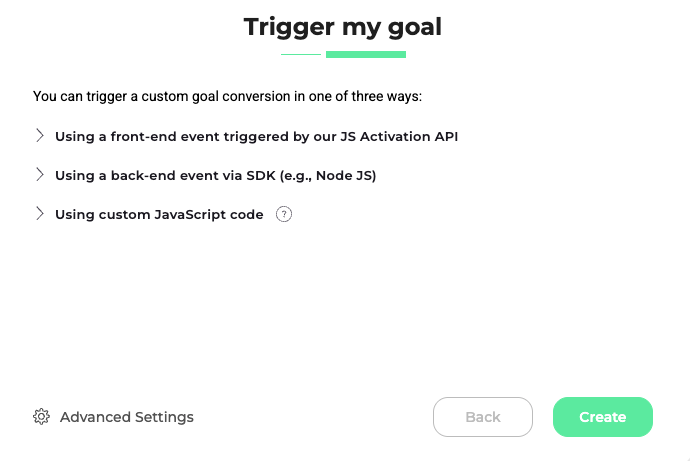
Option 1: Using a front-end event triggered by our JS Activation API
Choose this option if the conversion event happens in the user's browser (client-side).
- How it works: Kameleoon provides a specific function (
Kameleoon.API.Goals.processConversion(ID), whereIDis your goal's unique identifier) that you insert into your JavaScript code. When the user performs the action you are tracking, your code executes this function to send the conversion signal directly to the Kameleoon platform.
The goal's ID will be generated once the goal is created.
Click the Copy icon to copy the event code and implement it in your JavaScript (or pass it along to your development team for implementation). For more information on the processConversion() method, see this article.
Option 2: Using a back-end event via SDK (e.g., Node JS)
Choose this option if the conversion event happens on your server (backend). This method is necessary for tracking actions that do not rely on the user's browser session (for example, successful payment processing).
How it works: The Kameleoon server-side SDK uses a specific method (trackConversion()) to communicate the conversion event directly from your server to the Kameleoon platform.
Click the Copy icon to copy the SDK event code and pass it to your backend development team for implementation.
Code example:
trackConversion({visitorCode, goalId})
visitorCodeis the visitor's unique identifier you want to target.goalIdis the goal's unique identifier.
The goal's ID will be generated once the goal is created.
For more information on the trackConversion() method, see this article.
Option 3: Using custom JavaScript code
Choose this option if you need to run specific JavaScript logic to determine when to trigger the goal. Custom JavaScript is the most flexible option and is useful if you need to dynamically calculate revenue or capture additional metadata before sending the conversion signal.
- How it works: The code you enter in the text field runs automatically once your site is ready. Within that code, use the
triggerGoal()method to fire a conversion. You can also optionally pass revenue and metadata parameters.
Enter your custom JavaScript code directly into the provided text field.
| Function | Description | Example code |
|---|---|---|
triggerGoal() | Triggers a conversion with no parameters. | triggerGoal(); |
triggerGoal(revenue) | Triggers a conversion with a revenue value. | triggerGoal(49.99); |
triggerGoal(revenue, metadata) | Triggers a conversion with revenue and extra data. | triggerGoal(49.99, {5: "Gold"}); |
For more information on using custom JavaScript code for custom goals, see Kameleoon's developer documentation.
Alternatively, If you're initiating a conversion from a Tag Management System (for example, Google Tag Manager), you should use the Kameleoon Command Queue, which allows you to delay the command's execution until the Kameleoon engine finishes loading.
In Google Tag Manager, go to GTM > Tags > New > Tag Configuration > Custom HTML > insert the following code:
<script>
window.kameleoonQueue = window.kameleoonQueue || [];
kameleoonQueue.push(['Goals.processConversion', goalid, revenue]);
</script>
Then, select the trigger that will send the goal conversion call to Kameleoon.
Find out more about Kameleoon.API.Goals here.
If you want to access advanced setup options, click Advanced settings in the bottom left-hand corner of the pop-in.
Time spent
This goal is met when the visitor spends a certain amount of time on your site.
To set up this goal, choose Time spent in the dropdown menu of the pop-in and click Next.
The pop-in will now show the setup options for the goal.
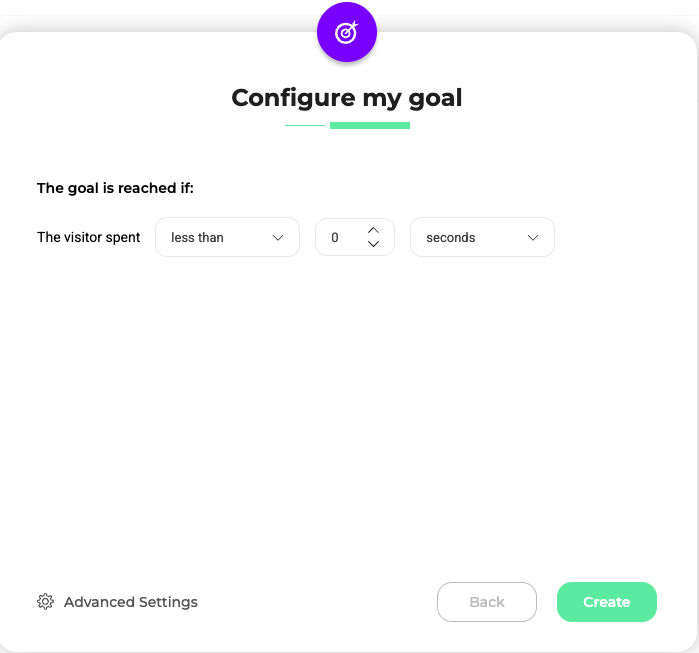
Indicate the time the visitor must spend on your website to meet the goal.
To do this, you can choose the limit:
- more than: The visitor must spend at least a given time on the page
- exactly: The time spent must match exactly
- less than: The time spent must not exceed a given duration
Indicate the figure of your choice and one of the possible units in the dropdown menu: seconds, minutes, or hours.
If you want to access advanced setup options, click Advanced settings in the bottom left-hand corner of the pop-in.
Number of pages viewed
This goal is met if the visitor has viewed a certain number of pages.
To set up this goal, choose Number of pages viewed in the dropdown menu of the pop-in and click Next.
The pop-in will now show the setup options for the goal.
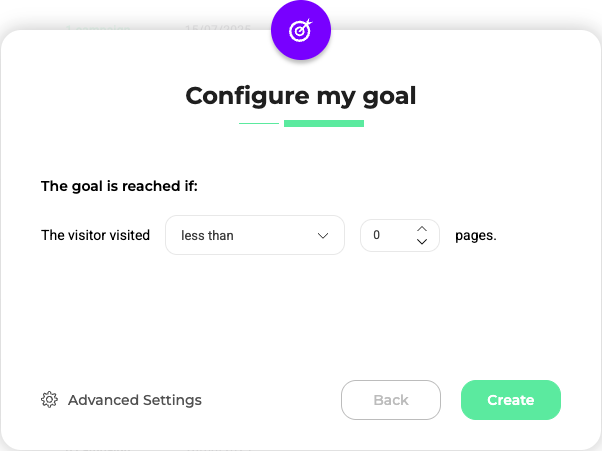
Indicate the number of pages the visitor must view to reach the goal. You can choose among an exact number, a minimum or a maximum.
If you want to access advanced setup options, click Advanced settings in the bottom left-hand corner of the pop-in.
Retention rate
This goal is one of the default settings for all new websites set up with your account. The retention rate records the number of visitors who made at least one click on their landing page.
To set up this goal, choose Retention rate in the dropdown menu of the pop-in and click Next.
The pop-in will now show the setup options for the goal.
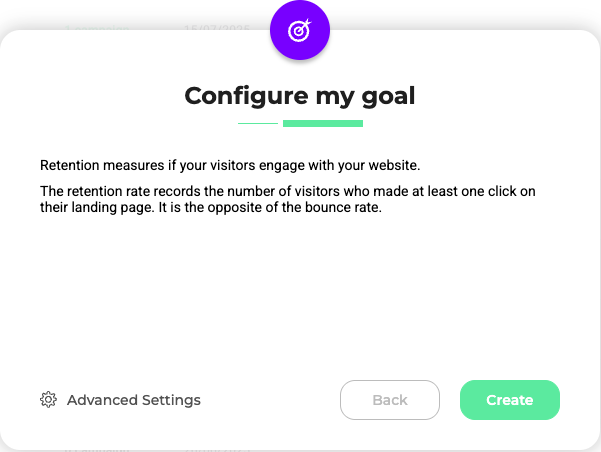
The goal is already set, you just have to name it and add a description if you wish.
If you want to access advanced setup options, click Advanced settings in the bottom left-hand corner of the pop-in.
Advanced settings
Click Advanced settings in the bottom left corner of the pop-in to access advanced setup options.
The pop-in is divided into several sections.
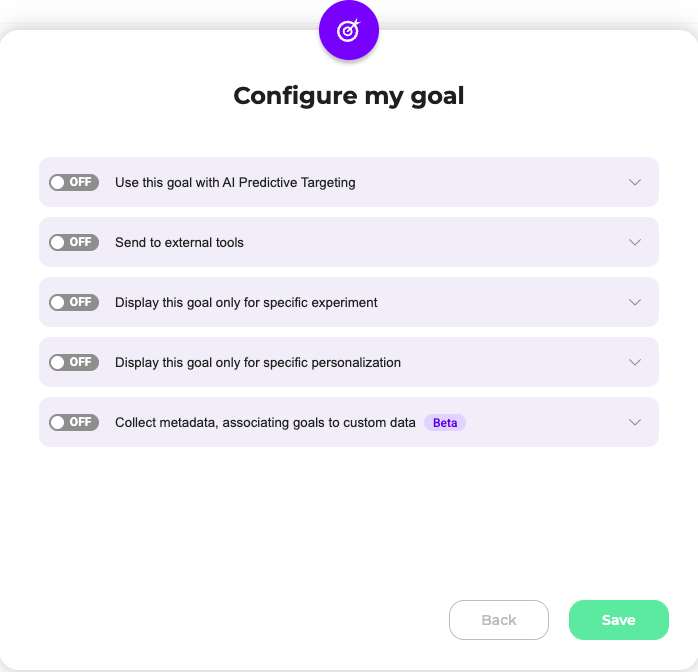
Use this goal with AI Predictive Targeting
Activate this option to enable predictive targeting for your goal. In real-time, machine learning will recognize patterns that significantly impact the goal, estimating each visitor's conversion probability, allowing you to target visitors based on their likelihood to convert.
Select which triggers you wish to make predictions at for this goal. More about triggers
Send to external tools
This section lets you send a conversion event to selected external tools when Kameleoon triggers this goal. This option is only available for Google Analytics 4, Universal Analytics, Mixpanel, and Segment.
You can send the following types of goals to external tools:
- Click tracking
- Scroll tracking
- Access to a page
- Custom goal
- Time spent
- Number of pages viewed
- Retention rate
The code below defines the available goal types:
const enum GoalType {
	CLICK = "CLICK",
	CUSTOM = "CUSTOM",
	SCROLL = "SCROLL",
	PAGE_VIEWS = "PAGE_VIEWS",
	URL = "URL",
	TIME_SPENT = "TIME_SPENT",
	RETENTION_RATE = "RETENTION_RATE",
}
For Google Analytics 4 users, once the integration is correctly set up in Kameleoon, the goal event will be sent without needing any additional GA4 configuration. However, Kameleoon doesn't automatically create a GA4 audience for these goal events; you must do that manually in GA4. If you're using Google Tag Manager (GTM), remember to add the necessary configuration in GTM to forward the event to GA4.
Display this goal only for specific campaigns
This section lets you control which campaigns track a goal. By default, all your goals are active in every experiment. If you want to exclude a goal from specific campaigns, simply indicate which campaigns should not track the goal.
The dropdown menu includes three criteria to limit the application range of this goal:
- Name of the campaign: check the boxes next to the experiments you want to apply this goal to;
- Type of campaign: select the type of experiment you want to apply the goal to (clicking on Experiment makes the goal available for all experiments on the website the goal applies to; same thing for Personalization);
- Tags: by selecting a tag, the goal is applied only to the campaigns linked to this tag.
Handle outliers
This option is only available for Custom goals.
More about Winsorization at Kameleoon
Metadata
What is metadata?
Metadata are additional properties attached to a goal conversion. They let you filter or breakdown your results by specific values (for example, payment method, delivery type).
For instance, if you want to track how many "Purchase" conversions happened with each payment type, you can use metadata to capture that value.
Using metadata
To use metadata:
- Define a custom data (refer to this article for more information).
- Link the custom data as metadata when creating or editing a goal by selecting it from the dropdown.
Custom data with the option Use this data only locally for targeting purposes will not be considered, as it is not sent to our servers.