
Read here our documentation for Kameleoon new Graphic editor.
In this article:
– An overview of the Graphic editor’s interface and main features
– Step-by-step instructions for creating variations using the editor, including adding and editing elements such as text, images, and buttons
– Tips for optimizing your variations for maximum impact
– Best practices for testing and validating your variations before launching your experiment
Once you’ve created your account and installed Kameleoon script, you are ready to create and launch your experiments! You can modify your pages directly in a few clicks with the Kameleoon Graphic editor.
Here are some tips before you start:
- Graphic editor doesn’t work in incognito mode
- When cross-sites cookies are blocked, editor can’t work
- Mozilla blocks cookies by default, if you’re using it then you need to modify cookies default configuration to manually enable cookies in Mozilla
You can enhance your use of our Graphic editor with the Kameleoon Graphic Editor extension.
To troubleshoot issues with Kameleoon’s Graphic editor and offer best practices for avoiding these issues in the future, please read this documentation.
- Launch the Graphic editor
- Tool panel
- Variation menu
- Select an element and a parent element
- Add a new element
- Hide and reveal an element
- Select the hover mode of an element
- Edit the style of an element
- Edit the HTML code of an element
- Edit the position of an element
- Click tracking
- Scroll tracking
- Edit history
- Set up the Graphic editor
- Preview a variation
- Select a display
- Create a CSS selector
- Add CSS and JavaScript code
- URL redirection (split URL experiments)
- Change management on the Graphic editor
Launch the Graphic editor
Kameleoon’s editing mode enables you to create variations of your webpages and to launch and manage your A/B experiments.
Via your website
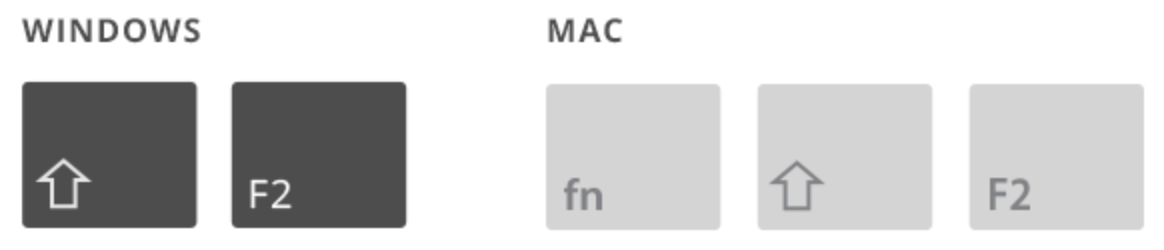
To launch Kameleoon, go to one of the webpages on which you have installed the Kameleoon script and press Shift + F2 or, il you are a Mac user Fn + Shift + F2.
If nothing happens, you can try another method to launch Kameleoon: simply add this code at the end of your URL:
#kameleoon=true
For example, your URL will become:
https://www.website.com/#kameleoon=true
Once Kameleoon is loaded, a connection pop-in opens. Fill in your user name and password to access the editor. When the editor is open you will see a header above your webpage.
Choose the type of experiment you want to create: Classic A/B.

Fill in the information of your experiment and click on Create.
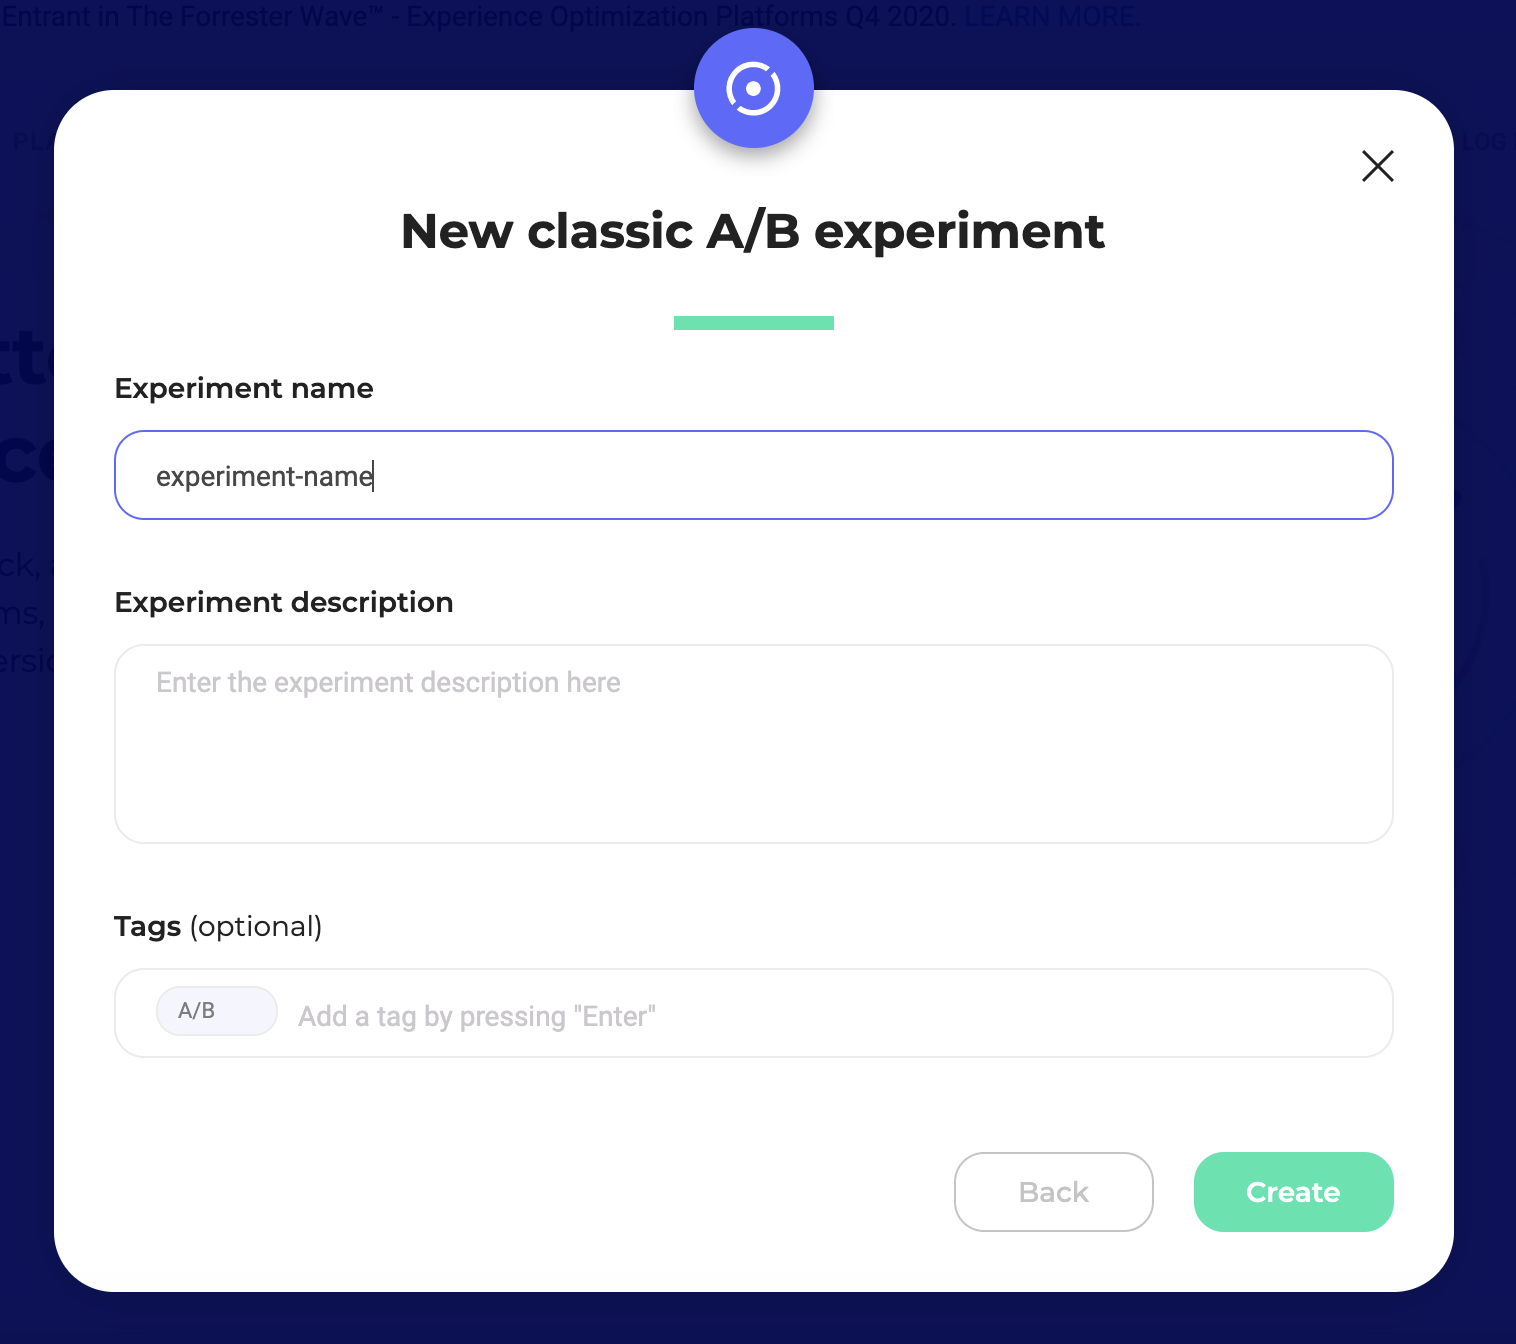
The Graphic editor opens on your web page.

Via your App
You can also launch the editor from the App. First of all, you need to log in to your Kameleoon App.
To do so, click on the New experiment button on the homepage or on the Experiments dashboard.

Select In the graphic editor.

Then choose the type of experiment you want to create: Classic A/B.

Fill in the information of your experiment and click on Create.
The Graphic editor opens on your web page.
Tool panel
When you select an element, a panel appears on the left of your screen. It contains all the tools you need to edit your web pages.

The panel is contextual: according to the selected element, the available tools will not be the same.
You can reduce this panel by clicking on the arrow on the top left, or move it anywhere on the page with a drag and drop.
Three tabs are available:
- Style
- Position
- Tracking (click/scroll)
For each tab, the most used tools are displayed, but you can access more features by clicking on the More options button.
In the Graphic editor, to the right of the name of the experiment you are editing, you can see its status, its creation date and its last save.

Under it, you will find the list of your variations. It always includes:
- The original: the original page of your website. This page is used as a reference for your experiment, you cannot change or delete it.
- At least one variation: By default, a variation named “Variation 1” is created. You can add or delete as many variations as you want but you must always keep at least one variation on your experiment.
- + Add variation: With a click, you can create a new variation.
What is a variation?
A variation is a copy of your webpage, which can be edited in order to prepare an A/B experiment.
When you add a new variation, Kameleoon makes a copy of the original page (the one from which you started Kameleoon). Every change will be saved in the variation. When you launch the experiment, the variation contains all your edits.
Note : You are not limited to using the variations you created for one A/B experiment; you can reuse them for other experiments or personalizations. Moreover, you can apply the changes made in a variation to other pages, not just the one you edited. For instance, if you want to change the color of every “Add to cart” button of your website, you can do it very easily with Kameleoon by targeting the pages you want to include in the experiment. For further information, please read our article about Multi-pages A/B experiment.
New variation
The Original variation with the padlock icon is the original page from which you started Kameleoon. It is locked to avoid any modification. You have to make all changes in the variations.
With a click on Variation 1, you create a copy of the original web page, where you can include modifications.
To add a new variation, click on + Add variation. Please note that it is recommended to have only one major change for each variation.
Note: You can create an unlimited number of variations with Kameleoon. However, the more variations you have, the more traffic you need.
Clicking on one of your variations (other than the Original) will open a menu under the header and give you access to different features. These features allow you to add a new element (such as a pop-in or a new paragraph), insert CSS or JavaScript code, rename, duplicate, preview, redirect to a URL, or delete your variation.

Select an element and a parent element
The selection tool enables you to select one or more items.
Basic selection
To select an element, make sure the Editing mode is activated in the top right corner of the header. If you are in Navigation mode, click on it to change modes.
If no elements are selected, place your cursor on an element to display its ID and a selection frame. The element to be selected will be covered by a green zone.

Click once to select the element.

Once the element is selected, the green zone disappears, while the selection frame remains.
Note: You can display the element’s HTML tags by activating this option in the Preferences.
Fine-tune your selection
When you select an element, a panel appears at the bottom left of the editor.

The central part of the panel shows you which element is selected as well as its parent elements. By clicking on the name of the parent element, you select it instead of the element you selected previously.
In this example, Image is the original selected element, Block and Block its parent elements.
To see the whole list of parent and child elements, click on the icon on the left.

A drop-down list will open with all elements. Scroll up to see the child elements and scroll down to see the parent elements.

Tip: Sometimes you can’t select an element because it is hidden by another one. In this case, use this tool to select it.
- ID: selects a unique element on the page with its ID. This is the default selection mode of Kameleoon when the block selected on the page has an HTML ID.
- Hierarchy: default CSS selector when there is no ID on the selected block. Kameleoon selects the element according to its (unique) hierarchical position on the page, by creating a hierarchical path from one of the parent blocks containing an HTML ID.
Multiple selection
To select several elements, start by selecting one of them.
Then click on the green icon on the right.

A list enables you to fine-tune your selection.

Several multiple selection criteria are available depending on the element you select:
- Tag: selects all elements sharing the same HTML tag (for example, all h4 elements).
- Class: selects all elements sharing the same HTML class.
- Content: selects all element with identical content (for example, all Add to cart buttons).
- Custom: selects all elements with the same custom CSS selector. This selector appears only if you previously added a new CSS selector on the page. For futher information, you can read our article about CSS selectors.
- Child elements, above the selected element on the list.
- Parent elements, below the selected element on the list.
Add a new element
Open the variation menu, click on your variation, then click on New element.

A pop-in offers you several options:
- An image
- A paragraph
- A pop-in
- A widget

Add an image
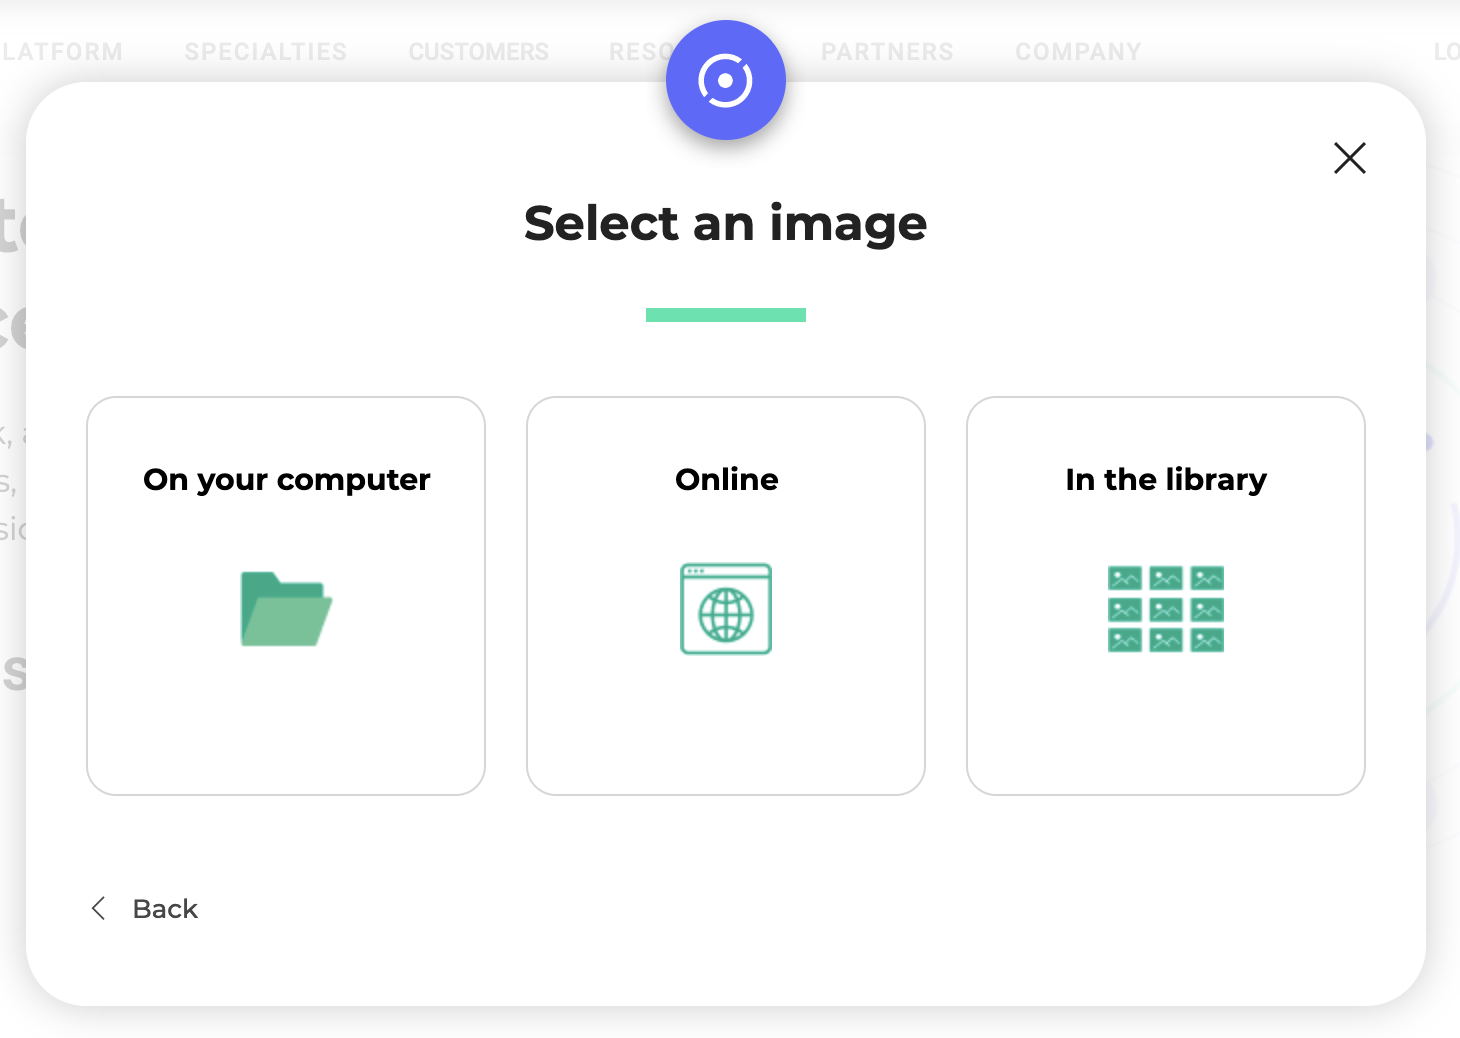
Select an image

The selection pop-in now allows you to choose between three modes of image selection.
On your computer
This download option allows you to choose from the files stored on the computer.
After you download the image, use one of the two icons in the top right corner to change or delete it.
Then choose whether or not to save it in your library.
You can add a link to redirect your visitors to a page.
Online
Just enter the URL and click on Done.
In the library
If you have at least one image in the library, you can open the library to pick an image.
If the library does not contain any images, the icon is grayed out and cannot be chosen.
More about Kameleoon Image Library
Structure of the image library
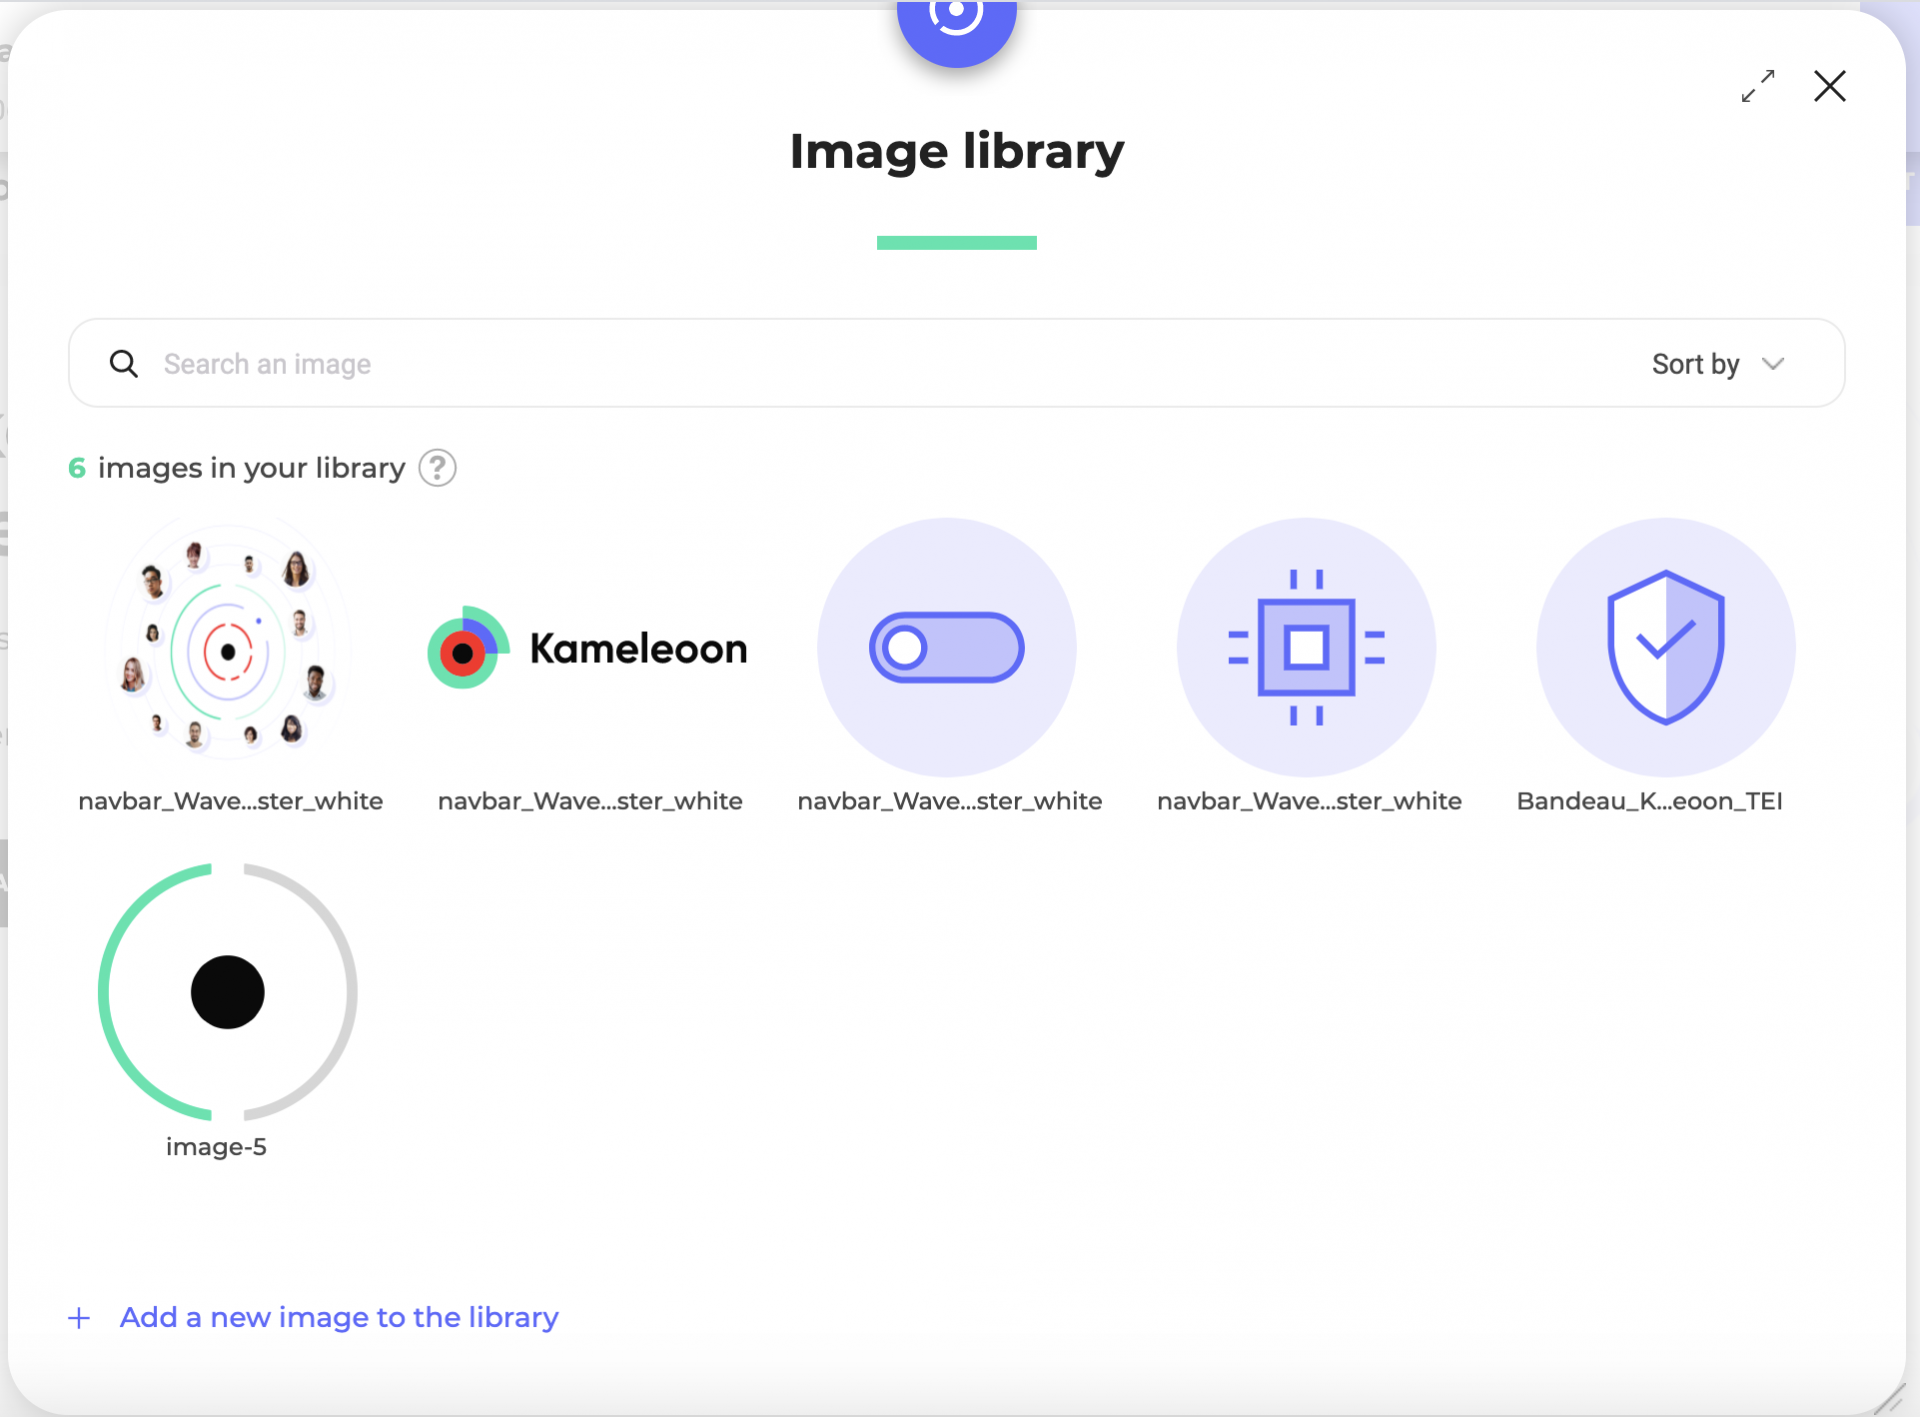
Search and sorting tools
Some search and sorting tools helps you to find a particular image in your library:
- A searchbar (the search is done on the name of the image);

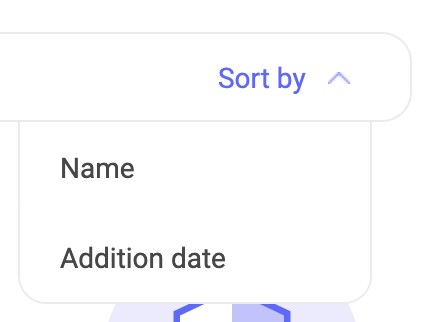
- A sorting tool by name/addition date.
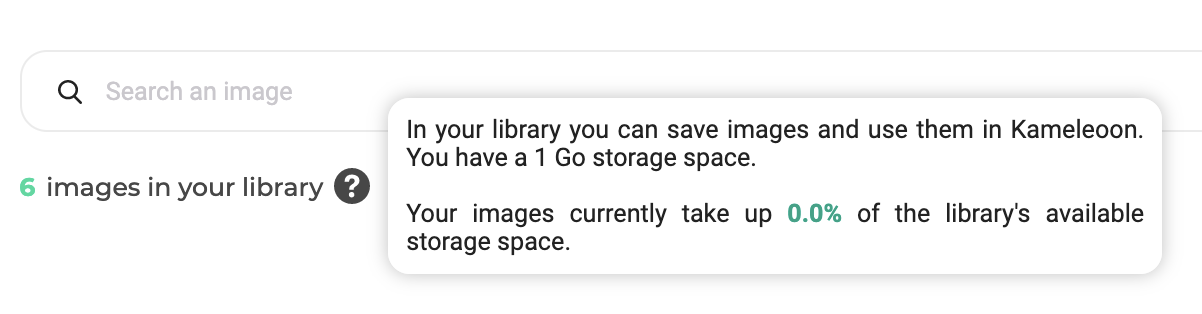
Storage information
Next to the number of images stored into the library is displayed a tooltip to inform you about the library storage and how much space you have left in %.
The storage limit is 1 Go.
You will see an orange warning next to the text if your images take between 90 and 100% of the storage.
If your images occupy 100% of the total library storage, you will see a red warning and the Add a new image to the library option will deactivate.
Select an image from your library
Select an image in the library pop-in for your experiment (its outline turns green), then click Done at the bottom right.

It will then be added as a pop-in or as an image, depending on the option chosen in the variation menu at the beginning of the process.
Hovering on an image

When hovering over an image, 4 options appear.
Copy image URL

Click to copy the image’s URL to the clipboard so you can use it elsewhere in Kameleoon.
Expand

Click to display the image in a larger size.
This way, you can zoom on an image and see it in its real proportions, even for images that don’t have square proportions.
Use the arrows on the left and right of the image to navigate between the images of your library from this option.
Click on the cross on the upper right to exit the expansion mode.
Delete

Click on the bin icon.
A message asks you to confirm your choice. You can either click on the green check to permanently delete the image or cancel the deletion by clicking on the cross.
Rename

On click on the pencil icon, or when double-clicking on the name of the picture, you will be able to rename the image.
Add a new image to the library

When you click on the option, a tooltip opens to add either from the computer or from a URL.
Then, follow the same operation as in the previous cases.
Managing your image library
If you wish to access your image library directly, click on the burger menu at the top left of the editor, then go to General set-up > Image library.

Add a text paragraph
Choose Paragraph: a pop-in opens where you can type and format your text with the built-in formatting bar. Then click on Validate to integrate the text into the page.

You can move the text on the page using the Position tab of the tool panel and change it at any time via the Style tab.
Add a pop-in
A pop-in is a window that opens inside your web page, above its content. It can appear upon opening the page or after an event (like a click on the Add to cart button).
Select the image
To select an image, type its URL in the corresponding field, import a file from your computer or choose one of the images from your library (if the icon is grayed out, it means that you have not yet loaded an image into your library).
Redirect the visitor to an URL
If you wish, you can add a link to your pop-in. To do this, simply indicate the link in the corresponding field.
The URL you entered will open in a new window if the visitor clicks anywhere in your pop-in.
Position of the pop-in on the page

By default, the pop-in is located in the center of the page, but you can choose its location by clicking on one of the arrows of the diagram. You can also move it with a simple drag and drop, or precisely adjust its position on the X (horizontal) or Y (vertical) axis by clicking on Advanced positioning.

Exposure parameters
Drag the toggle buttons to ON to limit exposure to the pop-in.

A menu is displayed for each option, allowing you to configure it precisely.
Then click on Done: your pop-in is added to your page!

You can then move or edit it using the Position and Style tabs in the tool panel.
Hide and reveal an element
Select the element you want to hide.
You can hide the element using the Style tab of the tool panel. Click on the eye icon.

If you want to show again a hidden element, click on the burger icon on the top left of the editor, go to the burger menu > General set-up > Display.

Check Edited elements and validate.

You also can show the hidden element using the History panel on the right of the editor.
A hidden element can also be found using the hierarchy panel (a crossed-out eye signals it).
Select the hover mode of an element
You can make changes to the hover mode of an element. The hover mode is what happens when the user hovers the mouse over the item.
To do this, select the element of your choice while holding down the Control key on Windows or the Command key on a Mac.
The hover mode of the element will be selected to allow you to modify it as you wish. A HOVER rectangle appears at the bottom left of the selected element.
If the selected element also has a hover mode (a menu and its sub-menu for example), a pop-in appears to allow you to choose the hover level you want to select. Choose Standard View to stay on the first level of the hover mode or Flyover View to select the second level of the hover mode.

Edit the style of an element

Hide/Show item

Click on this icon to hide the element. When the element is hidden, click again on the icon to display the element again.

Copy and paste an item

With the above icon, you can copy the element. Once it is copied, the two icons on the right are no longer dimmed. One will enable you to copy before another element, the other to copy after another element.

Click on the icon of your choice, and select a reference element. Depending on your choice, the element will be pasted before or after this second element.
Add or edit text content and layout

When you select a text, one of the available tools is called Text. Double-click on your text to edit it or click on Edit Content to edit your content in a pop-in.

You can edit the HTML of your element.
Add or edit an URL

Click on Edit URL or Add URL to edit the element’s link or add a new one.

Change the background or border

Click on Image, Color or Border to open a pop-in and make the changes of your choice.
Image

Color

Border

Change opacity
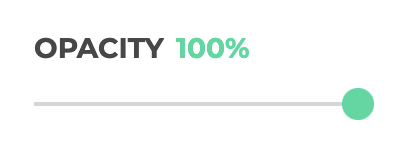
Choose the opacity of your element thanks to the opacity gauge. 0% is a transparent element (hidden) and 100% is a completely opaque element.
Add a shadow effect
You can add an outline or an inner shadow, or both, to your element.
Attribute
Click on Edit Attribute to open a pop-in and edit the selected element’s attribute.
Edit the HTML code of an element

When you select a text, one of the available tools is called Edit content & HTML. Double-click on your text to edit it or click on Edit Content & HTML to edit your paragraph in a pop-in.

To access the HTML of your element, click on Source and make your changes.

Note: Editing the source code of an element makes it entirely static as Kameleoon will replace the HTML code of the element by the one you will enter in the source code pop-in. So if the element contains dynamic elements, they will be overwritten by Kameleoon making them completely static. As a general rule of thumb, we recommend that you use this feature only if you believe the element you want to replace is not too wide on the page or only contains static content. If that’s the case, we recommend you rather inject your changes using JavaScript and/or CSS code.
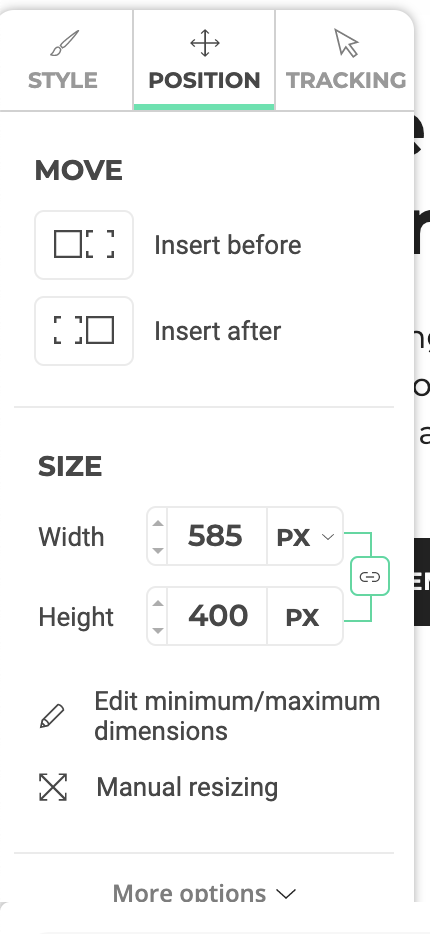
Edit the position of an element

The Position tab makes it possible to modify the format, an element’s margins or the position on your page.
Move
Different modes are available.
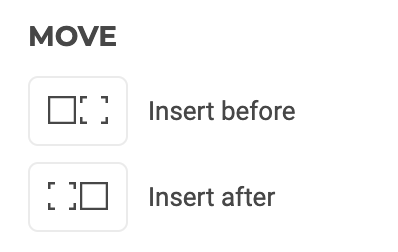
- Insert before/after: move the selected element before or after another element of your choice.
- Swap: swap two elements.
- Insert into: inserts the selected element into the element of your choice.
- Slide, anchor and extract: resize and move the element in the page, maintaining its original place or not.
For each of these options a tooltip offers further information on its role.
Size
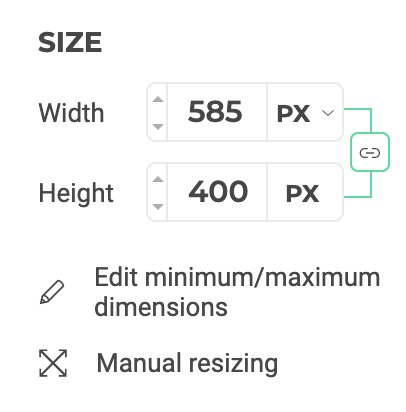
This tool makes it possible to modify the dimensions of the selected element. If links are enabled, the element’s proportions remain unchanged.
To resize the element, type the desired value in the Width and Height fields or click on Resize manually.
If you choose to resize manually, markers are displayed on the selected item. Click on one of them to drag and drop it to the desired position in order to resize the item.
If links are enabled in the tool panel, the element’s proportions remain unchanged.
Margins
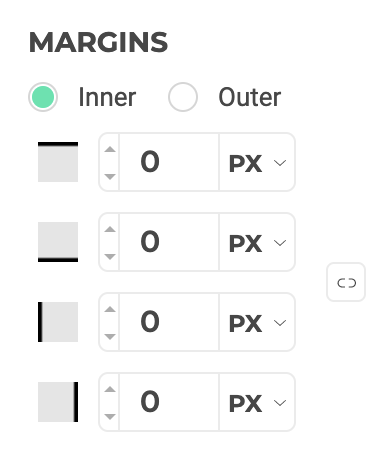
With this tool you can modify the selected element’s internal or external margins. Activate the links on the right to automatically assign the same value to all margins.
Z-index
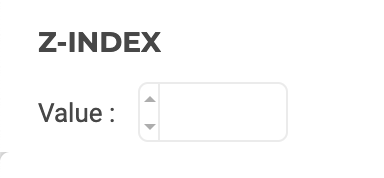
The value of the Z-index enables you to define which element will be located above the other. For example, for two overlapping elements, one with a z-index of 1 will be placed above the one with a z-index of 0.
Click tracking
You can create your click tracker directly via the Graphic editor or via the App.
Create a click tracking
You can create your tracker from any variation, it will appear on all of your experiment’s variations. Once you have created your event tracker, you can use it in other experiments as well.
Select the element for which you want to track clicks. On the tool panel, the Tracking tab enables you to create a click tracker.

Type in the name you want to give to your event tracker, then click on Track this element. The tracking is automatically associated with the element. You can now find it in the experiment finalizer. The tracking will be available for all your experiments.
Associate an existing click tracking
You can associate an existing click tracking to other elements. It can be useful if, for instance, you have two Download buttons on the same page and you would like to track the total amount of clicks on these buttons.
To do so, search the existing click tracking in the click tracking name field.
Associate several click trackings with an element
You can also associate several click trackings to one single element, either by creating a new click tracking or by associating an existing click tracking with the element.
In our example with two Download buttons on the same page, you can track both buttons together, but also each independently.
Edit or delete a click tracking
Once a click tracking is created, you can edit it at any moment. To do so, go to Associated to the element where you will find the list of the click trackings associated to the selected element and place your cursor above the element you want to edit.

Click on the pencil icon to edit the tracking. A new pop-in will appear, enabling you to edit the click tracking settings. In this pop-in, you will be able to edit the name, and add a description, a category or an action.

Click on the CSS icon to view, add and delete the CSS selectors linked to your click tracking.

Click on the bin icon to delete the click tracking. This action will delete it permanently.
Click on the broken link icon to cancel the association with the element (if you no longer want to associate the click tracking to the element but not delete it permanently). You can associate it again if you want to by clicking on the + Add an existing click tracking button.
Define as a goal
Once you have created you click tracking, you just have to select is as a goal to push the results in Kameleoon’s reporting tool.
Before launching your experiment, in your experiment finalizer, select Kameleoon as a reporting tool.
The list of goals created is displayed: select the click tracking you have created.

Congratulations! You will now find your results in your Kameleoon App.
Scroll tracking
Scroll tracking enables you to measure the rate of visitors having scrolled to a certain level on your web page.
Just like click tracking, a scroll tracking can be created from any of your variations. Once created and associated with your experiment, all its variations will be tracked. You can also use scroll tracking for all new experiments.
Create a new scroll tracking
Select the element you want to associate a scroll tracking to; the tool panel appears. The third tab, Tracking, enables you to configure the tracking.

Name your scroll tracking to be able to identify it and in the drop-down menu, select Scroll tracking.
The page is divided in two:
- The upper part is displayed normally and delimits the part of the page the visitor must scroll for the goal to be converted.
- The lower plart is dimmed and represents the of the page that is excluded from scroll tracking.
This delimitation between the two areas gives a precise view of how far the user has to scroll to convert. The goal is converted when all of the non-dimmed page has been displayed, i.e. when the limit has reached the bottom of the screen.
You can set the level in 3 different ways.

Based on an element
By default, the scroll tracking level is set according to the element you selected to create the tracking.
The level is placed directly below the selected item. The goal is converted only if the visitor has scrolled down to reveal the entire element.
The definition in percentage is dimmed, you can’t change it.
Based on a specific percentage
By selecting a precise percentage from the drop-down list, changing the percentage becomes possible.
You can define the scroll tracking level as a percentage of your page.
The percentage applies to the entire page, starting from the top: 0% places the level at the very top of the page, 50% places it at half of the page and 100% at the very bottom .
The page display automatically adjusts to the percentage you enter.
You can also manually move the scroll tracking level.
Note: The percentage takes into account the entire page and not just the part currently displayed on your screen.
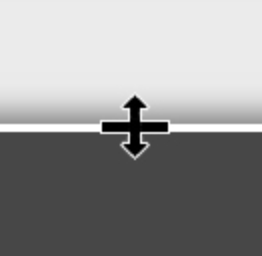
Place your mouse pointer on the white line that delimits the area included in the tracking. A double-headed pointer appears. Hold the left click and drag the level where you want on the page. The percentage is automatically adjusted in the tool panel.

From a height in pixels
By choosing a height in pixels from the drop-down menu, you can set the placement of the scroll tracking level based on a height in pixels.
The position according to a height in pixels works the same way as the placement according to a percentage. The zero point is at the top of the page. The lower the level on your page, the higher the pixel height, the maximum height being that of the entire page.
As for the percentage, you can manually move the level on the page by clicking and dragging the white bar. The corresponding pixel height adapts automatically.

Finalize scroll tracking
Once you have defined the scroll tracking level, click on Add the tracking.
By adding the tracking, you associate it with an element if you defined the level according to an element. Otherwise, the tracking is associated to the page body. Your tracking’s name and type (scroll) are now displayed in the list of trackings.
Edit or delete a scroll tracking
On hover over the name of your tracking in the list, options appear.

With a click on the pencil symbol you can edit the tracking. A pop-up with editing options opens.

You can :
- Rename your tracking
- Modify the level
- Add a description
- Associate a category
- Associate an action
Click on the bin icon to delete the scroll tracking. This action will delete it permanently.
Define scroll tracking as a goal
Once your scroll tracking created, you just have to define it as goal to transmit its results to the Kameleoon tool.
To do this, when launching your experiment, select Kameleoon as a reporting tool.
The list of existing goals appears: select the scroll tracking you have previously created.

Congratulations! You can now find your results in your Kameleoon App!
Edit history
Each action performed on your variations is saved in the history: you can retrace your steps at any time.
Kameleoon also enables you to easily visualize modified/tracked elements on a page. For more information, you can refer to this documentation.
Simplified view
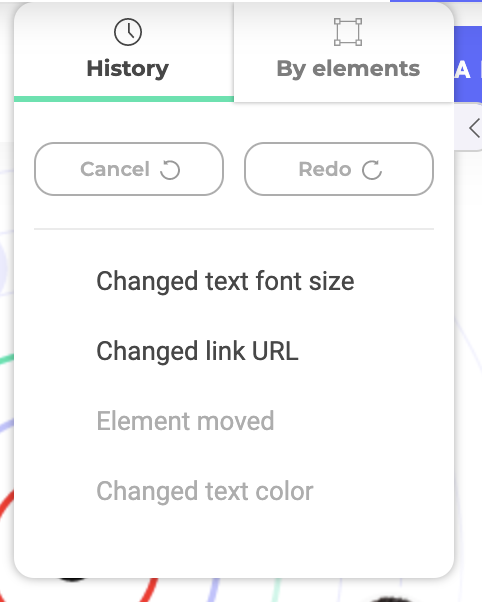
By default, the history is displayed in simplified view: two arrows enable you to cancel or restore the actions you have performed.

Click on the left arrow to cancel the last action performed, or the right arrow to restore the previously undone action.
If there is no action to undo or redo, the buttons are grayed out.
Note: Canceled actions are not deleted but disabled, so they are always visible in the list of actions performed.
Important: The history works by variation. The Cancel button will cancel the last action performed on the selected variation.
Click on the upper part of the tool to switch from the simplified view to the full History panel.
History by action
The list of actions you have performed on your variation is displayed here.
Click on the three-dot menu to the right of each action (at the hover): various icons appear.
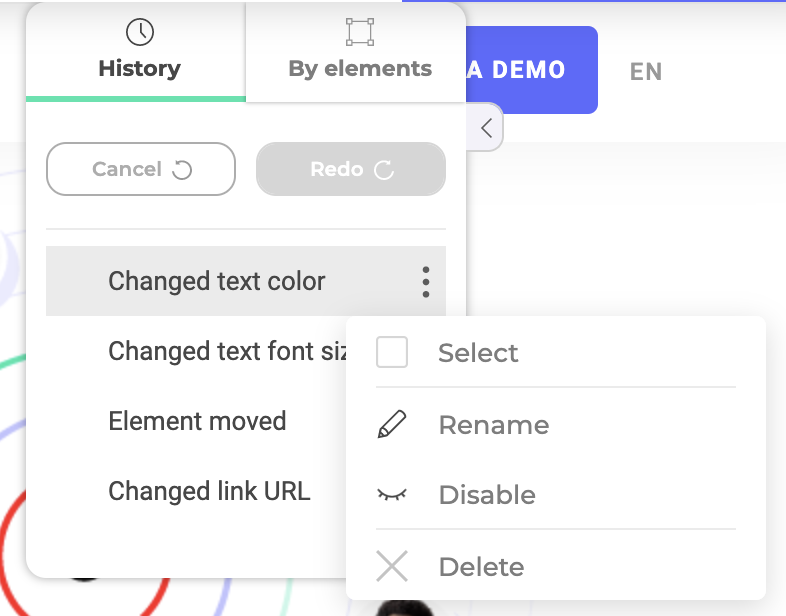
These icons enable you to select, rename, disable/enable or delete your action.
Select
You can select several actions at the same time to apply the same action.
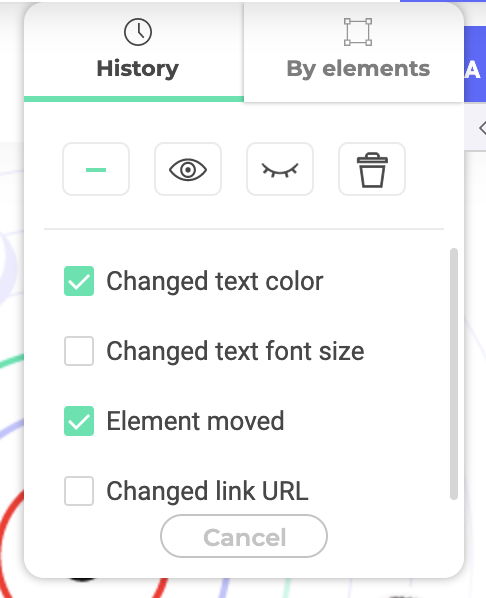
Action icons appear in the upper part, as well as checkboxes associated to each action.
Click Cancel at the bottom to exit the multiple selection mode.
Rename
Rename an action if you want to identify it more easily among the other actions.
Disable/Enable
Click to disable an action, or re-enable a disabled action. The action will be grayed out in the list and will not appear on your variation.
Delete
Click to permanently delete the action.
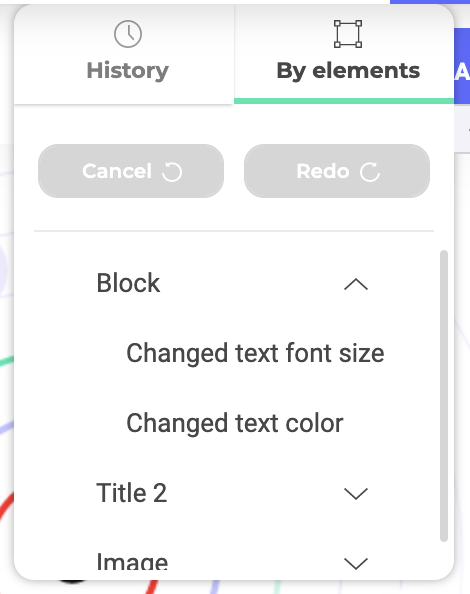
History by element
In the By elements tab you can display the history of your variation, ranked by element.
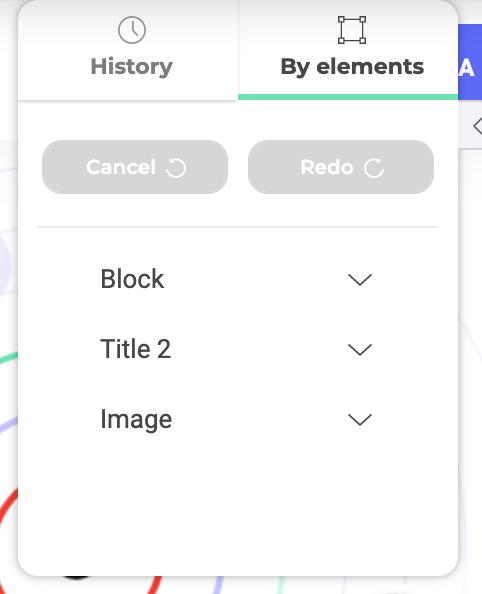
Click on the item of your choice to display the list of actions performed on that item.
Simple selection
You can perform the same actions as in the classic history: hover your mouse over an action to display the icons to rename, disable/enable or delete the action.
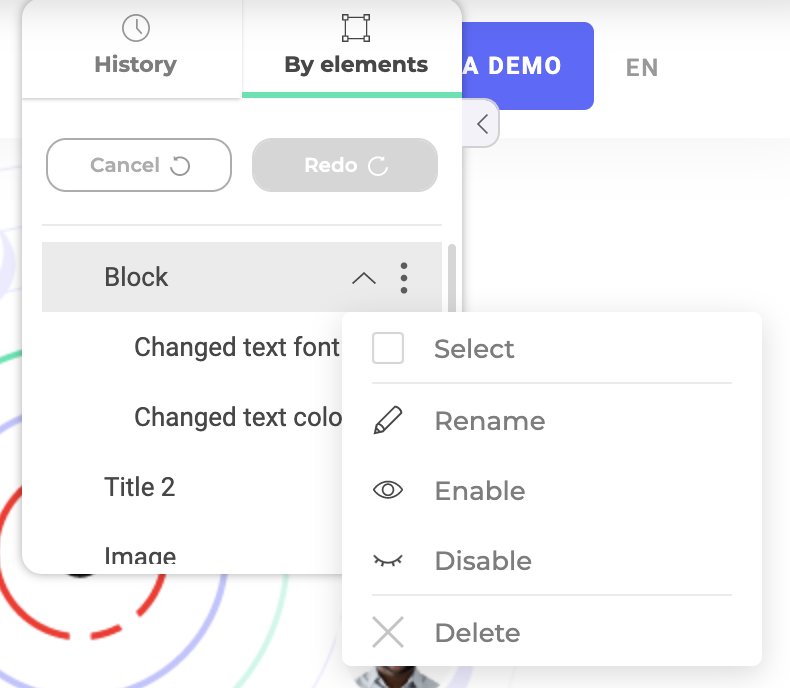
Multiple selection
You also have the possibility to act on several actions and/or elements at the same time. For example, if you want to disable several actions linked to the same element, click on the three-point menu on the right of the element: a panel will be displayed.

Action icons appear in the upper part, as well as checkboxes associated to each element and each action.
You can:
- select one or more scattered actions;
- select all the actions linked to an element (to do so, simply check the checkbox of the element);
- select all actions and elements.
Click on a checkbox to select all actions, click again to deselect all.
Depending on your choices, some checkboxes change their appearance:
- the checkbox to the left of the grouped action icons is empty if nothing has been selected, full if all the actions linked to all the elements have been selected; half-full if at least one of the actions has not been selected (as in the example below);

- the checkbox to the left of an element has the same behavior, empty if none of the actions related to the element have been selected, full if all the actions related to the element have been selected, half-full if at least one of the actions related to the element has not been selected.

Check or uncheck these checkboxes to apply a grouped action to the selected actions (or all actions associated with a selected item):
- Enable
- Disable
- Delete
Click Cancel at the bottom to exit the multiple selection mode.
Set up the Graphic editor
Access the editor’s configuration by pulling down the burger menu at the top left.

You will fin here:
- Information about the experiment currently edited
- Elements regarding general setup
- Tutorials
- The possibility to log out of the Kameleoon interface
- A way back to the App
My experiment

Via this menu, you can:
- add tags and a description
- add JavaScript or CSS code on all of the experiment’s variations
- change the URL of the page on which you loaded the editor
- estimate the duration of the experiment.
Tags and descriptions

Add tags and/or a description to your experiment.
Note: Kameleoon provides predefined tags which you can use to change the behavior of Kameleoon.
Experiment-specific code

You can add JavaScript or CSS code to all the variations in the experiment. Just enter the code in the field and click on Done.
Uncheck the option at the bottom if you do not want to add this code on the original.
URL of the loaded page
Modify here the URL of the page currently loaded in the editor.

Estimate the duration of the experiment
Our tool allows you to estimate, in number of days, the duration of your experiment. More information
Tutorials
The tutorials panel gives useful information about our tutorials, including their level of difficulty (one highlighted box = easy, two highlighted boxes = medium, three boxes highlighted = difficult), their category and status (whether you have already viewed it or not). We would love to hear your thoughts on these tutorials: feel free to give us feedback to help us improve them.
General set-up

Display
This pop-in helps you define the display settings. You decide what elements you want to appear on your editor.

- Tracked elements: By checking this box, the following icon is displayed for all tracked items, enabling you to find them at a glance or make sure that the tracker has been set up.
- Edited elements: By checking this box, you will see the following icon on each edited element.
- HTML Tags: Check this box to display HTML tags in the selection tool.
- Hierarchy panel: Check this box to display the following panel at the bottom left of your page. This panel will enable you to select the ID of an item you have selected.
- Rulers: Graduations appear in the editor to help you place the elements on your page and resize them if necessary.
- Overview of the experiment before updates: Before any update, this screen offers to check that everything has been correctly set. You can memorize this display for future sessions. To do so, switch the button to ON.
You can save these settings for future sessions.
Language

A click on the language selection opens a pop-in offering three languages: French, English and German.
Custom CSS selectors

With this feature you can create a custom CSS selector to select one or more elements on the page. You can also find the selectors already created.
Once the elements you are interested in are selected, do not forget to validate to apply the changes.
Image library
Open your image library directly to download images or edit them before adding them to your experiment. More about the image library
Logout
Click here to sign out of your account. Be careful, this action will close the editor.
Back to the App
Click here to go back to the App. Be careful, this action will close the editor.
Preview a variation
Before launching an experiment, we recommend you simulate it to make sure it meets your needs. You can quickly preview a variation or simulate the entire experiment. Here’s how to proceed.
You can independently test each variation. To do so, click on the variation, which deploys the associated action menu. Just click on Preview to launch the preview. Unlike simulation, the preview does not enable you to check your experiment’s targeting.

Note: The preview mode offers the possibilityto quickly validate the display of your variation. However, it is always better to simulate your experiment before launching it to validate the entire scope of your experiment.
Select a display
On the editor, on the left of the Finalize button, the selected display mode is indicated:

- Edit mode: The links of your site are deactivated, you are free to make the modifications of your choice.
- Navigation mode: Unlike the editing mode, the navigation mode does not enable you to modify elements, but only to view your web page without leaving the Kameleoon editor.
You want to launch an experiment on the mobile version of your website? Please refer to our documentation on the subject.
Create a CSS selector
It’s sometimes useful to be able to change a group of elements that share the same CSS class. You may want to change the color of all links in a menu or increase the font size of all the elements with the same CSS class.
Why CSS selectors?
Creating new CSS selectors is useful in several cases.
Multiple selection of a subset of elements
If you want to be able to select or clearly identify several elements with the same class, and edit their CSS style.
Technical issues on the page
Sometimes, there can be bugs on the A/B tested page, such as two elements sharing the same HTML ID. Normally, each HTML element on a page must have a unique ID (i.e. not shared with another element on the same page). If this is not the case, then Kameleoon cannot implement certain changes, such as switching elements.
Let’s look at an example: you want to integrate a menu in front of another, i.e. you need to reposition it. The two menus don’t look the same but have the same HTML ID. Kameleoon proceeds as follows:
- The tool retrieves the IDs, which, in our example, are identical
- It generates the JavaScript code required to implement the position change, which might look like this:
#(identifiant_menu).insertBefore(#identifiant_menu)
- The change cannot be made, as the menus cannot be differentiated by their ID. The problem can be solved by creating a CSS selector, which enables Kameleoon to differentiate the two elements.
Unsufficient precision of hierachical selectors
Let’s say that you want to change the color of all your h4 links. There’s no need for a CSS selector as this can easily be implemented with Kameleoon’s tag selection tool.
However, if your experiment runs on several pages, it will probably change all h4 links on your website. To avoid this problem, you need to create a new CSS selector that allows you to precisely identify the area of h4 links to change.
Choose a CSS selector
Detecting an ID and a CSS class
With CSS, elements of an HTML page can have several attributes. You need to identify 3 of them to benefit from all the features offered by Kameleoon’s CSS selectors:
- Type of element or HTML tag:
div,table,h1,h2,h3,section,body,header,li,ul, etc. - CSS class, positioned as an attribute of the element
class="myClass", enabling you to retrieve a group of display parameters (color, font, layout, etc.) on the CSS style sheet. - ID, positioned as an attribute of the element
id="myID", allowing to precisely and uniquely identify an element in the page.
Let’s look at the following example:
<h1 class="landingHeader" id="landing_header_6747">Bienvenue</h1>
- Type of element:
h1tag; you can reach it directly by typingh1in the the CSS selector text field. - CSS class:
landingHeader; you can access it by putting a.in front of the name class. Four our example, type.landingHeaderin the selector.
Be careful, several elements can share the same class, this is often the case with similar elements.”.landingHeader” will tell Kameleoon to retrieve all elements sharing this CSS class. - CSS ID:
landing_header_6747; to find this element with a selector, put a#in front of the ID.
Examples
We have listed the main CSS selectors that can help you fine-tune your selection of elements on your HTML pages. You can also combine several selectors.
#identifiant= ID selector; targets an HTML element via its ID..classe= Class selector; unlike the ID selector can identify several HTML elements sharing the same CSS class.A= This selector selects all the typeAelements. For example, the selector will select all typeAHTML links in a page .A B= This selector targets allBelements included inAelements. For example,ul Awill select allAHTML links included in aullist.A + B= This selector identifies the firstBelement located immediately after anAelement. For exampleul + pwill select the first paragraph after aullist.A > B= This selector selects onlyBelements that are descendants ofAelements. For example,#identifiant > ulwill select allulelements that are descendants of elements with “identifiant” as an ID. The otherulelements are not selected. To select them, you have to use anA Bselector.A:nth-of-type(n)= This selector allows you to identify the nthAelement on the page. For examplediv:nth-of-type(5)will select the 5th division of the page.A:nth-child(n+nb)= selects allAelements starting from the nth element. For example,li:nth-child(n+16)will select alllichild elements starting from the 16th element of the page.span :nth-child(5)will selectspanwhich is the 5th child of its parent element.A:first-child= selects the first child of theAelement.A:last-child= selects the last child of theAelement.
For more examples of CSS selectors, use the W3Schools guide: CSS Selector Reference.
Create a selector with Kameleoon
Via the Graphic editor
Let’s say we want to select all h4 titles in this menu. In this case, we select all the h4 elements, but only on this page, not on the whole website.

In the menu located in the header on the left, click on General set-up and then on Display.

Check Hierarchy panel.

A box will appear on the bottom left of your page. This will enable you to determine the path of the selected element.

Here, the parent element is #main-content.
In the previous menu, click on Custom selectors.

 Then create the CSS selector of your choice. To select all the
 h4 elements included in main-content, create the CSS selector #main-content h4.
Select one of the h4 links, then select the CSS selector using the Selection menu in the toolbar, as shown below.

This will select all h4 links included in #main-content
Once you have created your CSS selector, you will be able to select it in the CUSTOM section.

You can now change the color, the font, etc. Your changes will be implemented on all selected elements.
Characteristics of the Kameleoon selector

To check which CSS selector is used, check the Hierarchy panel in the Display settings menu.
The hierarchy panel will appear on the bottom left of your web page.
In the example above, the path #main-content indicates the CSS path of the selected element.
When you click on the Selection button of the toolbar, you have access to multiple advanced selection features:
- ID: selects a unique element on the page with its ID. This is Kameleoon’s default selection mode when the block selected on the page has an HTML ID.
- Hierarchy: this is the default CSS selector when there is no ID on the selected block. Kameleoon selects the element according to its (unique) hierarchical position on the page, by creating a hierarchical path from one of the parent blocks containing an HTML ID.
- Tag: selects all elements sharing the same HTML tag (for example, all the
h4elements). - Class: selects all elements sharing the same HTML class.
- Content: selects all the elements with identical content (for example, all Add to basket buttons).
- Custom: selects all elements with the same CSS selector. This selector appears only if you previously added a new CSS selector on the page.
Add CSS and JavaScript code
If you want to test far-reaching changes in complex A/B experiments the graphic editor’s features may no be sufficient. For these cases, Kameleoon offers to integrate CSS or JavaScript code directly in your web page’s HTML code, enabling you to create all kinds of experiments.
Add code to a variation
CSS
To add CSS code, click on the name of the variation of your choice to open the action panel.


Then click on CSS to open a pop-in where you can inject your code.
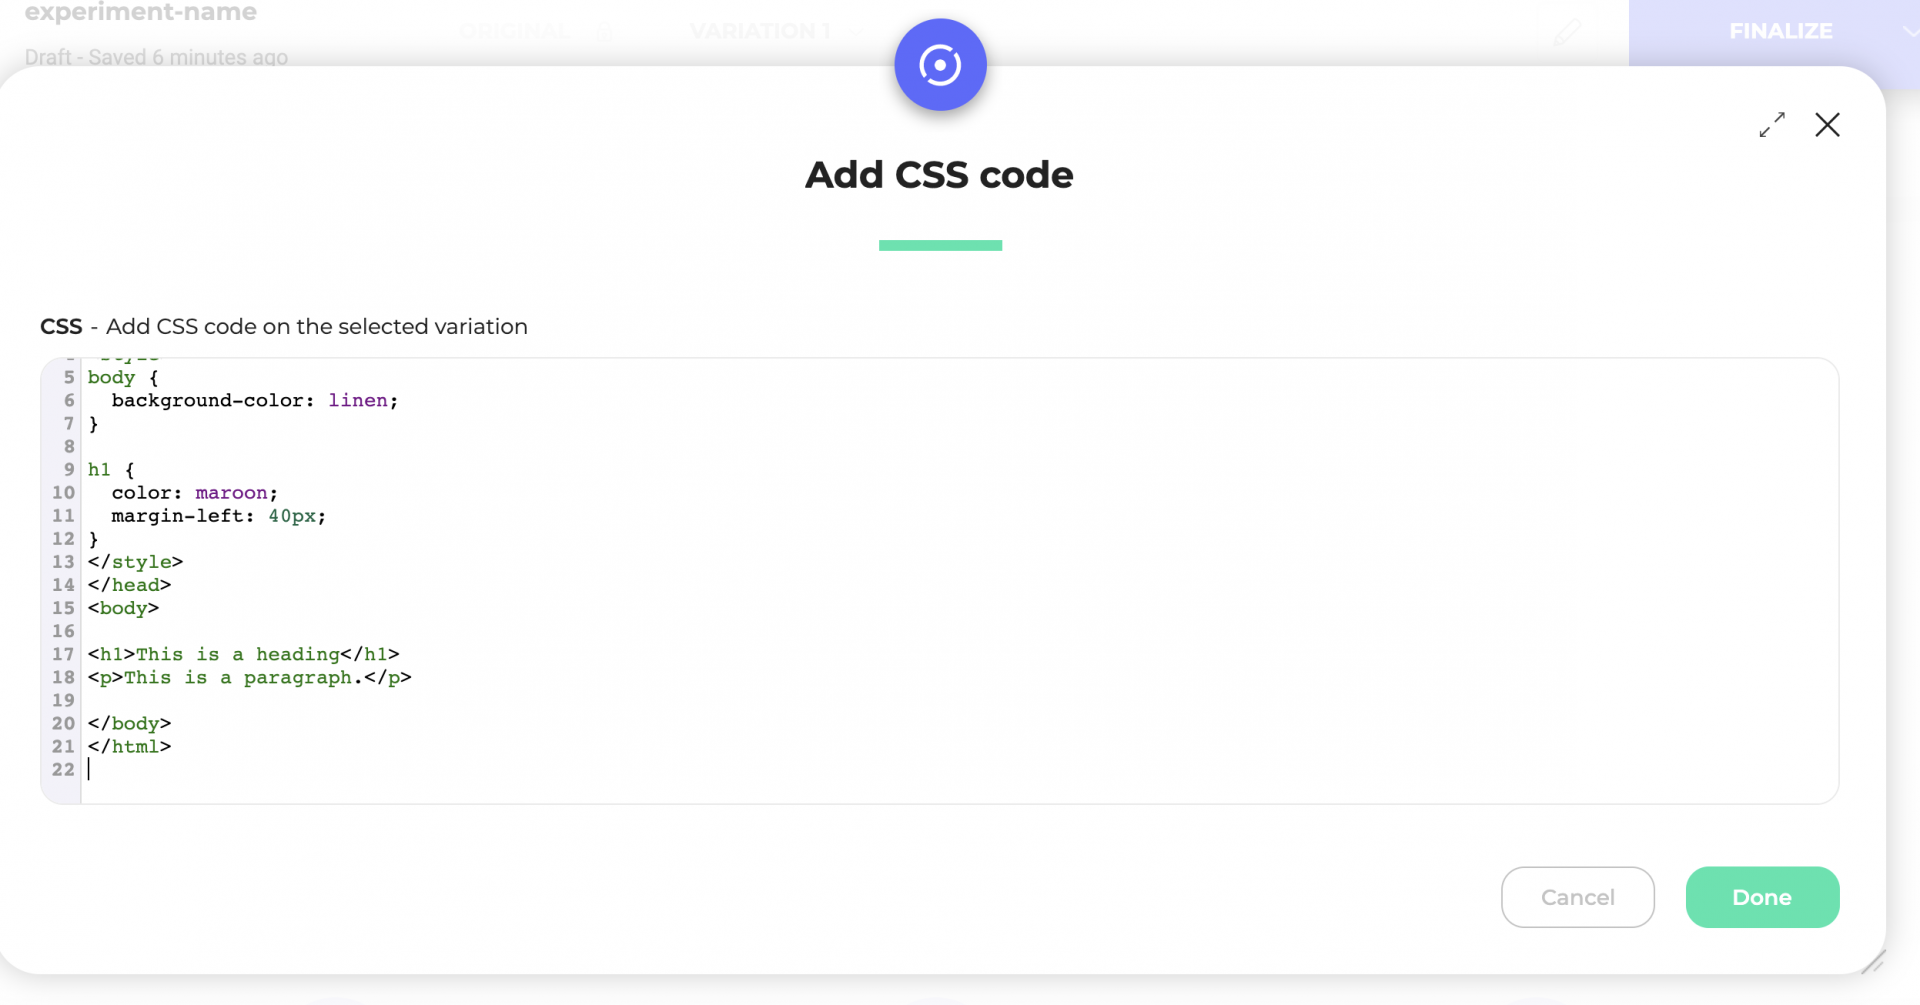
You can extend the size of the pop-in to have more space in the code field. Just click on the Extend icon on the top right or drag and drop the bottom right corner of the pop-in.
Once you have typed in or pasted your code, click on the Done button.
The CSS turns green in the variation menu.

Warning: Kameleoon can load before your CSS style sheet, and the CSS rule you added might be crushed by the existing one. To avoid this, you need to add an
!importantattribute to the CSS rules of your choice to make sure it will load before the existing one. For instance:div#button{background-color : red !important;}
JavaScript
To add JavaScript, click on the name of the variation of your choice to open the action panel.

Then, click on JavaScript to open a pop-in where you can inject your code.
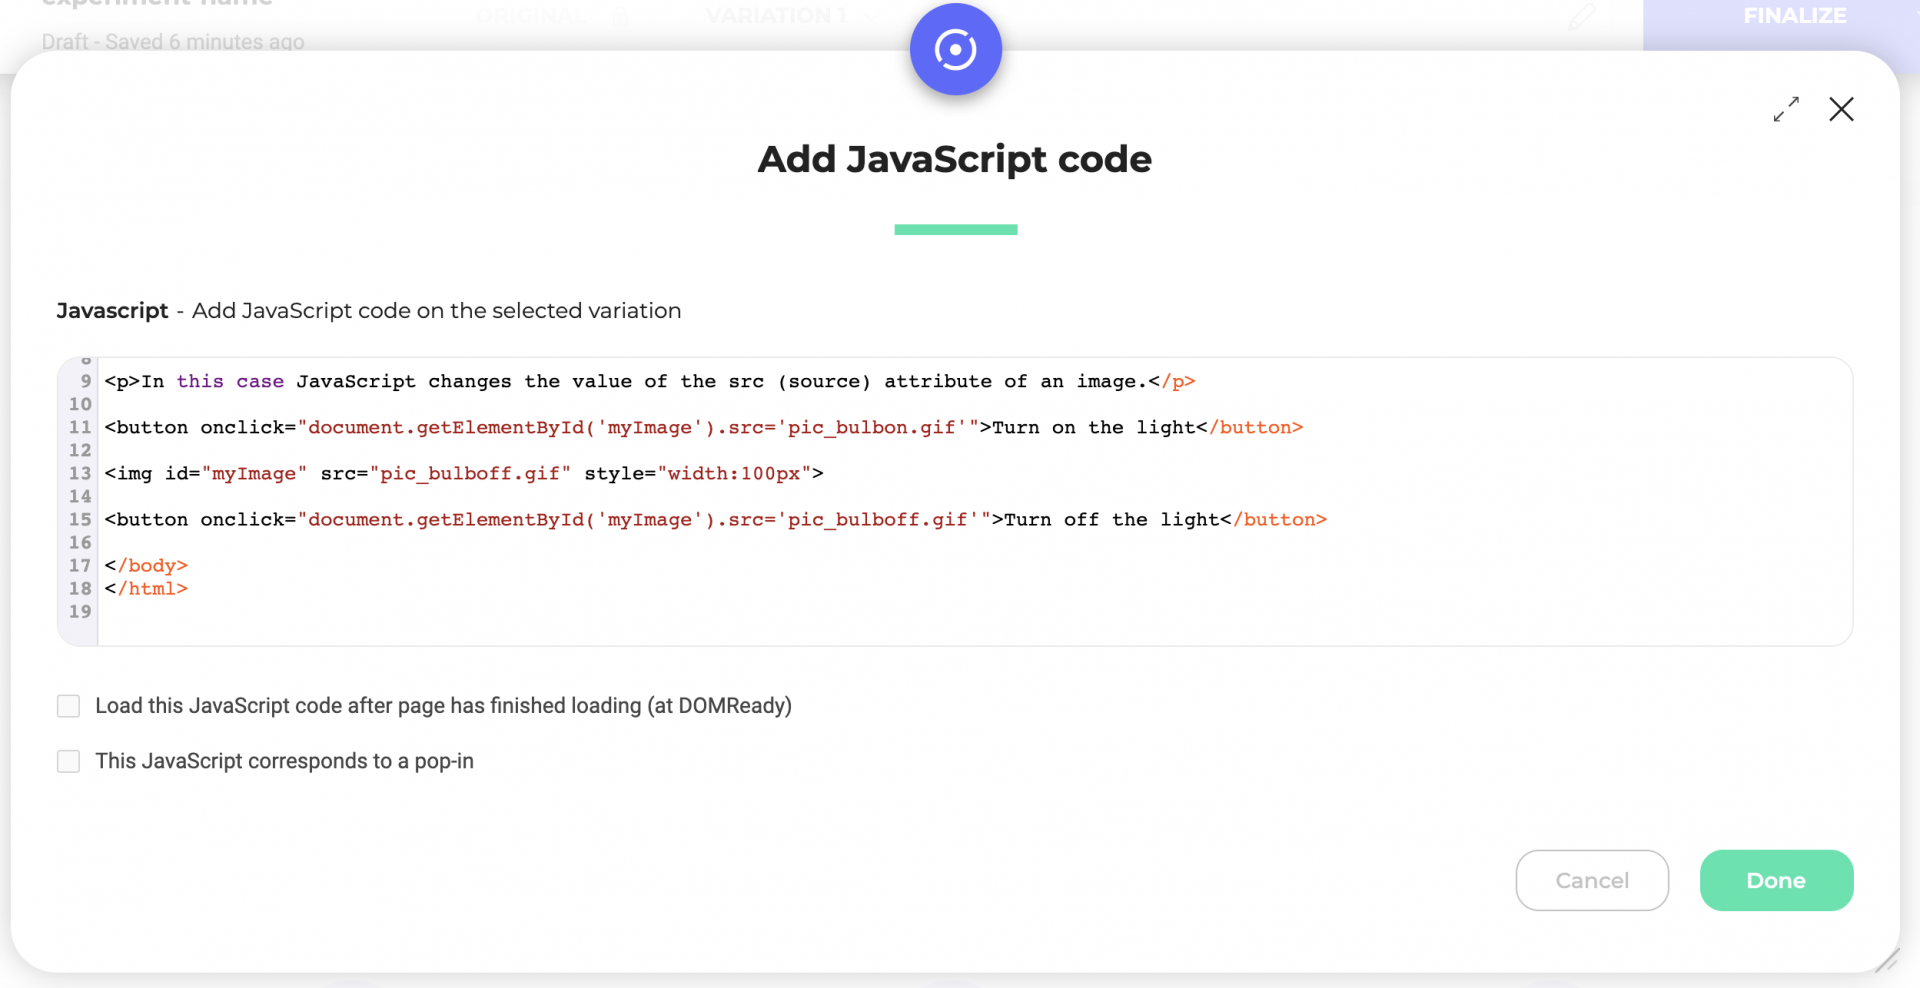
You can extend the size of the pop-in to have more space in the code field. Just click on the Extend icon on the top right or drag and drop the bottom right corner of the pop-in.
Once you have typed in or pasted your code, click on the Validate button.
The JavaScript turns green in the variation menu.

Kameleoon also provides an API and some features we strongly recommend for writing your JavaScript code. Please note that Kameleoon does not include jQuery, therefore the one already on your website will be used. Kameleoon might load before jQuery, bur it is necessary to wait for jQuery to load to run your variation’s JavaScript code . To make sure jQuery has loaded, you can use this piece of code:
Kameleoon.API.Core.runWhenConditionTrue(function(){
 return typeof jQuery != "undefined";
 //allows to check that jQuery is loaded. Returns True if it is, or False otherwise. Kameleoon will execute this condition again every 200ms.

}, function(){
 //Enter here the code you want to execute in your variation. For example if you want to change the text of a block and this block has the id "block-2345", you can use the following Kameleoon API function

 Kameleoon.API.Core.runWhenElementPresent("#bloc-2345", function(){

 //Enter here your JavaScript code
 jQuery("#bloc-2345").text("My new text");

 });

}, 200);
Note: JavaScript code does not run directly in the editor. To preview your modification, click on the Visualize button or simulate your experiment.
If you want more information about Kameleoon.API.Core, you can read our documentation for developers:
- Find out more about the runWhenElementPresent() method
- Find out more about the runWhenConditionTrue() method
Add code on all variations
You can also add CSS or JavaScript code on all variations of your experiment.
To do so, click on the burger menu on the left of the editor > My experiment > Experiment-specific code.

A pop-in opens, allowing you to add CSS code, JavaScript code or both.

You can extend the size of the pop-in to have more space in the code fields. Just click on the Extend icon on the top right or drag and drop the bottom right corner of the pop-in.
You can also apply these changes to your original page. To do so, check the box Also add JavaScript and CSS on the original.
Note: The changes made on the original will only appear in this particular experiment. Visitors excluded from this experiment will not see this version of your original page.
If you want more information about Kameleoon.API.Core, you can read our documentation for developers:
- Find out more about the runWhenElementPresent() method
- Find out more about the runWhenConditionTrue() method
URL redirection (split URL experiments)
Unlike a classical A/B experiment, an A/B experiment with URL redirection implies that the different versions of the tested page are developed and hosted on your web server. The versions are made available to visitors directly via your website.
Let’s take the following example: you have two subscription pages you would like to experiment. Here are their URLs:
http://mywebsite.com/SubscriptionA.html
http://mywebsite.com/SubscriptionB.html
These two pages are accessible via your website. With Kameleoon you can A/B test these two pages and analyze their performances and results.
Simple URL redirection
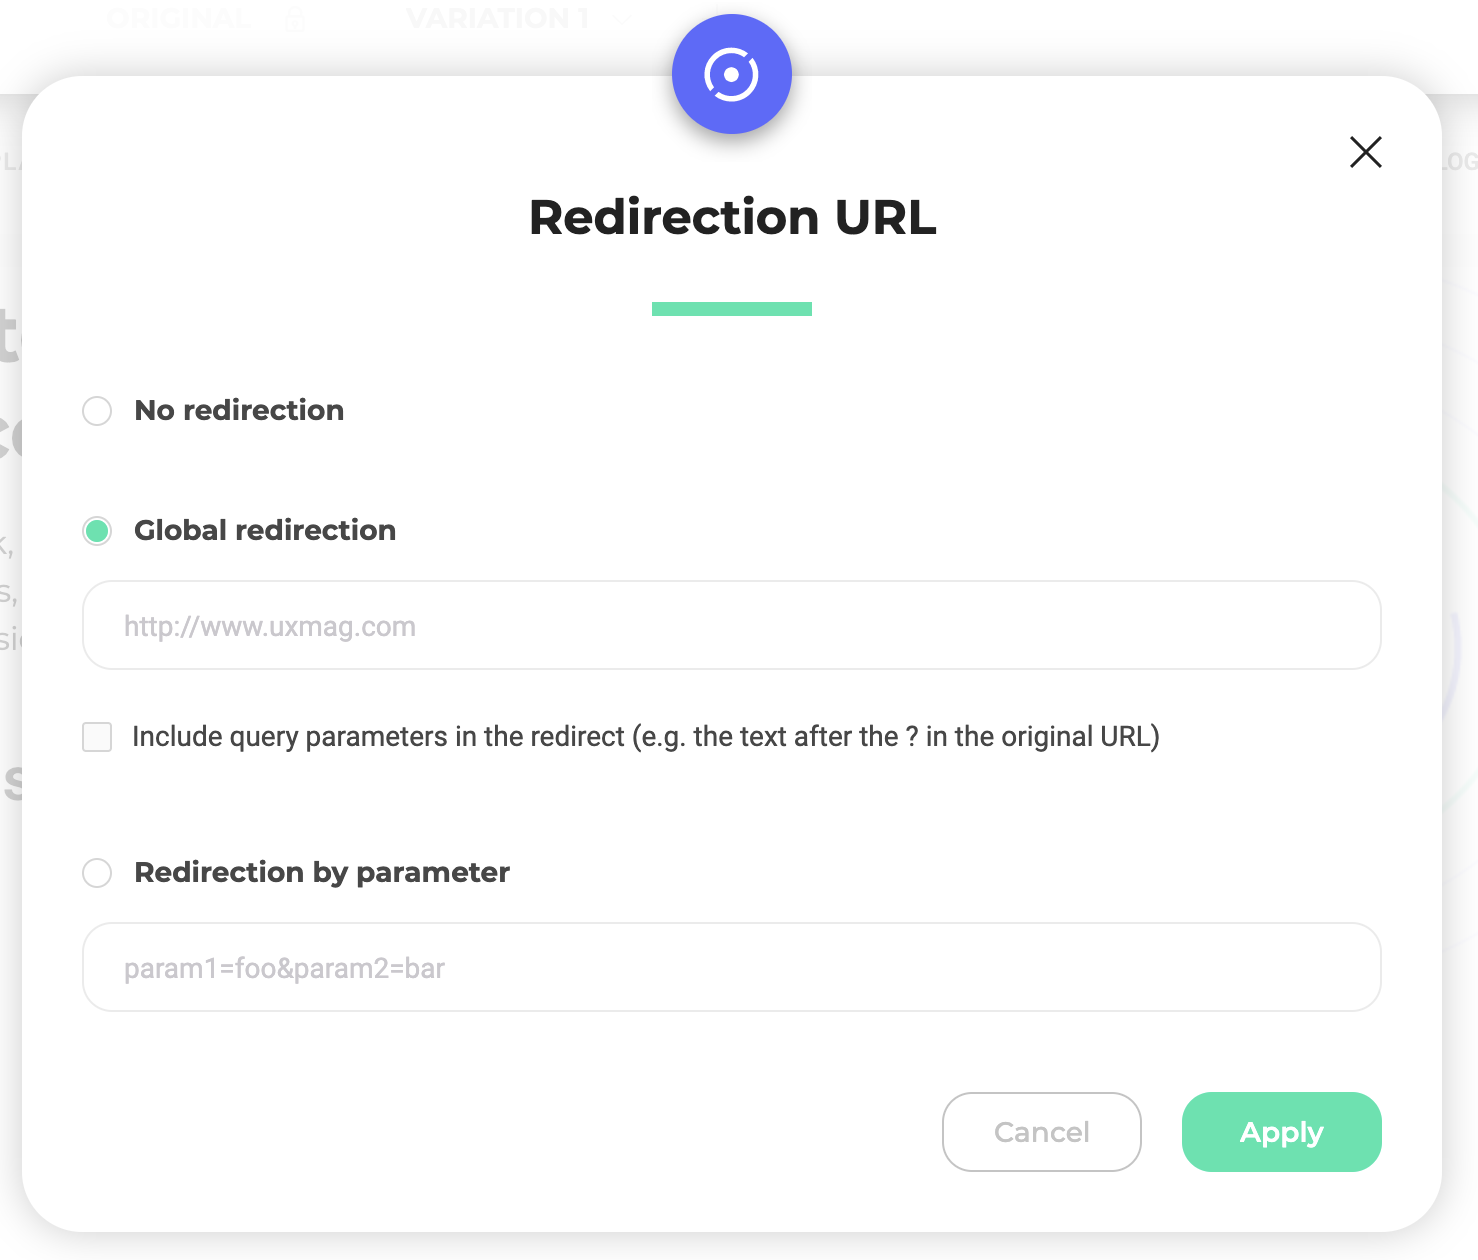
Launch the editor on your website, like for a classical A/B experiment. Create one variation by page to test. Click on one of your variations to open the variation action menu. Then click on the Redirect to a URL button. A pop-in opens. Here, you will be able to configure your URL redirection for the selected variation. There are two kind of redirections: Global redirection and Redirection by parameter.
Global redirection
Global redirection is a simple URL redirection, without further parameters.
In the example above, to create the two versions of the subscription page, we should use this redirection.
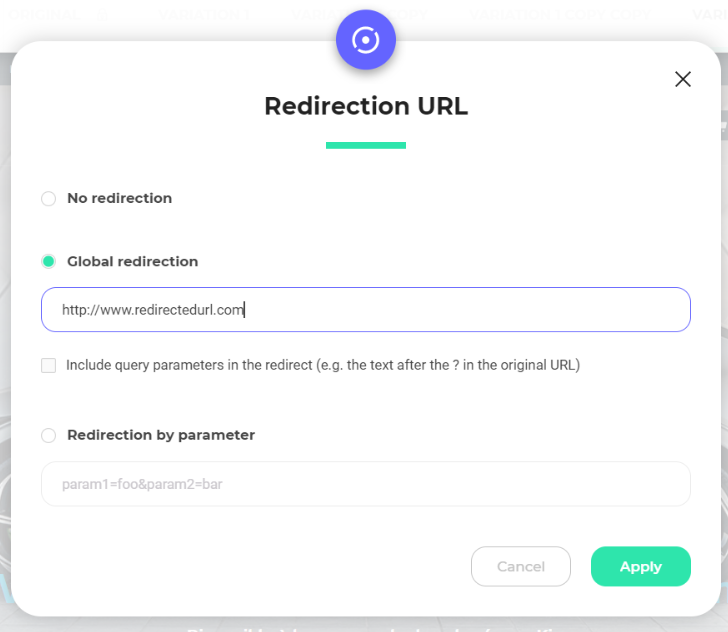
You need to type a complete URL (and not just a fragment of the URL). For example, you can indicate a global redirection from http://www.website/page1 to http://www.website/page2.
Redirection by parameter
If you want to use to the same URL but with extra parameters, use the Redirection by parameter option.
Indicate the parameters to add at the end of the URL. This can be useful if you want to change the default sorting of results, on a product page for instance.
Repeat this operation for every variation you want to test, indicating for each one which URL visitors have to be redirected to, instead of the original.
Warning: In the case of a split URL A/B experiment, it is important to correctly target your experiment. Note that we highly recommend not to use the Presence of an element on the page targeting option because it would significantly increase the flicker effect. Kameleoon would have to wait until the page is loaded to check the presence or not of the targeted element and then redirect visitors to one variation or another. For this kind of experiment, we recommend to use the other targeting options (URL or advanced JavaScript condition). Likewise, if JavaScript code is used for complex redirection, we recommend to keep the box Load this JavaScript code after page has finished loading (at DOMReady) unchecked. Also it is not necessary to indicate in the targeting that both pages (A and B) are concerned: page A is sufficient.
URL redirection on several pages
When a split URL A/B experiment runs on several pages (example: every product sheet), you need more features than those available in the Redirection windows shown above. It is often necessary to manage the redirection with a personalized JavaScript code.
For instance, we wish to redirect every visitor accessing the pages:
http://mywebsite.com/product/sheet/technology,product,id.aspx
to the pages:
http://mywebsite.com/product_AB/sheet/technology,product,id.aspx
The technology, product and id parameters change according to the product sheet displayed. To make this experiment, it is mandatory to write JavaScript code to make sure every possible case is taken into account. Here is an example:
var url = window.location.href;
var redirect_url = url.replace("/product/", "/product_AB/");
Kameleoon.API.Core.processRedirect(redirect_url);
Once the JavaScript code written, you will have to carefully define the target. If you want to target via a URL, you need to restrict the experiment to URLs containing the following fragment:
http://mywebsite.com/product/sheet/
Note: running a split URL A/B experiment on several pages implies that elements of identification are not managed as parameters but straight in the URL. The page type will not be
categorie.php?product=but/categorie/produit.html.
Do not hesitate to consult our developer documentation on URL redirection
URL redirection and consent policy
When Kameleoon does the redirection, data have to be stored on the visitor browser to perform a correct tracking of a visitor when they land on URL B.
However, as no storage of data is allowed before consent has been provided, Kameleoon will not be able to store the variation ID and perform the tracking to analytics.
To overcome this problem, you can enable the redirect experiment only for visitors who have already provided consent. To do so, you can use this targeting JS condition:
return Kameleoon.API.Visitor.experimentLegalConsent || false;
Change management on the Graphic editor
As a general rule
You can modify several elements of your page via the Graphic editor. However, the following rule must be observed:
When you edit an element in the Graphic editor, always edit the parent element first.
Indeed, if you modify a child element, then one of its parents, the first modification is likely to be overwritten by the second: the tree structure must therefore be respected.
To make sure that you respect the hierarchy of elements when making modifications, two methods exist and can be used in a complementary way:
- Use the hierarchical selection tool, which allows you to know the place of each element within the tree structure of your website;
- Use the History panel, which allows you to make sure that each modification is taken into account and to select precisely an action you have made.
Using hierarchical selection
On the Graphic editor, click on one of the elements of your page. A hierarchical selection tool appears, allowing you to navigate between parent and child elements.
In the example above, the Image element is contained in the Block (1) element, which is contained in the Block (2) element. In other words, the parent of this title is Block (1), which is a child of Block (2). It is possible to go up again in the hierarchical sequence by clicking on <…>.
If you make a modification on Image (edit its size, for example), then on the Block element (edit its dimensions), the modification on Image will not be taken into account: it has been overwritten by the editing of its parent element.
When planning several editing operations, start with the most important element hierarchically. For example, edit the section, then the block, then the title.
