
In this article:
– How to simulate a campaign in Kameleoon to test and preview changes to your website before launching them
– Best practices for using the simulation feature to streamline your website testing and optimization process
The simulation mode enables you to check whether:
- Your variations or personalizations are displayed correctly;
- The targeting of your campaign is configured correctly, and if not, understand why;
- The goals you have set are converting or not;
- Your different visitors see the right content for them, and at the right time.
Simulating a test and previewing it are two different actions. To learn more about previewing, you can read our article on the subject.
Open the simulation panel
From the Graphic editor
Kameleoon offers you the possibility of testing your variations and/or your targeting options before launching an experiment. On the Graphic editor, just click on Simulate (top right of the editor).

Kameleoon will open a new page in your browser and a panel will be displayed at the bottom of the page, giving you access to a number of options.
At any time, you can click on the Hide button to collapse the bottom part of the window and make room for your simulated web page. To unroll it again, click on Show.

From the Code editor
Kameleoon offers you the possibility of testing your variations and/or your targeting options before launching an experiment. On the Code editor, go to the Finalize panel.
The Simulate button is the fourth step of finalization.
Kameleoon will open a new page in your browser and a panel will be displayed at the bottom of the page, giving you access to a number of options.
At any time, you can click on the Hide button to collapse the bottom part of the window and make room for your simulated web page. To unroll it again, click on Show.
From the Personalization creation page
Kameleoon offers you the possibility of testing your personalization, targeting options and display settings before launching a personalization. At the bottom of the Personalization creation page, click on the Simulate button.

Kameleoon will open a new page in your browser and a panel will be displayed at the bottom of the page, giving you access to a number of options.
At any time, you can click on the Hide button to collapse the bottom part of the window and make room for your simulated web page. To unroll it again, click on Show.
From the dashboards
You can now launch the simulation from your dashboards (Experiment AND Personalization). To do so, you have to go through the secondary actions of the campaign card.

Structure of the simulation panel
The simulation panel is divided into 5 areas:
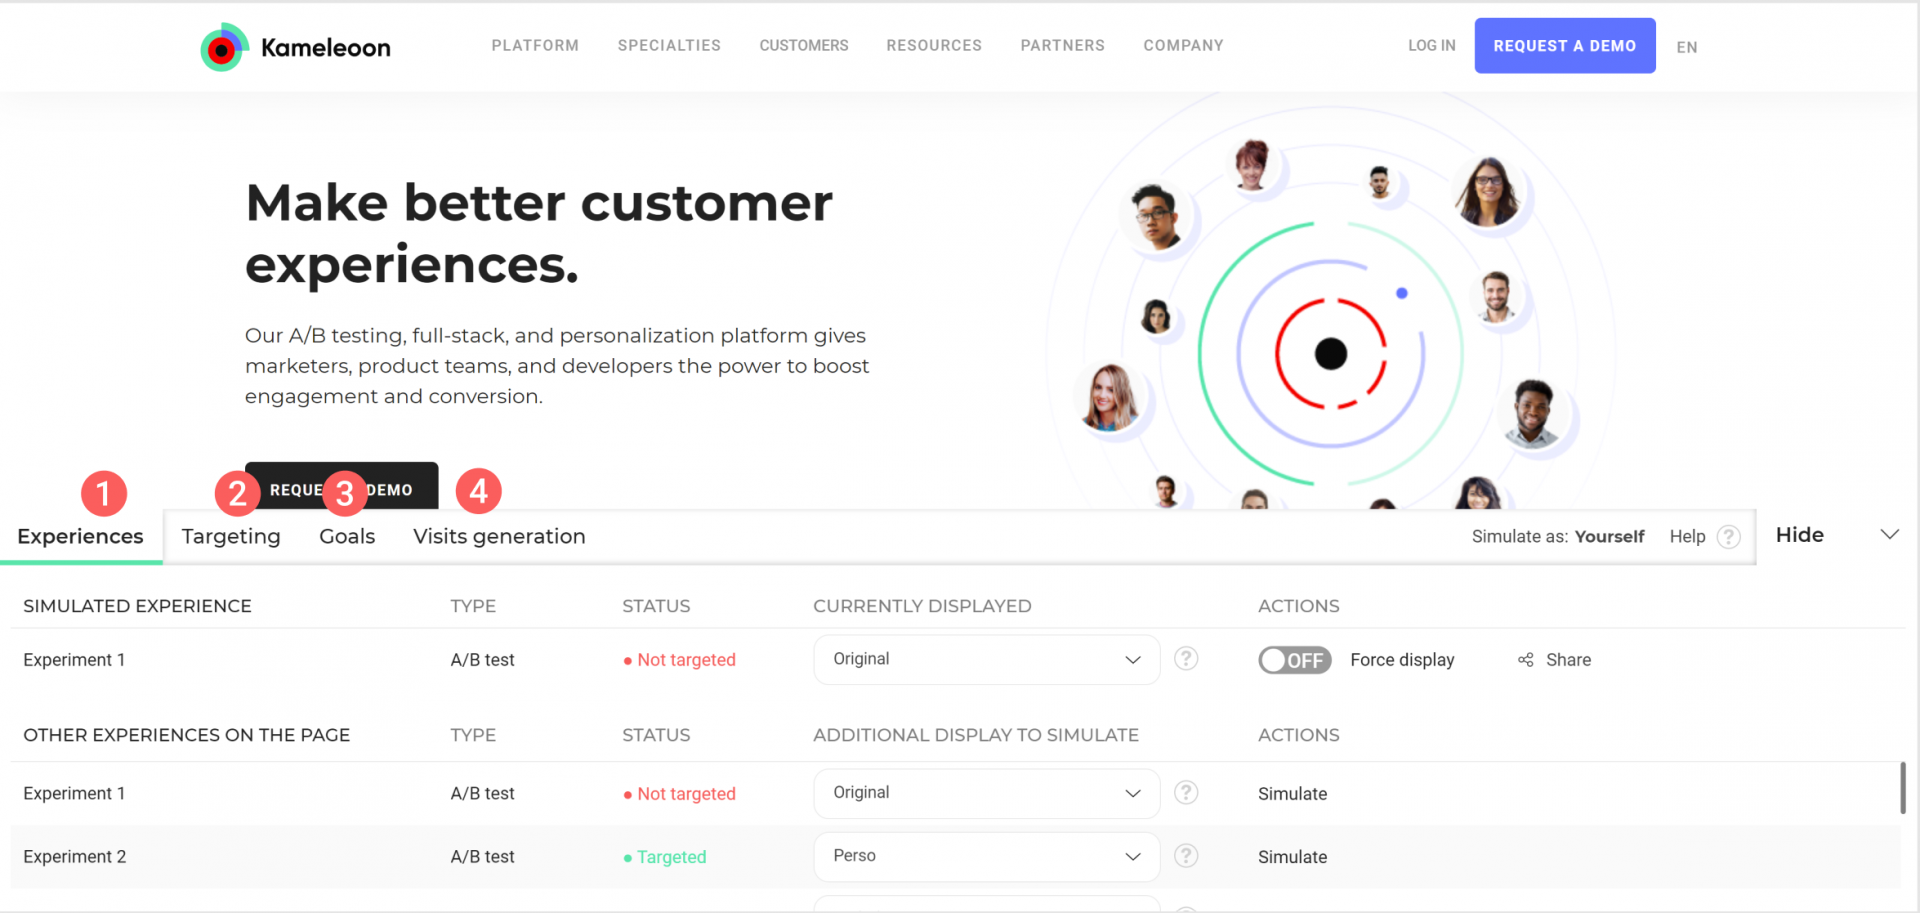
- The Experiences tab
- The Targeting tab
- The Goals tab
- The Visits generation tab
- The area on the right
The simulation step is highly recommended but optional. It does not prevent you from launching a campaign.
Important: If you simulate a live campaign, you have to put either the simulated or live version in the Original group to be able to properly check the variation.
If you modify an element of your campaign (whether it is already online or a draft) after having simulated it, we recommend that you launch a new simulation.
Simulation mode and mobile phone
It is possible to launch a simulation to check the settings of a mobile phone experiment. To do this, you can use a Chrome extension (like this one for example) to load a mobile view of your website. Then start the simulation mode as usual.
Experiences
This tab allows you to choose the experiment and the variation to display and to know the status of the displayed variation.
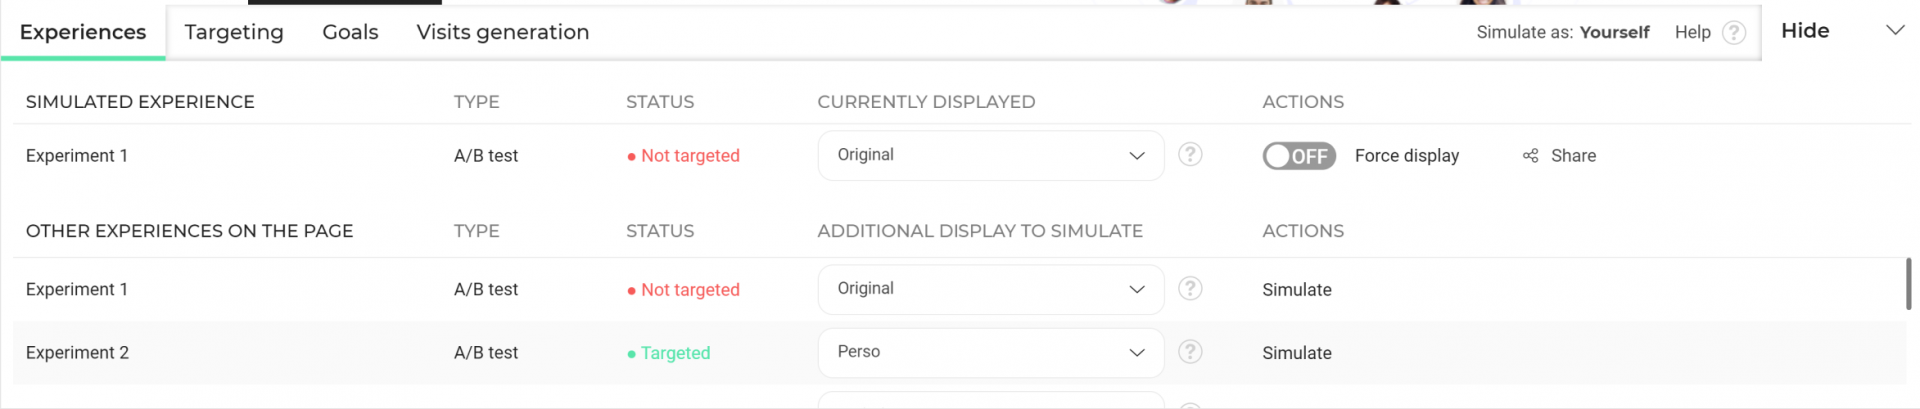
Note: By default, when launching the simulation, the Experiences tab is selected.
There are two sections: Simulated experience and Other experiences on the page.
Simulated experience
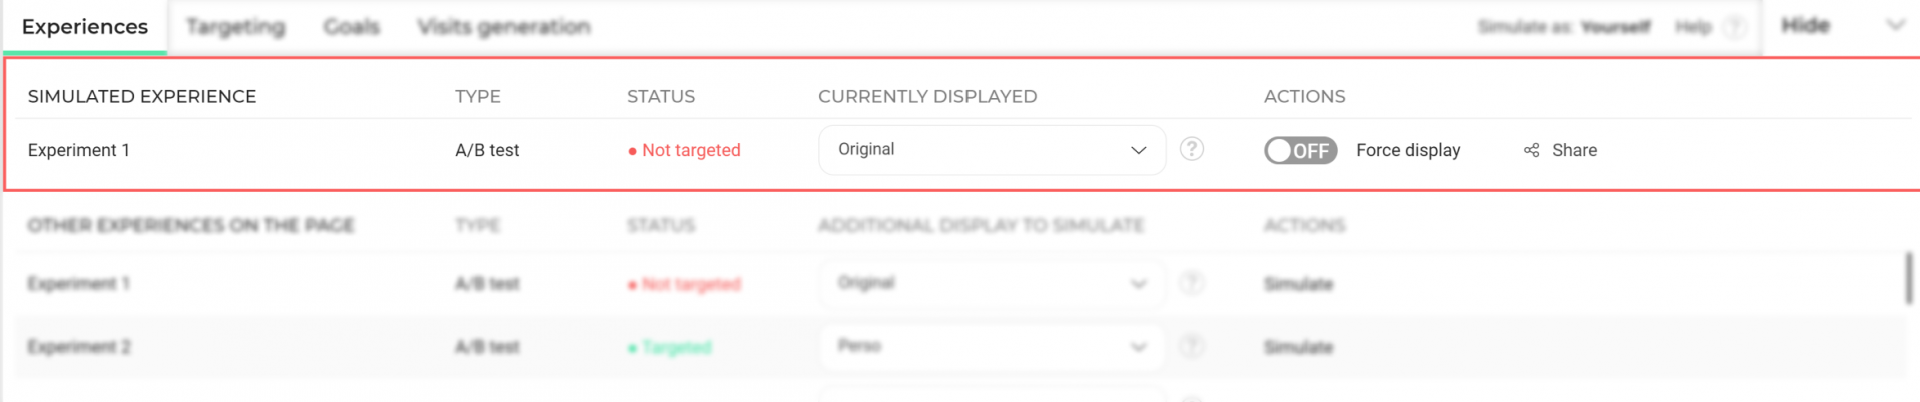
This section concerns the experiment from which you started the simulation and appears at the top of the panel.
It consists of 5 columns.
Experience in simulation
In this column, you will find the name of the currently simulated experiment.
Type
This column indicates the type of experiment currently in simulation: an A/B experiment or a personalization.
Status
The status column informs you of the status of your experience. This status depends directly on the targeting criteria you have defined and, in the case of a personalization, the defined exposure parameters.
The status of the experience depends on the type of experience (A/B experiment or personalization).
If the simulated experience is an A/B experiment, the status can be:

if you meet all the targeting criteria;

if you do not meet the targeting criteria.
If the simulated experience is a personalization, the status can be:

if you meet all the targeting criteria and the personalization is displayed;

if you meet all targeting criteria but are not exposed to the personalization;
This may be due to the exposure settings of your personalization (capping, prioritization, etc.)
if you do not meet the targeting criteria.
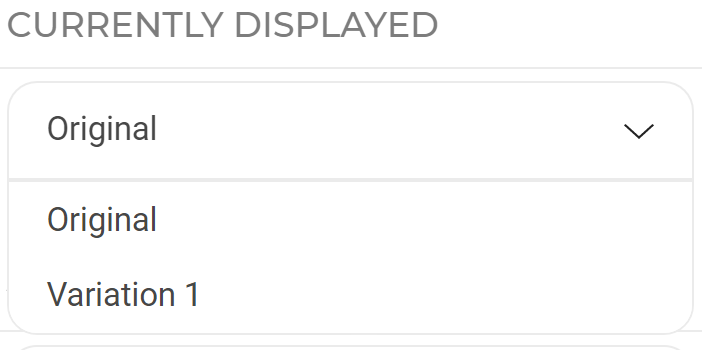
Currently displayed
This column contains a drop-down menu whose options depend on the type of experience.
If the experience is an A/B experiment, you can choose which variation you want to display among those associated with your experiment.
If the experience is a personalization, it offers different display options that will be combined with the simulated experience.
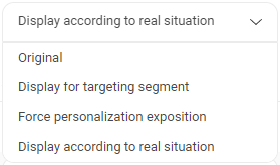
Four simulation modes are then available:
- Display according to real situation: this is the option selected by default. The displayed page corresponds to your current situation as a visitor and depends on the defined targeting and options.
- Forced personalization exposure: Displays the personalization regardless of its configuration. The personalization will necessarily take the status Exposed.
- Display for targeting segment: View what users in your segment will see on their screen, taking into account options and other active personalizations. The personalization will have the status Targeted not exposed or Exposed.
- Original: Displays the original page without personalization.
Actions
This column is used to act on the current simulation. You can force the display of the variation selected in the Currently displayed in simulation column and share the current simulation.
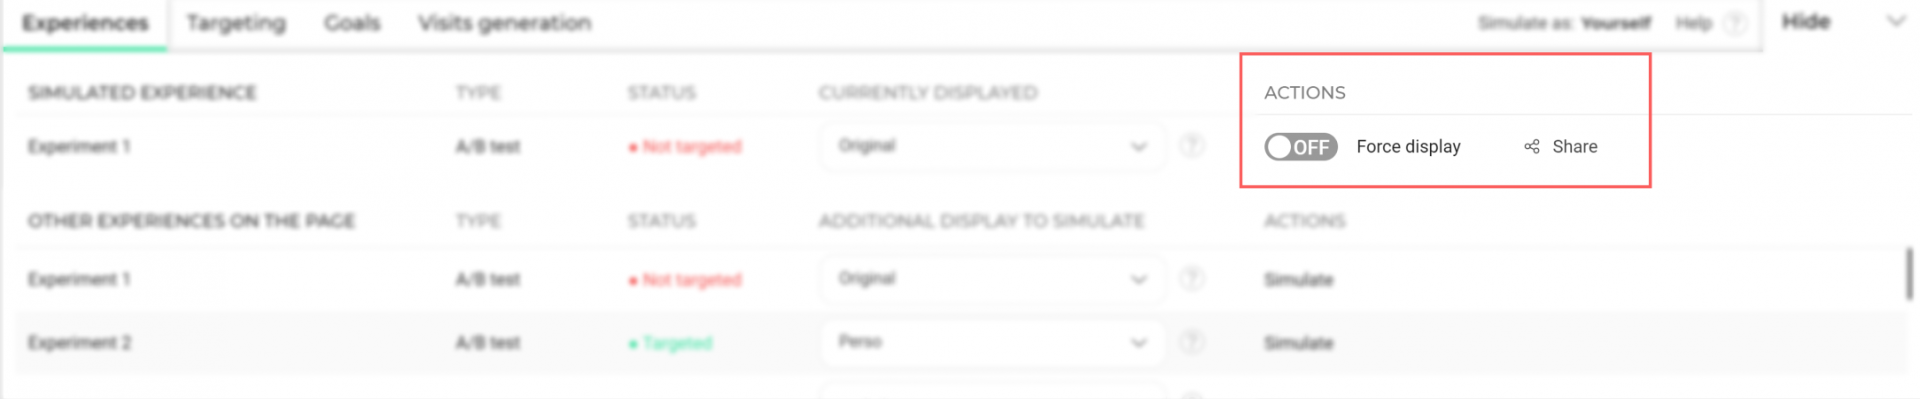
- Force display: If the status of the experiment is Not targeted, the switch button indicates OFF. The original page of your experiment appears, even if you select a different variation. Click on the switch button to ON and force the display of the variation regardless of the targeting status.
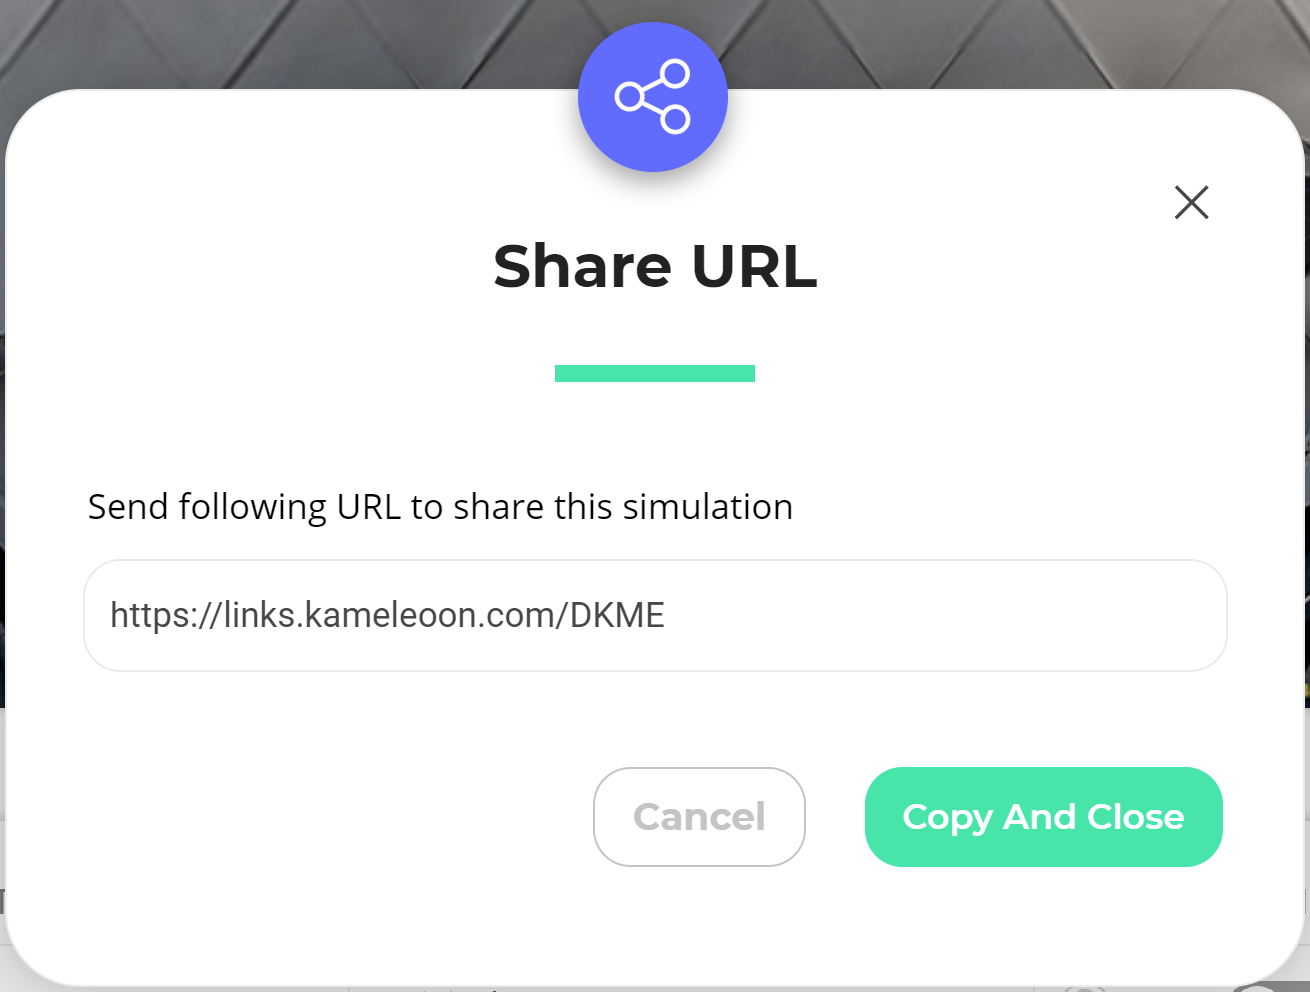
- Share: Click on Share to open a pop-in containing the URL of your simulation. Copy the URL of your simulation to share it with whoever you want. Thus, everyone to whom you send this link will be able to participate in the verification of your experiment.
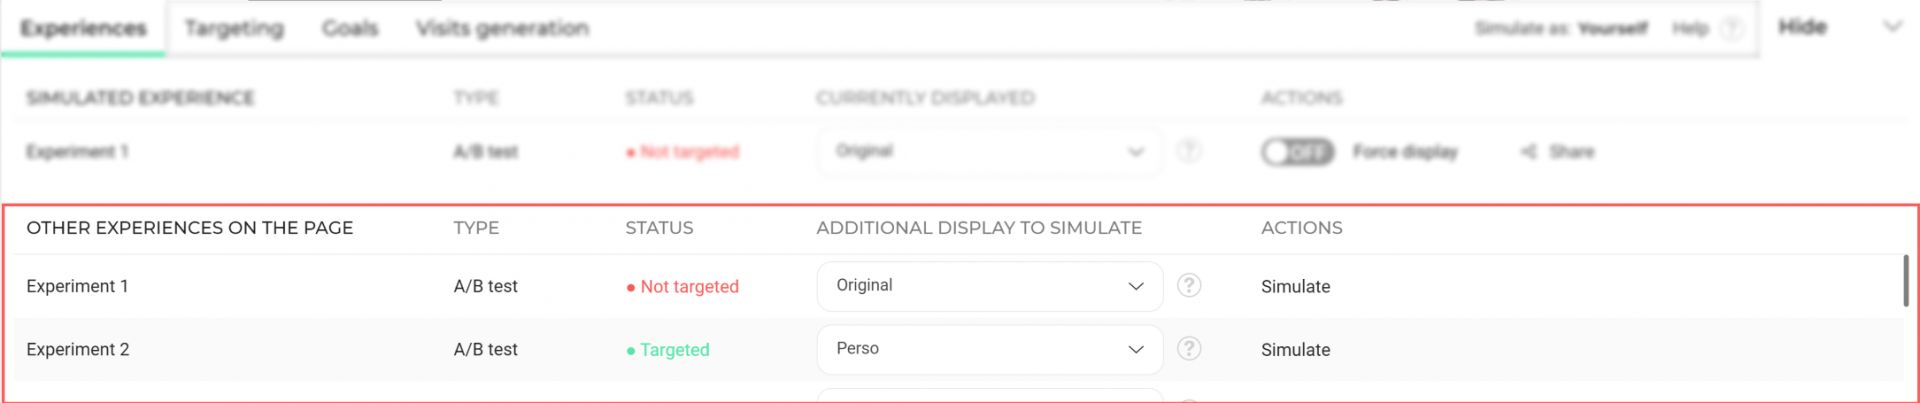
Other experiences on this page
Here are grouped the other campaigns on this page. The information displayed in this section is therefore not relevant to the experience currently in simulation.
Note: If no other experience has been created on the page, the section is empty.
As we will see, this part will allow you to combine variations and simulate other experiences in new windows.
It has 5 columns:
Other experiences on the page
In this column, you will find the names of the other experiences also created on the page of the experience currently in simulation.
Type
This column indicates the type of each of the other experiences on the page. It can be of two types: either the experience is an A/B experiment or a personalization.
Status
The status column informs you of the status of the experience. This status depends directly on the targeting criteria you have defined and the different conditions of your navigation on the site (behavior during the visit, technical criteria, external criteria, etc.).
The different possible statuses are the same as in the Simulated experience section.
Additional display to simulate
When the experience has the status Targeted or Targeted, exposed, a drop-down menu is displayed in the column. It allows you to combine/overlay other experiences with the experience currently in simulation.
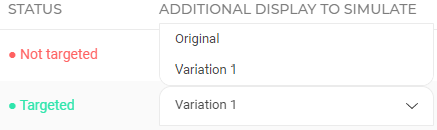
Note: In the case of an experience whose status is not Targeted, the drop-down menu is not available.Another action is then possible. (See the next article section for more on this situation).
The choices offered by the drop-down menu are different depending on the experience type.
If the experience to which the drop-down menu corresponds is a personalization, the choices available in the drop-down menu are the same as those described in the Column section currently displayed in simulation.
If the experiment to which the drop-down menu corresponds is an A / B experiment , select from this menu one of the variations of the experiment. This will then combine with the one already displayed in the upper part of your screen. This function allows you to view the combination of different variations.
Actions
For the experiences also present on the page but whose status is not Targeted or Targeted, exposed, Simulate is then displayed in the column. Click to open the simulation of the corresponding experiment in a new window.

Targeting
The Targeting tab allows you to visualize and evaluate the targeting conditions you applied to the experience currently in simulation. You can understand why your status is Targeted or not.

It consists of:
- A general part where you can choose the experience to evaluate and see the overall result of the targeting;
- A detailed part of the targeting.
Evaluation of the targeting conditions for
The top part of the Targeting tab contains a result section.
On the far right is the overall targeting result for the selected experience or segment.

Depending on the nature of the experience, the result of the evaluation of the targeting conditions may take different values. These are detailed in the Experiences tab.
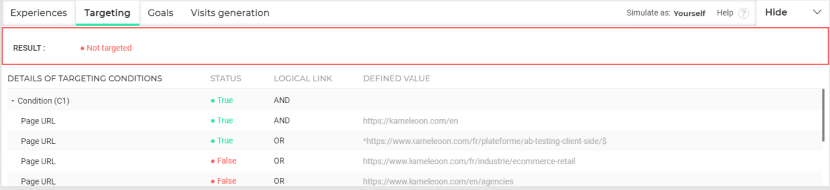
Details of targeting conditions
To fully understand the overall result of the targeting condition evaluation, the lower part of the tab displays the details of targeting, condition after condition.
These details differ according to the nature of the experience (A/B experiment or personalization). We will first see the details of the evaluation of an A/B experiment.
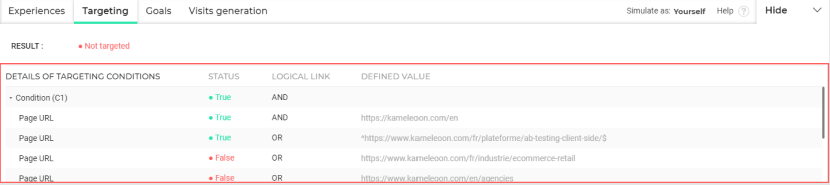
The detail of the targeting conditions consists of 4 columns.
Details of Targeting Conditions
This column lists the set of targeting conditions according to their hierarchy. If the experience or segment evaluated contains only one condition, it will appear only on the first line. If several conditions are defined, they appear hierarchically according to the grouping that was given to them when creating the segment.
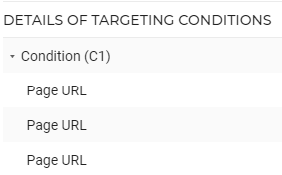
Conditions can belong to two different levels. If, during the segmentation, several conditions are grouped, they also appear grouped in the Targeting tab. They are then level 2 conditions and together they constitute a level 1 condition. Each level 1 condition is numbered (C1, C2, C3, …). A condition that does not belong to any group is a level 1 one.
You can expand (or close) a level 1 condition to display (or not) the level 2 conditions it contains.
To learn how to precisely define the conditions for targeting an experience, see our dedicated section.
Status
In this column you can know the status of each of the conditions listed in the previous column. A condition can be either True or False.

The truth of a level 1 condition with multiple level 2 conditions depends on the logical link between the level 2 conditions.
It is the same for the overall result of the targeting.
Logical Link
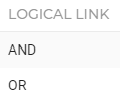
In this column you can know the link between the different conditions of the experience or segment evaluated. This link may be OR or AND.
The AND requires that all the linked conditions are true for the general condition to be true. If one of them is false, then the result is false.
The logical OR link allows only one of the conditions it contains to be true for the general condition to be true.
In a sense, the AND refines the targeting while the OR expands it.
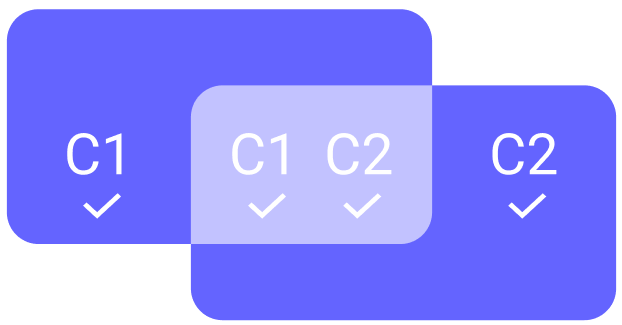
For example, suppose you have 2 conditions defined. You distinguish 3 groups of users: those for whom condition C1 is true, those for whom condition C2 is true and finally those for whom both conditions C1 and C2 are true.
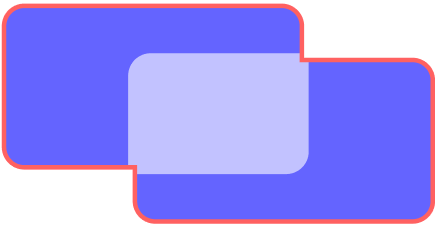
If the logical link between C1 and C2 is OR, the result of the evaluation will be True for all visitors whose at least one of the conditions is true:
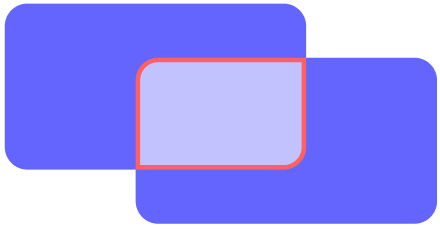
If the logical link between C1 and C2 is AND, the result of the evaluation will be True only for visitors whose two conditions are true:
Defined value
The last column displays, for each condition, the value that was set when creating your segment. If the condition is Elapsed time of the current session, the value set will be the time you specified in your segmentation. For example: more than 5 minutes. If the condition is Page URL, the value will be this URL.
Details of Exposure Options (personalization)
The details of the targeting conditions of a personalization display the same elements as those seen in the previous section on the targeting details of an A/B experiment, but also display the information related to the exposure parameters.
This information, named Detail of Exposure Options, appears after the detail of the targeting conditions.
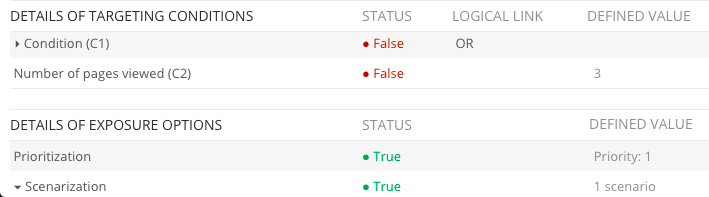
The detail of the exposure options is divided into 3 columns.
This first column lists all the exposure parameters by grouping them as they are in the Exposure Settings section when creating a personalization. You thus find the groups:
- Capping;
- Planning;
- Micro-targeting;
- Prioritization;
- Planning.
Each group can be expanded (or collapsed) to display (or not) the parameters it contains.
Status
In the same way as for the details of the targeting conditions, the Status column of the exposure options displays the status of each of the parameters. This status can be True or False.
Defined value
In the same way as for the details of the targeting of an A/B experiment, this last column displays for each condition the value assigned to it.
Goals
The Goals tab allows you to observe whether the goals associated with the experience being simulated have been converted or not.

It consists of 4 columns.
Associated Goals
All the goals associated with the experience are listed.
Note: If no goal has been set, the message “No goal set” is displayed. If more than 4 goals have been configured, a scroll bar appears on the right and allows you to scroll through them.
Status
The status of each associated goal is indicated in the Status column. A goal is Achieved from the moment the visitor has performed the action specified by the goal. If not, the status of the goal is Not achieved.

Note: The displayed data are those of the simulation. The status and the number of conversions are yours only.
Note: A recently added goal may not convert properly in simulation mode. An update delay is indeed necessary before it can be correctly taken into account. You can either wait a little (the update will be done automatically), or regenerate the sitecode linked to your site to speed up the process.
Number of conversions
This column shows the number of times the goal has been converted. It will therefore be 0 if the goal has the status Not achieved.
ID of the goal
This last column tells you the reference ID of the goal. It is a unique reference that allows you to accurately identify your goal.
Note: This data may change in real time, depending on the actions performed on the page.For example, if a click tracker has been set on an item, the Button Click goal will change from Not achieved to Achieved when clicked, and the number of conversions will change accordingly.
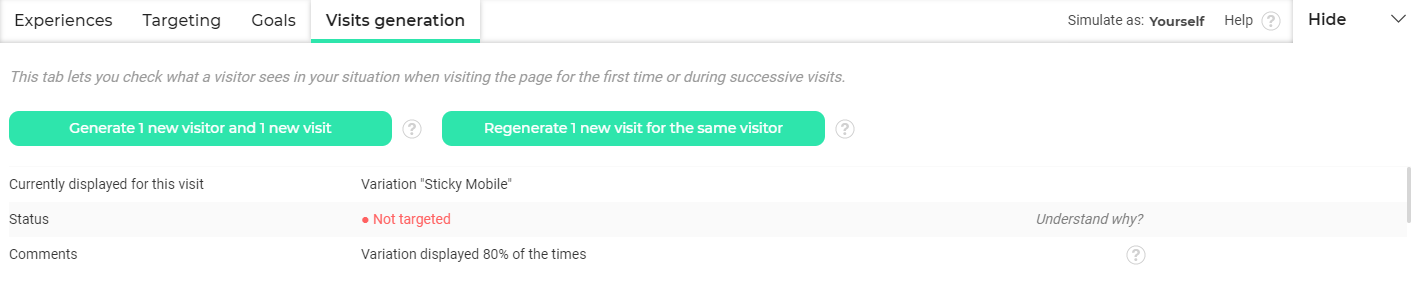
Visits generation
This tab lets you check what a visitor sees in your situation when visiting the page for the first time or during successive visits.
You can choose between two types of simulated visits:
- Generate 1 new visitor and a new visit;
- Regenerate a new visit for the same visitor.
Note: The second type is only available once the first type has been used: regeneration is possible only if there has been generation.
At any time, the information on the simulated visit is visible at the bottom of the tab.
Information on the visit
The lower part of the tab shows you information about the simulated visit.
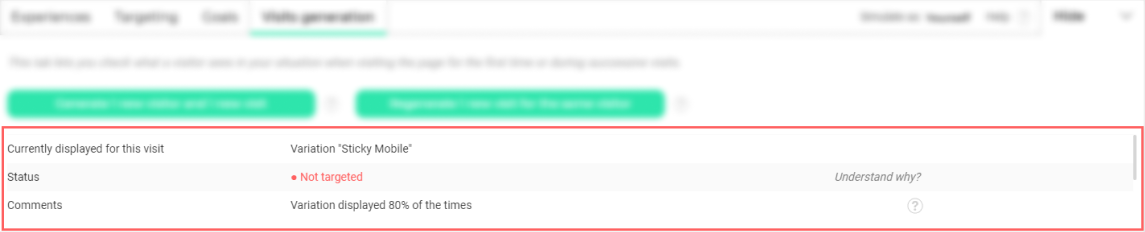
Currently displayed for this visit
Is this is an A/B experiment, here is indicated the variation to which the visitor is exposed. If this is a personalization, here is its name.
Status
You find here the general targeting results of the generated visit. Click on Understand why? to display the Targeting tab and access targeting details.
Comments/Display rate
The percentage of visitors that can be exposed to the variation/the personalization, as you set it when finalizing your experience.
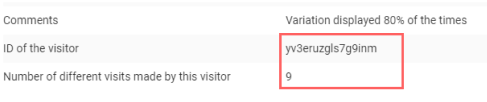
Visitor ID
The visitor ID is a notional identifier that let you know for sure whether you are generating new visits or new visitors.
The format of this ID is “SIMUXXXX”. You can replace “XXX” with the combination of your choice, but a number is better. With each click on the button Generate 1 new visitor and 1 new visit, this ID changes; with each click on the button Regenerate 1 new visit for the same visitor, it remains the same.
Number of simulated visits for this visitor
Find here the number of visits generated for the same visitor. Each time you generate a new visitor, the value changes from 0 to 1. Each time you regenerate a visit for that same visitor, the value increases.
Generate a new visitor and a new visit
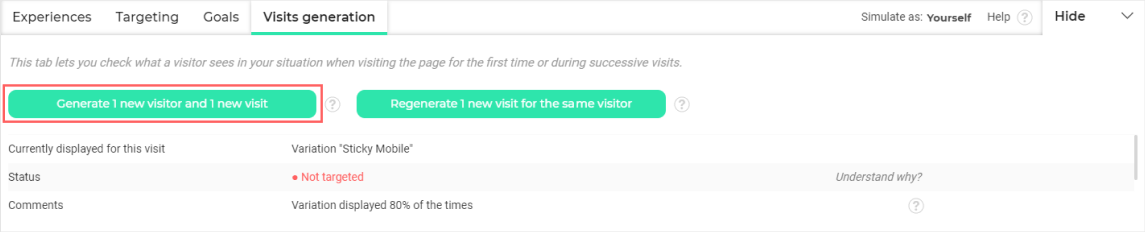
Click Generate 1 new visitor and 1 new visit to display the page as it will appear for any visitor belonging to the selected segment and visiting the page for the first time.
Understand the information on the visit
The variation/personalization displayed changes randomly in the proportions that you set during the finalization step of the experience. For example, if you have created a variation/personalization in addition to the original and divides the traffic so that 50% of visitors are directed to the original and 50% to the variation/personalization 1, each new visitor generated will have a one in two chance to be oriented towards the variation/personalization.
Since you generate not only a new visit but also a new visitor, the ID of the generated visitor is renewed each time the button is clicked.
The number of different simulated visits for this visitor remains unchanged.

Depending on your segmentation settings, the visitor’s status may change as well.
Regenerate a new visit for the same visitor
Regenerate a new visit for the same visitor to find out what the same visitor sees during successive visits.
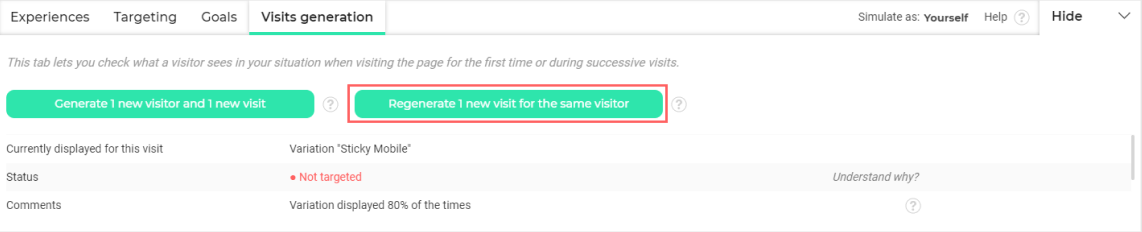
This allows you, among other things, to check the display of the page according to the number of visits parameters established during the segmentation or to check capping parameters.
Understand the information on the visit
Since the simulated visitor remains the same, his ID remains unchanged.
On the other hand, the number of different simulated visits for this visitor increases with each click on the button.
Depending on your segmentation settings, the visitor’s status may change. The variation remains the same for each visit of this visitor.
In the Actions section of the Experiences tab of the simulation panel, you will find the Share option.
This action is used to send the simulation. The simulation URL can easily be shared with your team members to validate the settings of an A/B experiment. This URL is automatically generated by Kameleoon and remains valid for 1 hour. Changes you made to your original website will only be visible to people who have access to this URL.

Close the simulation panel
To close your simulation, make sure to click on the Hide button then on Close to completely exit the simulation.

Everything works as planned? Are you satisfied ? Great, it’s time to launch your campaign!
