Snowplow
Snowplow is a Behavioral Data Platform. With Snowplow, you can:
- Generate a high-quality behavioral data set.
- Control you data's quality and compliance with governance tooling built at every stage of the solution.
- Model behavioral data with customizable incremental web and mobile models that shorten time to value, all managed securely in the Snowplow BDP Console.
Key benefits:
- Zoom in to individual customers and events.
- Zoom out to compare behaviors between cohorts and over time.
- Segment your audience by behavior.
- Develop recommendations and personalizations engines.
With our Snowplow integration, you can now use Kameleoon's campaigns events in any Snowplow Collector.
Activate Snowplow on Kameleoon
The first step is enabling Snowplow. To do this:
- Log in to the Kameleoon app.
- Click Admin > Integrations > Install the tool.
- Select the projects on which you want to configure Snowplow.
- Click Validate.
You will then see an ON toggle on the right of the tool's line, and the number of projects on which the tool is configured.

The data will be automatically sent to Snowplow using Snowplow's JavaScript Tracker.
If you need to change the behavior of our native bridge, you can create a custom analytics bridge and use the Snowplow sample code on our Github repository.
Kameleoon Snowplow event dispatcher
If your Kameleoon events are produced by multiple sources, our Snowplow event dispatcher integration is better suited for these use cases.
This integration plugs directly into our event streaming layer. It singles out the exposure events affiliated with your project ID and dispatches them via an HTTP call to your Snowplow Stream Collector.
To set up the dispatcher for a given project, provide your technical account manager with the following information:
- The URL of your Snowplow Stream Collector
- The host of your Iglu schema registry and your Snowplow API key.
The schema registry and API key are used to inform your Snowplow pipeline of the Kameleoon exposure event type's custom schema, enabling your system to correctly interpret the data we then send. Your API key will thus only be used once.
The schema of a Kameleoon exposure event that we will push to your registry is the following:
    {
        "$schema": "http://iglucentral.com/schemas/com.snowplowanalytics.self-desc/schema/jsonschema/1-0-0#",
        "self": {
            "vendor": "kameleoon",
            "name": "kameleoon_experiment_exposure",
            "format": "jsonschema",
            "version": "1-0-0"
        },
        "type": "object",
        "properties": {
            "nonce": {
                "type": "number"
            },
            "visitor_code": {
                "type": "string"
            },
            "timestamp": {
                "type": "number"
            },
            "experiment_id": {
                "type": "number"
            },
            "variation_id": {
                "type": "number"
            }
        },
        "required": ["nonce","visitor_code","timestamp","experiment_id","variation_id"],
        "additionalProperties": false
    }
Where:
nonceis equivalent to the event UUIDvisitor_codeis a unique user identifier that will be used as theuser_idin the JSON event sent to Snowplowtimestampis the timestamp of the eventexperiment_idis the unique ID of the Kameleoon experiment the user has been exposed tovariation_idis the unique ID of the variation the user has been exposed to within the given experiment
Kameleoon exposure events will be batched into the HTTP call body as custom self-describing JSON. This format contains a reference to the descriptive schema, described above, that Kameleoon pushed to your Snowplow Iglu schema registry during setup.
You may have set up a Mapping Identifier for your project to, for example, attach the visitor ID that you use for your standard Snowplow events to your Kameleoon visitor sessions. If so, this Mapping Identifier is used as the user_id parameter in the self describing event JSON sent to Snowplow instead of the Kameleoon visitor code.
For more information on the HTTP format for sending events to Snowplow, you can refer to the Snowplow Tracker Protocol specification.
Associate Snowplow with a Kameleoon campaign
In the Graphic/Code editor
- Click Integrations in the finalization panel.
- Select Snowplow.
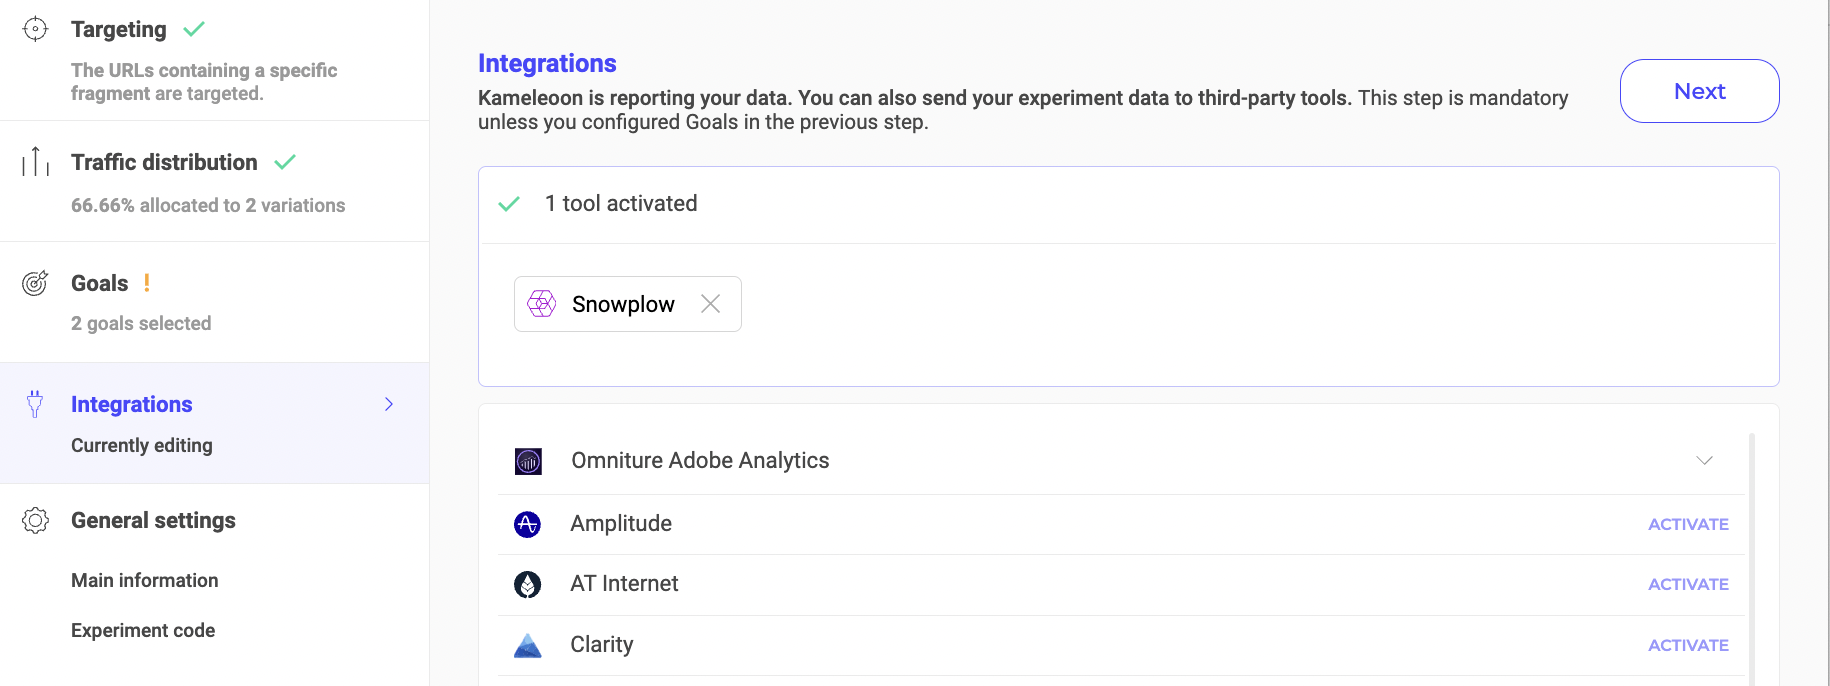
Snowplow will be mentioned in the summary pop-in before going live. Kameleoon will automatically transmit the data to Snowplow, and you can view your results directly in the tool.
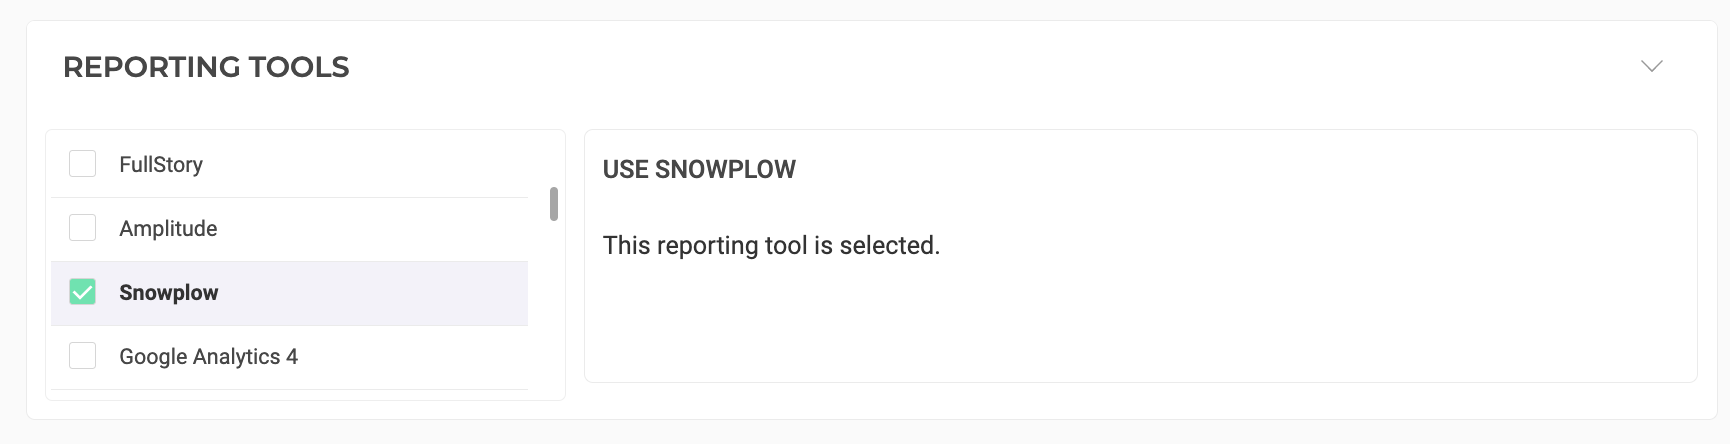
On the personalization creation page
You can select Snowplow among the reporting tools for a personalization in the same way you would in an A/B test.
On the Results page
Once Snowplow is set as a reporting tool for an experiment, you can select (or unselect) it via the Kameleoon Results page. To do this:
- Click Reporting Tools > Edit.
- Select or deselect Snowplow.
- Click Validate.