Creating a custom data enables you to target visitors according to data already available, such as user account information.
All your custom data created with Kameleoon are available on the Custom data page in the Configure menu of the App where you can create and manage them.
Create a new custom data
To access the creation pop-in, in the left menu of your Kameleoon App, click on Configure then Custom data.

Then click on the New button at the top right of the page.

Several fields help you set up your custom data.
Structure of the creation pop-in

- Name the new custom data
- Define how to get the value of the data
- Tell Kameleoon how to use the imported data
Custom data name

Name your custom data to easily identify it.
Avoid names that are too long and choose relevant names that reflect the characteristics of the custom data.
If several websites are selected, you will need to check that custom data is being pulled from each of these sites.
There is a limit to 255 active custom data, so consider carefully before creating them and don’t double up.
Value retrieval
Acquisition Method

In the dropdown menu, choose the custom data’s value retrieval method.
The main tag management tools are available:
- Adobe Tags (
_satellite.getVar) - GTM data layer (
dataLayer) - Commanders Act data layer (
tc_vars) - Tealium (
utag.data&utag_data)
For these tag managers, you need to indicate the name of the variable to get.
If you choose to use GTM dataLayer, proceed as follows to retrieve the values:
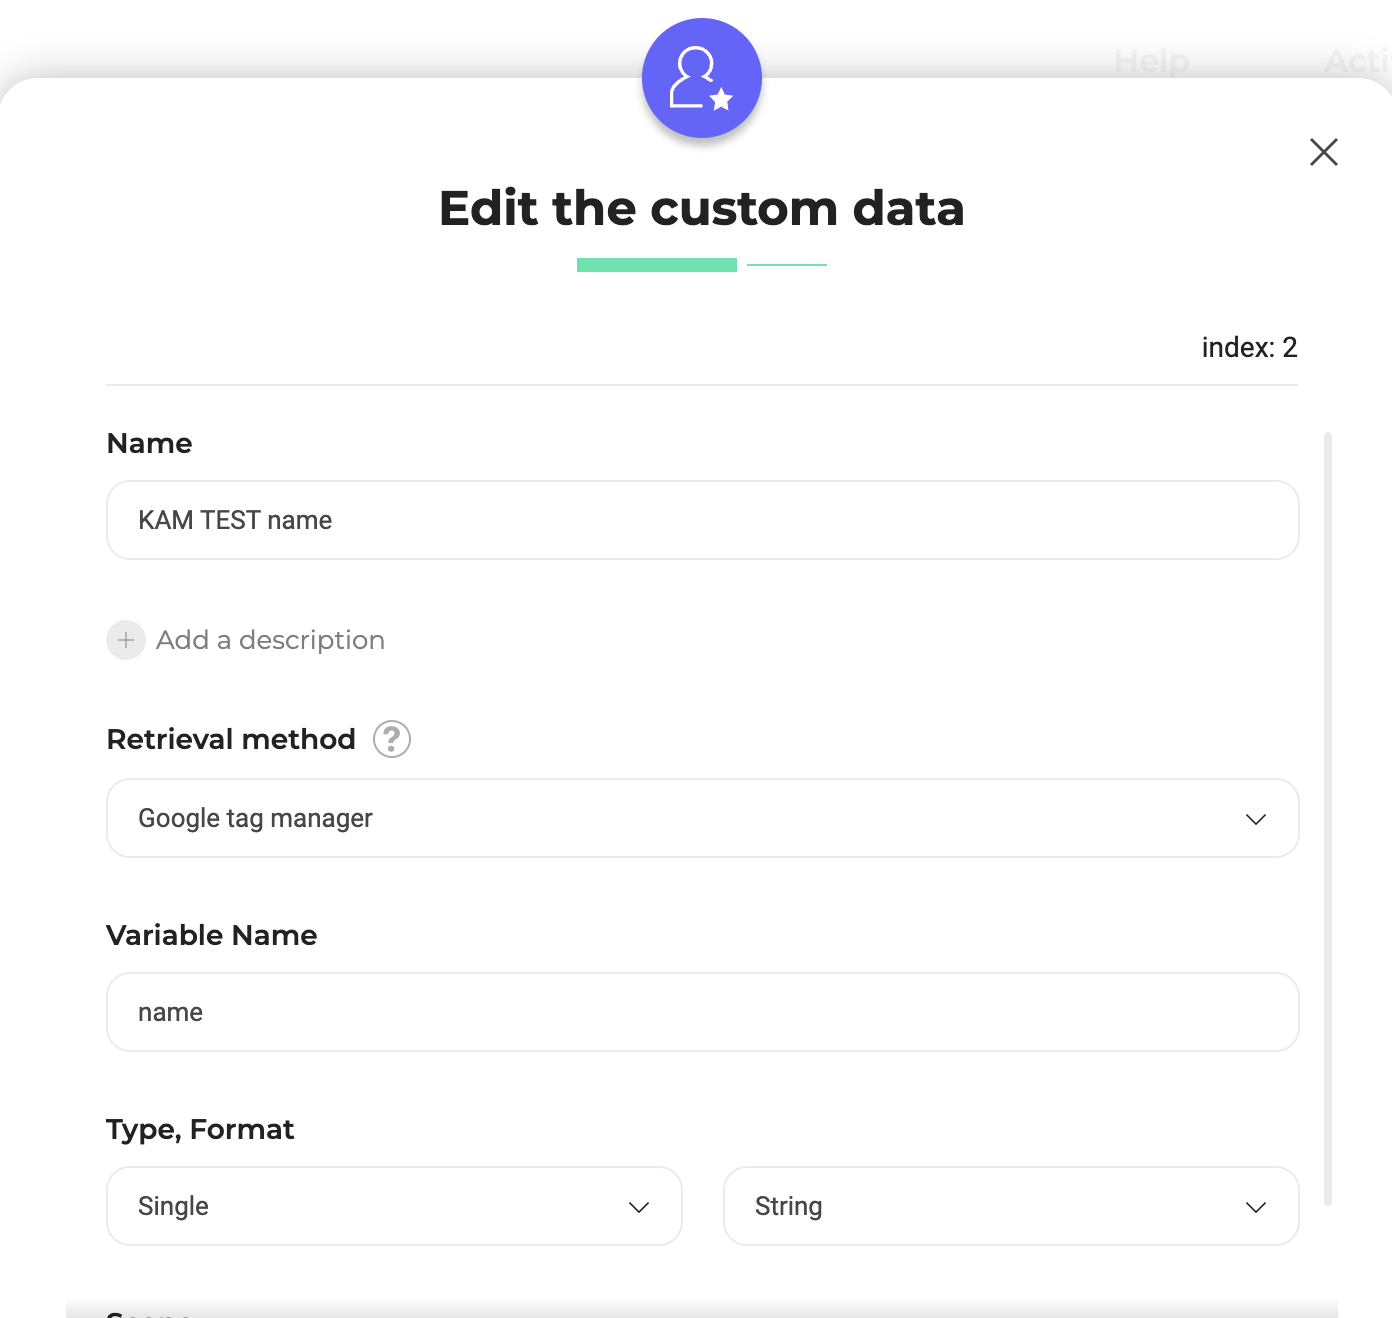
- if the key is in level 1 in the dataLayer, simply enter
namein the Variable name field.

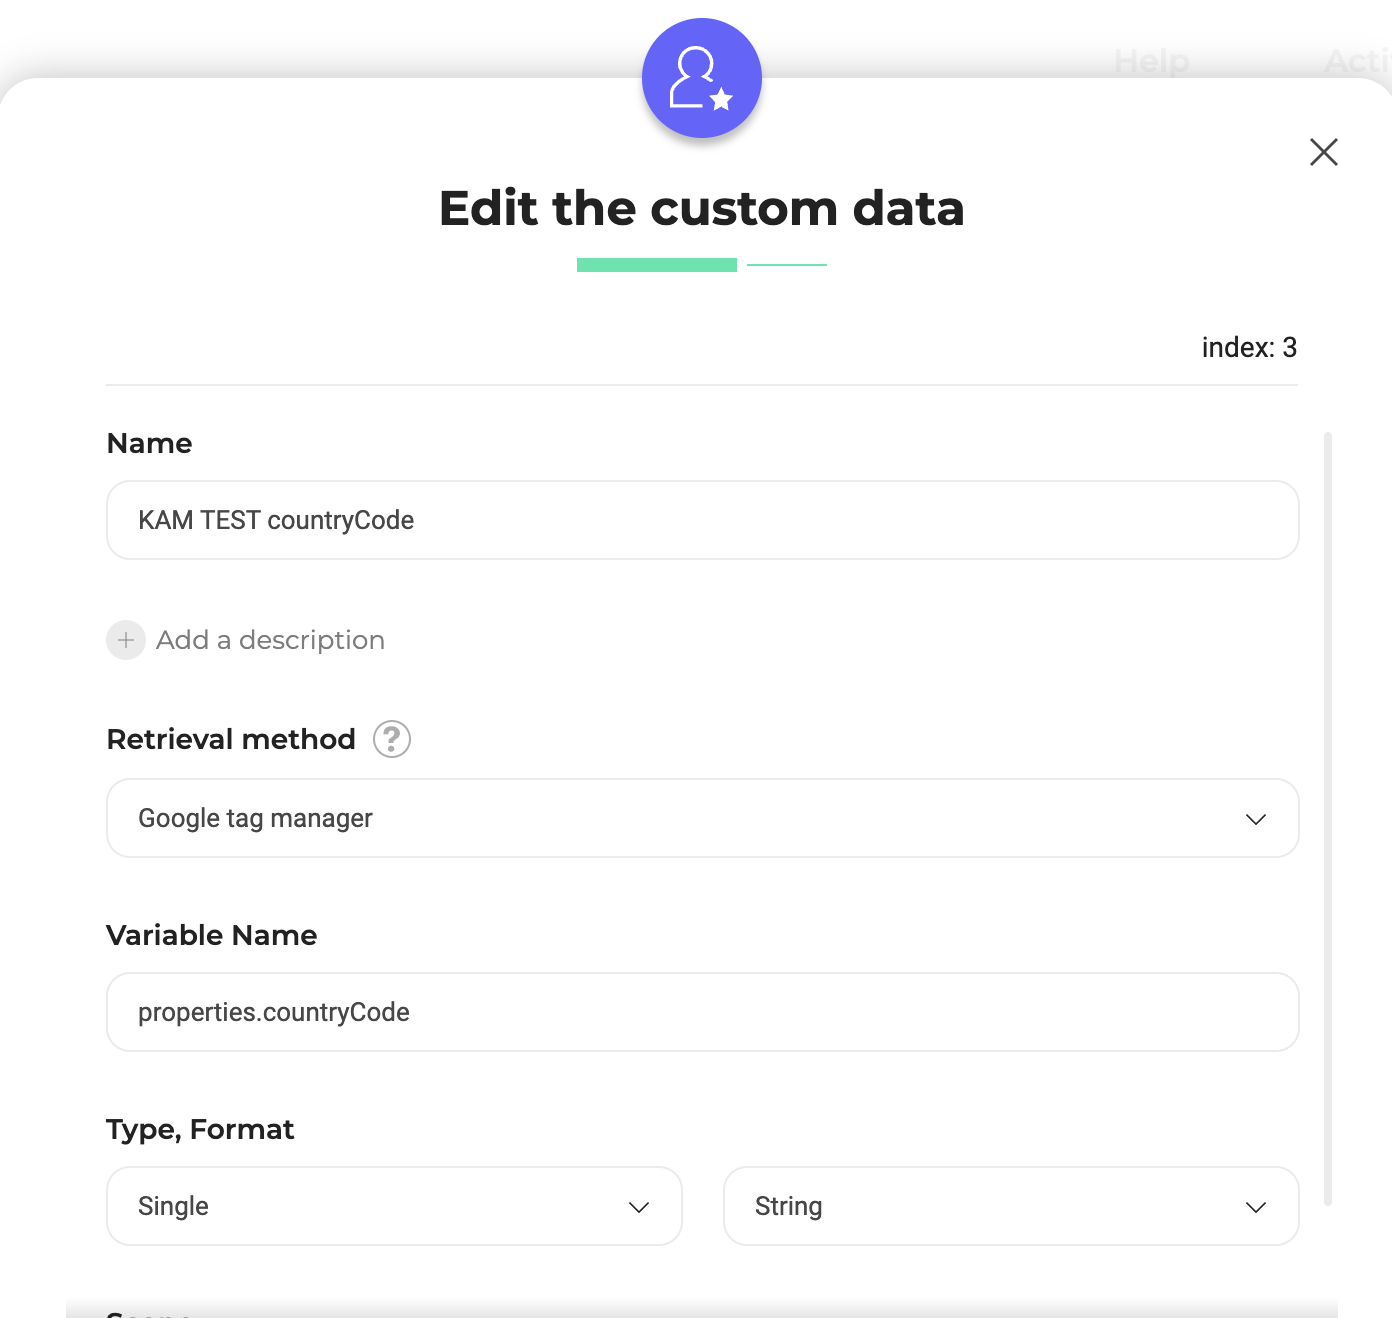
- if the key is in level 2 in the dataLayer, for countryCode you need to indicate
properties.countryCode

If you choose to use a custom JavaScript code to retrieve the value you need, carefully check the code and be careful with the use of scripts.
The main convention to respect is that to set the custom data, your code should return an object with two keys, “value” with the value you want to provide for this custom data, and (optionally) “override” with a boolean value (false by default). The code will be executed again: every 100 ms for the first 3 seconds after the first invocation, then every 3 seconds.
Here is an example:
if (! window.myObject) return null;
// custom data will not be set, but code will run later again

if (window.myObject) return {"value": window.myObject.x, "overwrite": true};
// returning a value and setting the custom data

if (window.someObject.value == 3) return {"value": null}
// stopping the periodic execution of the code, without setting the custom data
If the Kameleoon Activation API option is selected, this means that your website needs to regularly make calls to the Kameleoon Activation API.
If you use Kameleoon Feature Experimentation and one of our SDKs, you need to use the Kameleoon SDK method.
Type
When Kameleoon reads the data value, will it be expecting a single value or a table of values?

In the drop-down menu, select the format of the data to be retrieved.
The data can be of type :
- string (example: “woman dress”)
- boolean (example: female = “true/false”)
- number (example: cart amount = “127”)
- single (example: “127”)
- list (example: “126, 127, 128”; “shoes, dress, coat”)
- count list of (example: “shoes: 3, dress: 1, coat: 1”)
Scope

In the drop-down menu, select the scope of your custom data.
- Page: For each new page, we reset the data value, for example a cart amount.
- Visit: The value of the data is reset at each new visit by the visitor. For example: geolocation.
- Visitor: The unit of data relates to the visitor and not to the visit. For example: female = true.
Options

Custom data is evaluated each time the page is displayed. In case of “undefined” response, the code is executed again (every 100 ms for the first 3 seconds after the first attempt, then every 3 seconds).
- Use this data only locally for targeting purposes
If your custom data is only used for targeting, you do not need to stock the data on the server; in this case, it is recommended to use the LocalData API. This saves space compared to the limit of 255 active custom data. Note however that when you use the LocalData API, the custom data cannot then be used on the results page.
If you choose to stock the data on the server, be careful not to save sensitive data. Also be aware that the value of a custom data is limited to 1000 characters when it is sent to the server.
- Use this custom data as a unique identifier for cross-device matching
If you enable this option, a value (the email address, for example) can only be associated with one visitor). This means a visitor can be uniquely recognized. It enables cross-device tracking (ensure that the mapping IDs have a unique value for each visitor, otherwise cross-device tracking is pointless).
Learn more about cross-device history with our FAQ article and our developer documentation.
- Use this custom data as input for AI Predictive Targeting
To use the machine learning option, you need to activate Audiences.
If Predict is configured: you have to choose whether to feed in this data or not. Do not activate if the custom data is highly targeted.
Only number and Boolean-type custom data are accepted.
Do not add a date, time stamp or visitor identifier (email, customer account number, etc.), since those elements only concern a single visitor and therefore don’t allow you to analyze general behavior.
- Use this custom data as a unique identifier for cross-device history reconciliation
When activated, Kameleoon treats this custom data as a unique identifier for your visitors, which will be used to map several Kameleoon visits to a unique user. Learn more
- Save the values for the targeting condition associated with the custom data point
This option allows to set a list of values that will be available in the segment builder for this custom data.
You can click on Paste sample code to get a code example (exactly like for the custom JavaScript code on the first page of the custom data pop-in).

Your code must return synchronously a JS array containing objects representing the possible values along with their labels. This array should obey the following requirements:
- all elements in the array should be JavaScript objects;
- these objects should contain two keys: a ‘value’ key (containing the actual possible value for the custom data), and a ‘label’ key (representing the textual description for this particular value);
- for ‘value’, the type of the content should correspond to the actual type of the custom data; for ‘label’, you should provide a string as content.
Example:
return [{value:'q2f6hsbzpf', label:'First segment'},
{value:'8ney4225y65a', label:'Other segment'},
{value:'3h6vjtz26b', label:'Loyal users'}];
If the format is incorrect, when clicking on Validate an error message appears.
Once a correct JS has been filled in, click on Validate: you return to the basic settings pop-in. Continue to set up the custom data and validate its creation.
To know how to use these custom data values in the segment builder, you can read our documentation on the subject
Click on Create to validate the custom data’s creation.
Define a custom data as targeting condition
To add a custom data to a new segment, select the data of your choice in the Custom data tab of the conditions column. Only the custom data configured on the website is displayed.

In the dropdown menu, determine the required value of the custom data for a user to be targeted and include / exclude the visitors meeting the custom data condition.
Depending on the type of custom data, the configuration of the targeting condition changes (“is true/is false”, “contains”, “is equal to”…).
Filter/ventilate by custom data on the results page
On the results page of an experiment, it is possible to filter or break down the results according to a custom data associated with the experiment.

This will give you more detailed analyses for reporting purposes.
