
A new campaign results page is available! Discover its features
The side panel of the results page allows you to view the settings of the campaign for which you are viewing the results and making changes to it.
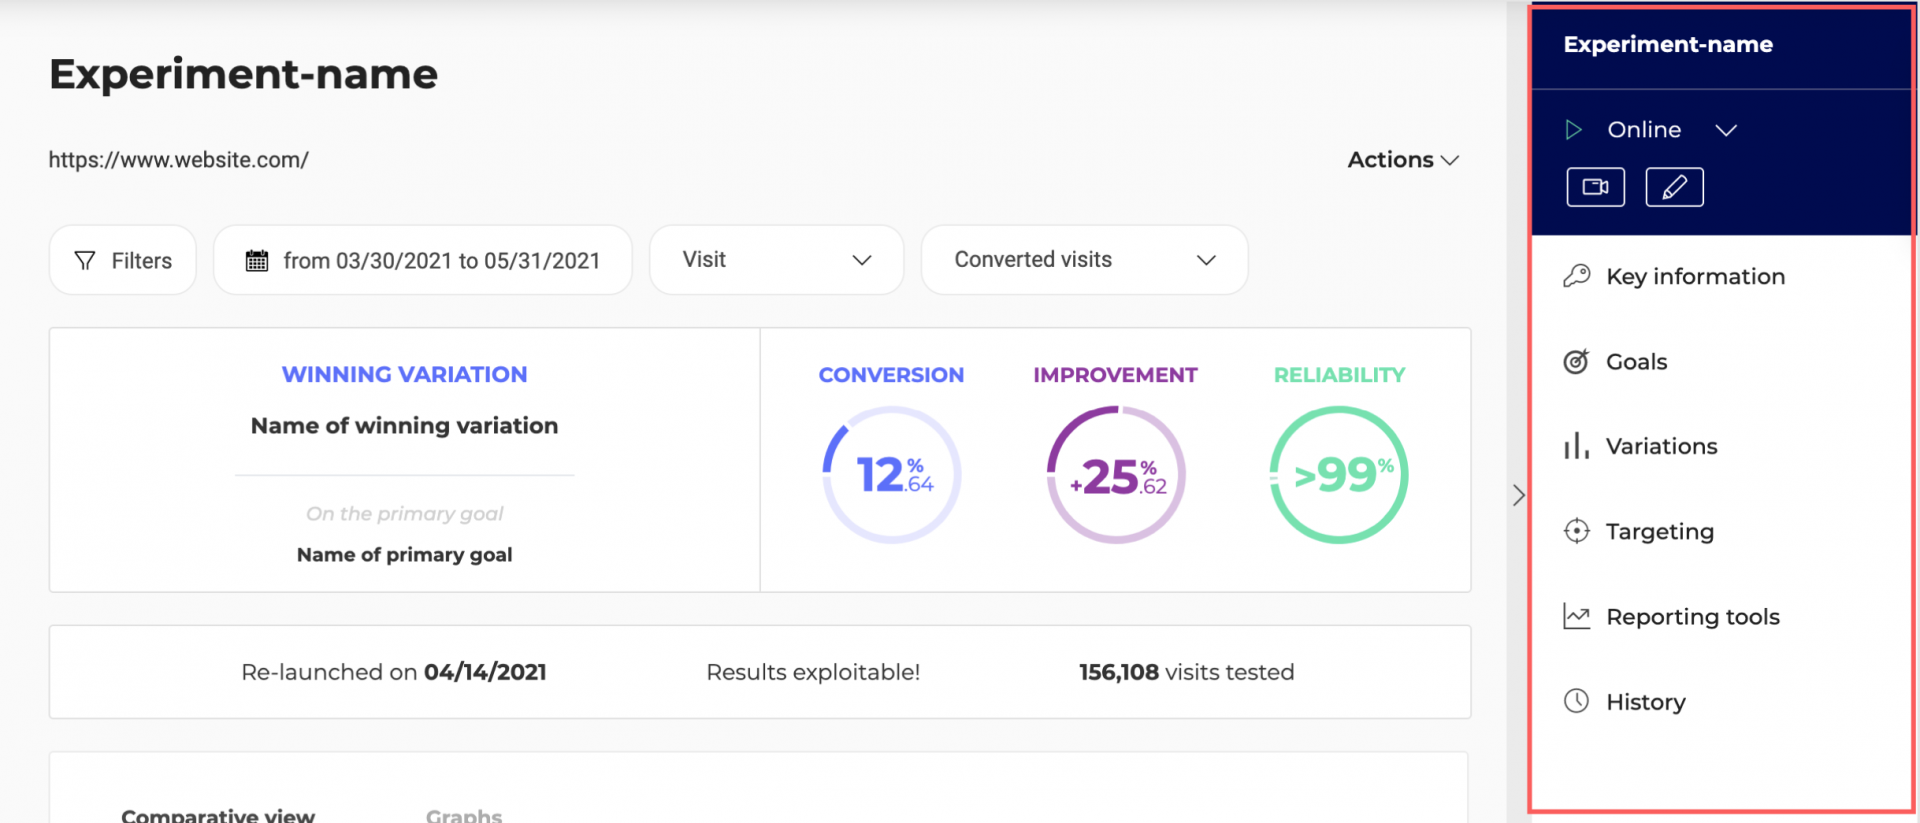
You will find this panel on the right side of the page. At any time, an arrow allows you to display or hide it.
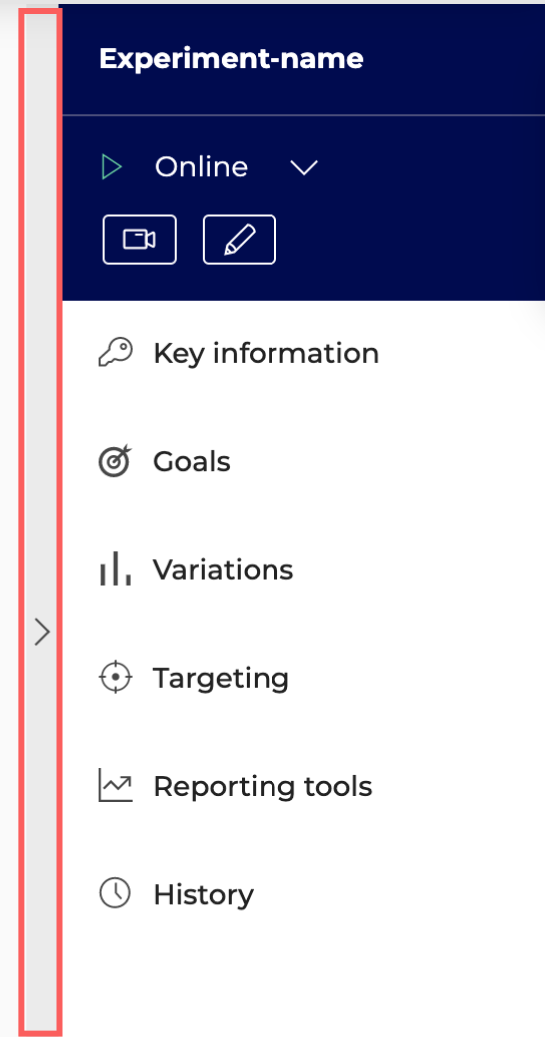
The upper part of the side panel indicates the campaign name and its status:
- Online;
- Paused;
- Stopped;
- Deviated.
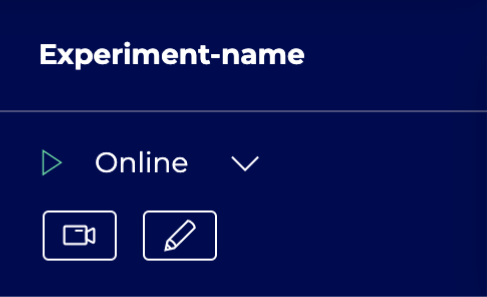
You also find here a certain number of actions.
Actions
View results from another campaign
When hovering over the name of the campaign with your mouse, arrow(s) appear and allow you, by clicking on it, to display the results of previous or next campaign.
Edit the status of the campaign
To change the status of your campaign, click on its current status and select from the drop-down menu the status you want to assign.

Simulate the campaign

Click on the icon to open the campaign simulation tool. To learn how to fully use the simulation tool, check out our dedicated articles.
Edit the campaign

Click on the icon to open your campaign in the Graphic editor and thus be able to modify it.
Delete the campaign

Click on the icon to permanently delete your campaign. Warning ! This action removes the campaign and its results and is irreversible!
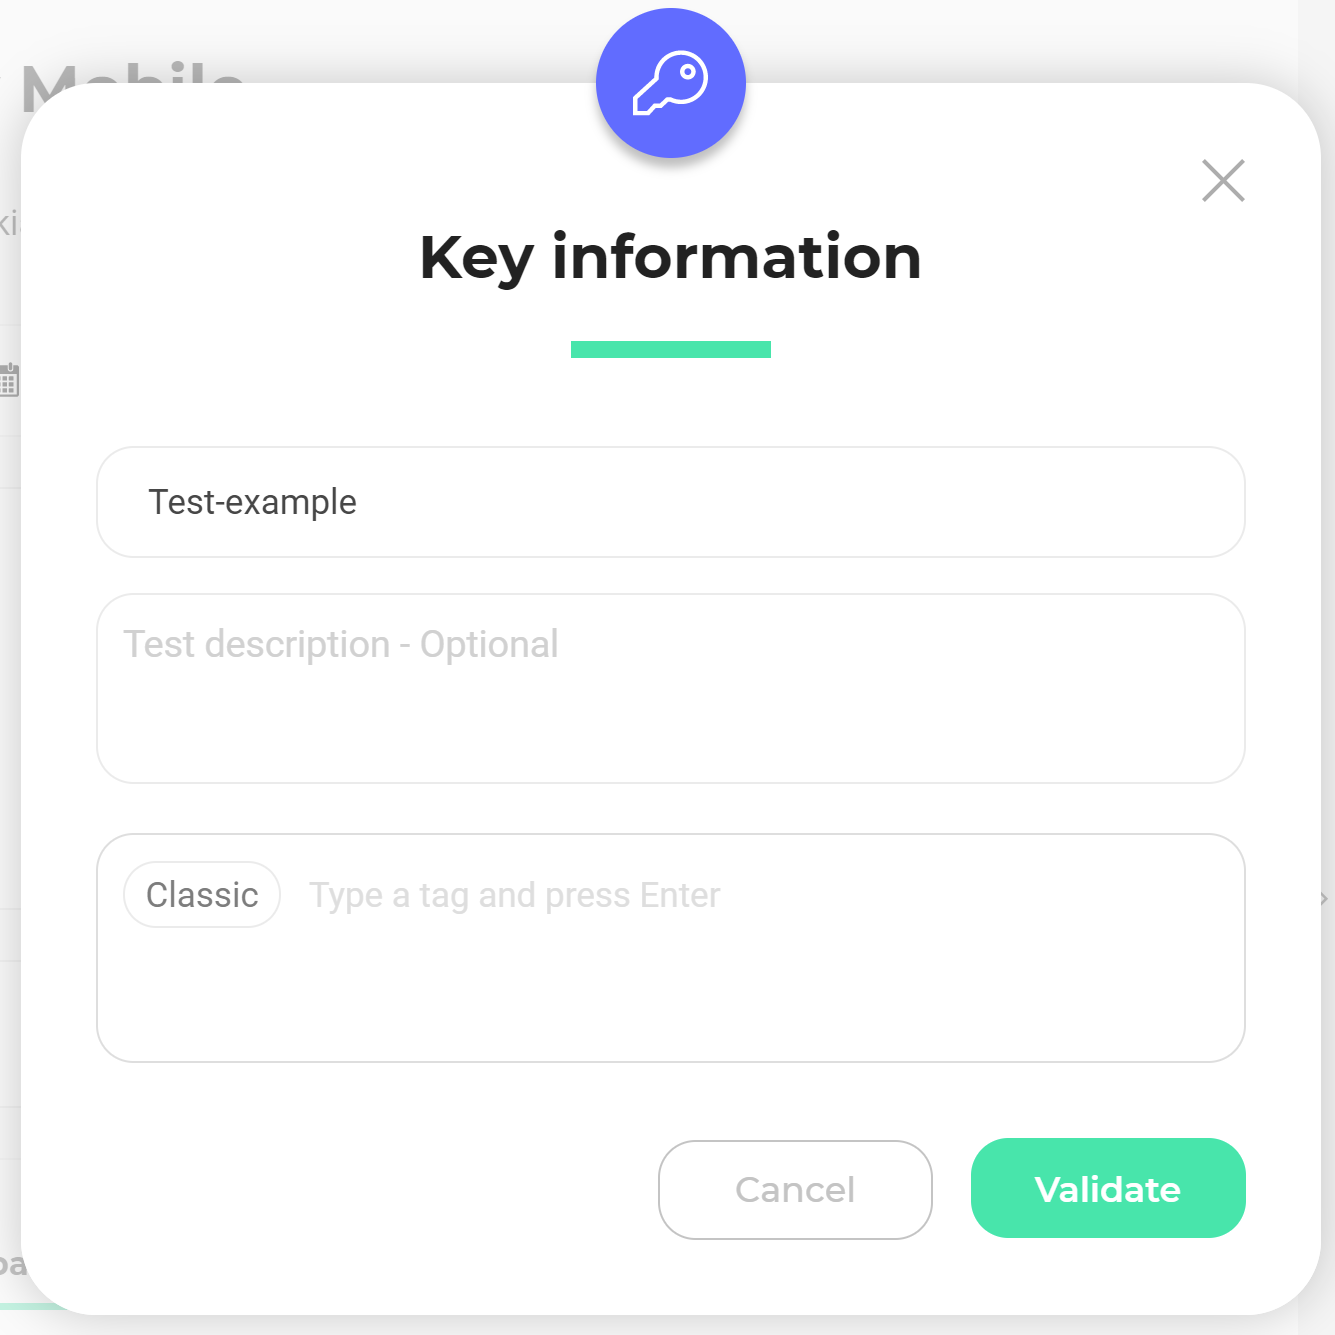
Key information
In the side panel, click on Key information to view and edit the main information of your campaign.
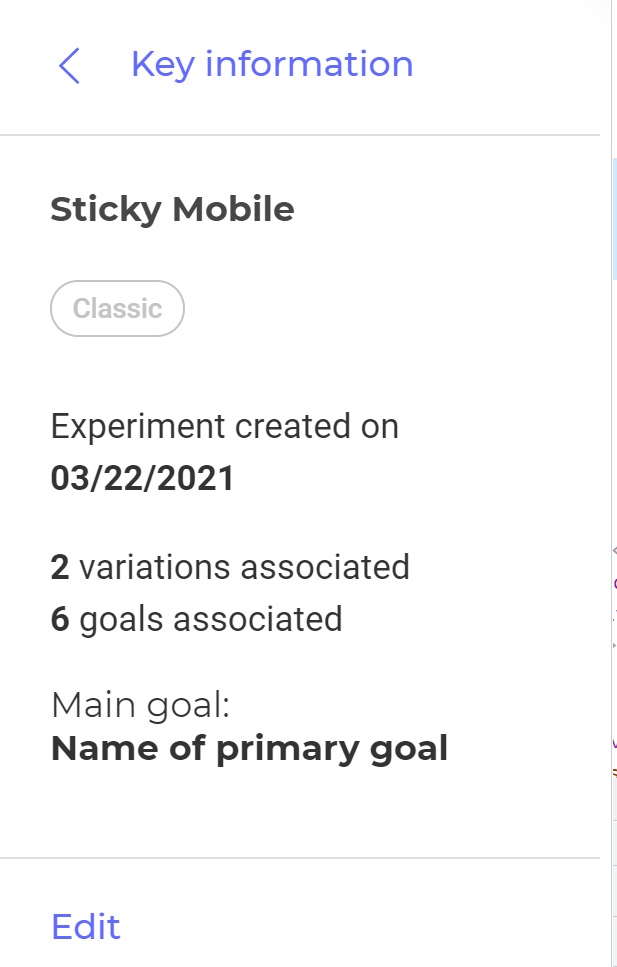
You will find in this tab various information about the campaign.
If this is a campaign:
- Name ;
- Description (if there is one);
- Tags (if there are any)
- Date of creation;
- Number of variations and goals;
- Name of the main goal.
If this is a personalization:
- Name;
- Description (if there is one);
- Tags (if there are any);
- Date of creation;
- Type of personalization (standard or predictive);
- Type of personalized content;
- Number of goals;
- Name of the main goal.
Click on Edit to display the pop-in allowing you to change the name of the campaign, its description and the tags associated with it.
Goals
In the side menu, click on Goals to view and edit the goals related to your campaign.
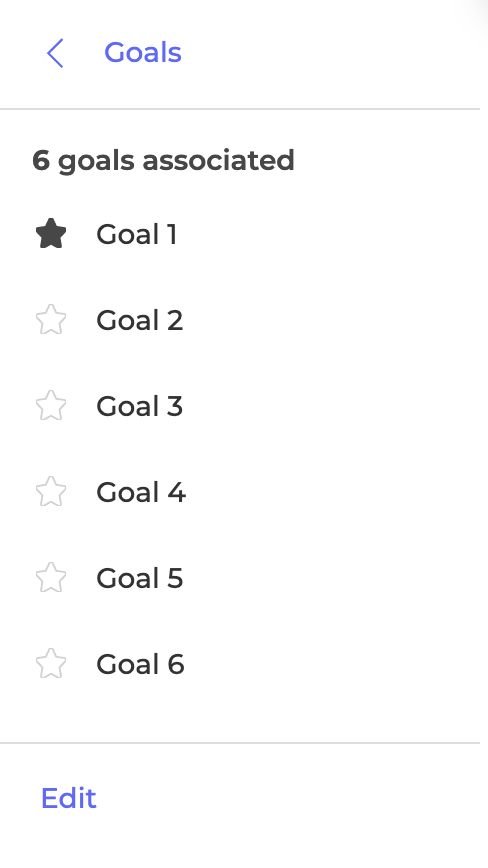
All goals related to the campaign are listed here. The first one of the list is the main goal of your campaign and is identifiable by its full black star.

Hover over the name of the goal brings up an information icon.

Move your mouse over this icon to see the additional information of the goal:
- Its type;
- Its description (or its configuration if there is no description).
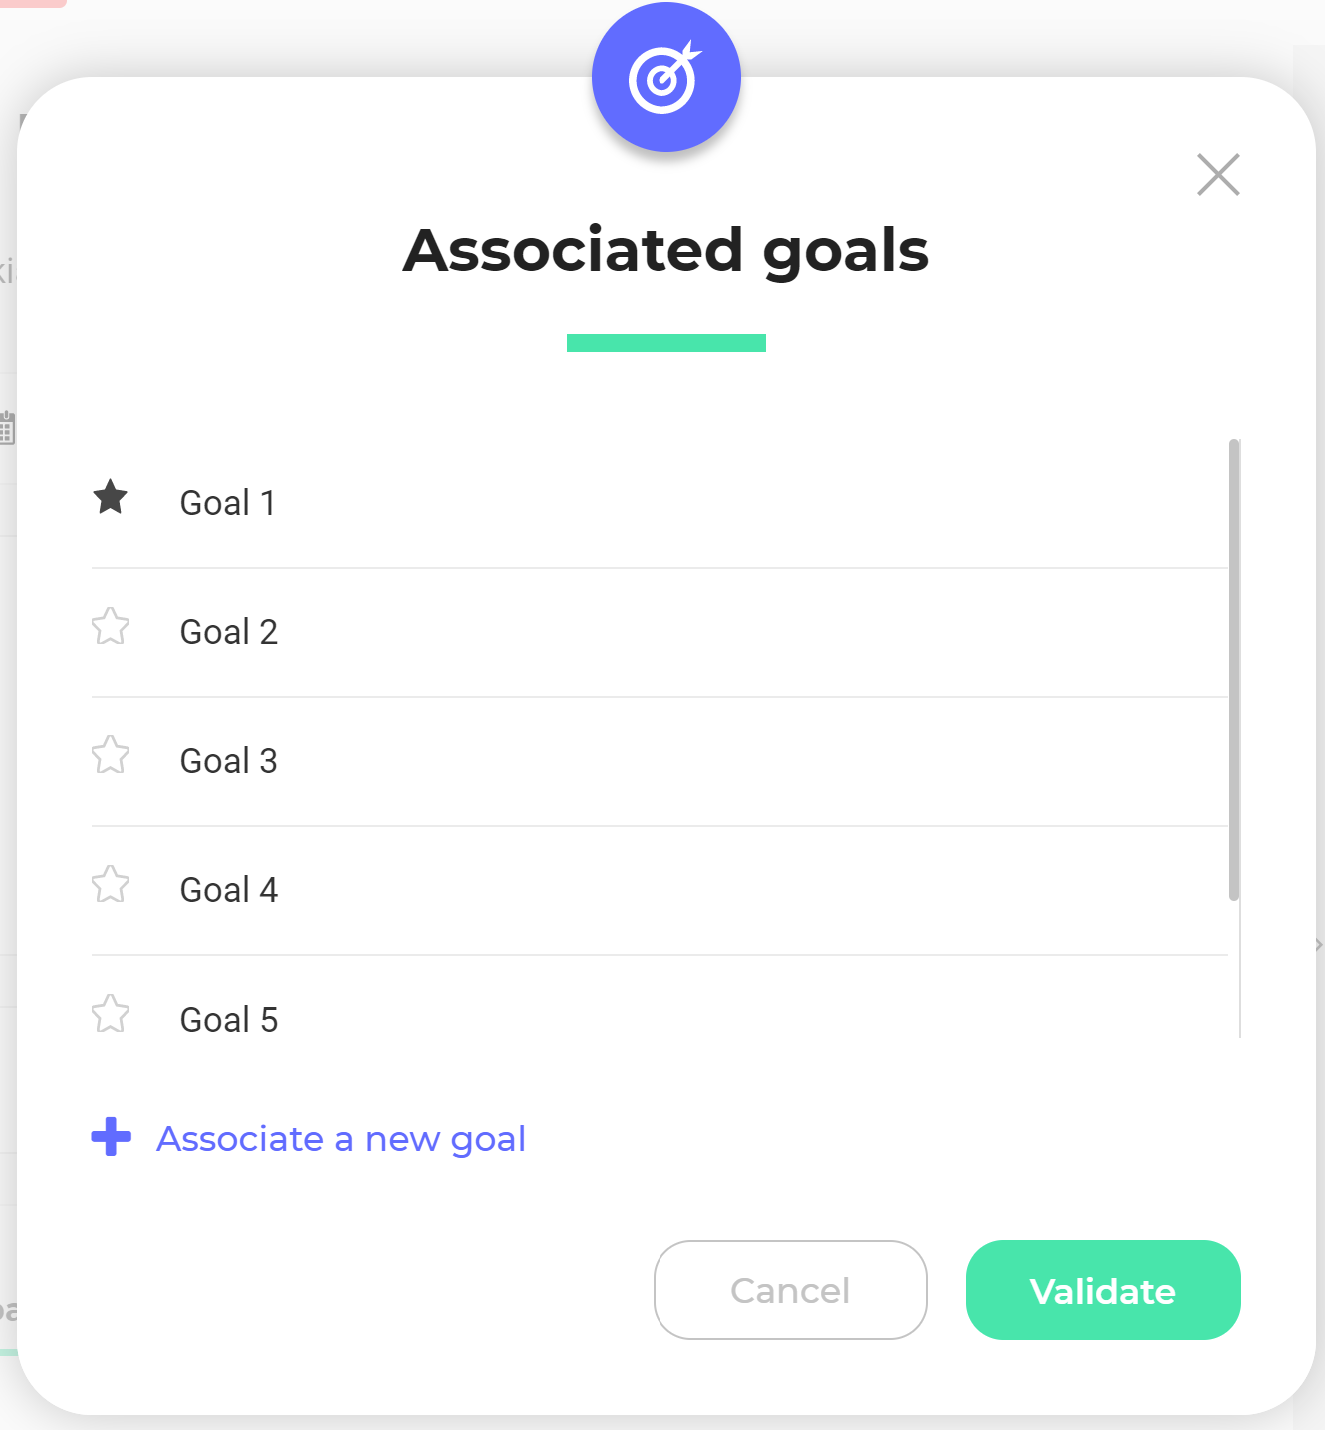
Click Edit to change the order in which goals are displayed, to dissociate goals, or to associate new ones.
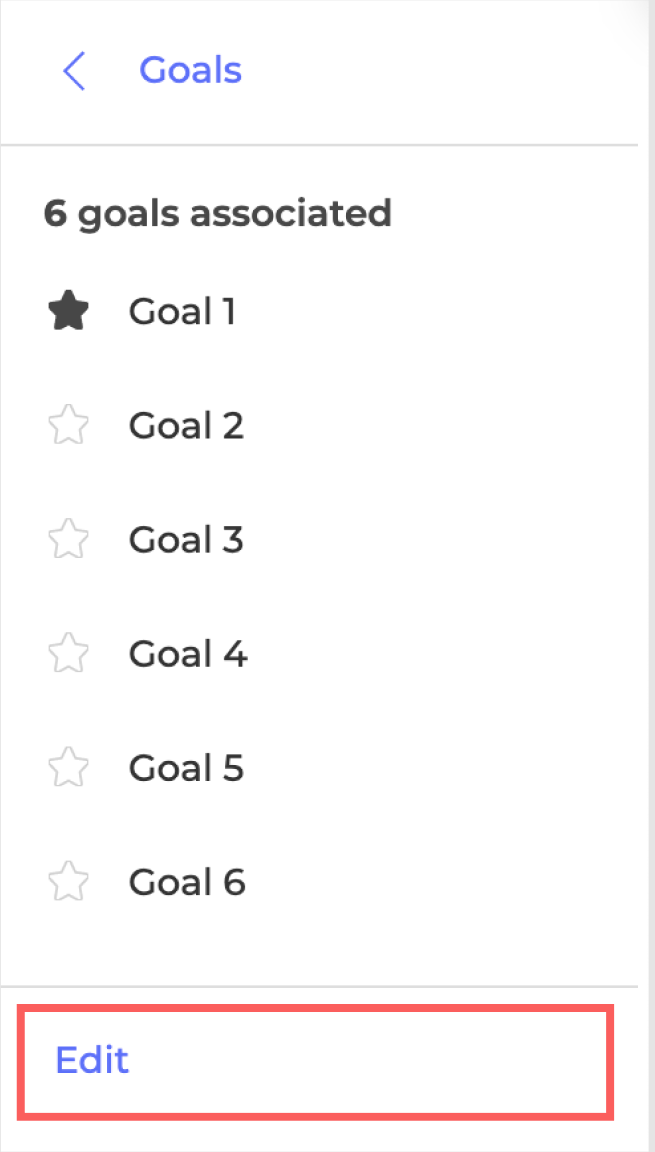
At the click on Edit, a pop-in with the list of related goals opens.
When you hover over a goal with the mouse, it becomes gray and two icons appear.

This icon allows you to dissociate the goal.

This icon indicates that you can edit its position in the list.
Dissociate a goal
To dissociate a goal, simply click on the dissociation icon.
A pop-in asks you to confirm your choice.
Change the order in which goals are displayed
To change the display order of the goals, move them one by one using drag and drop: click on the goal you want to move and, while holding the click, drag it to the location you want. Then release the click.
In addition to editing their layout in the sidebar tab, rearranging the order of the goals also changes their position in the results tables.
Associate new goals
To associate new goals, click Associate a new goal.
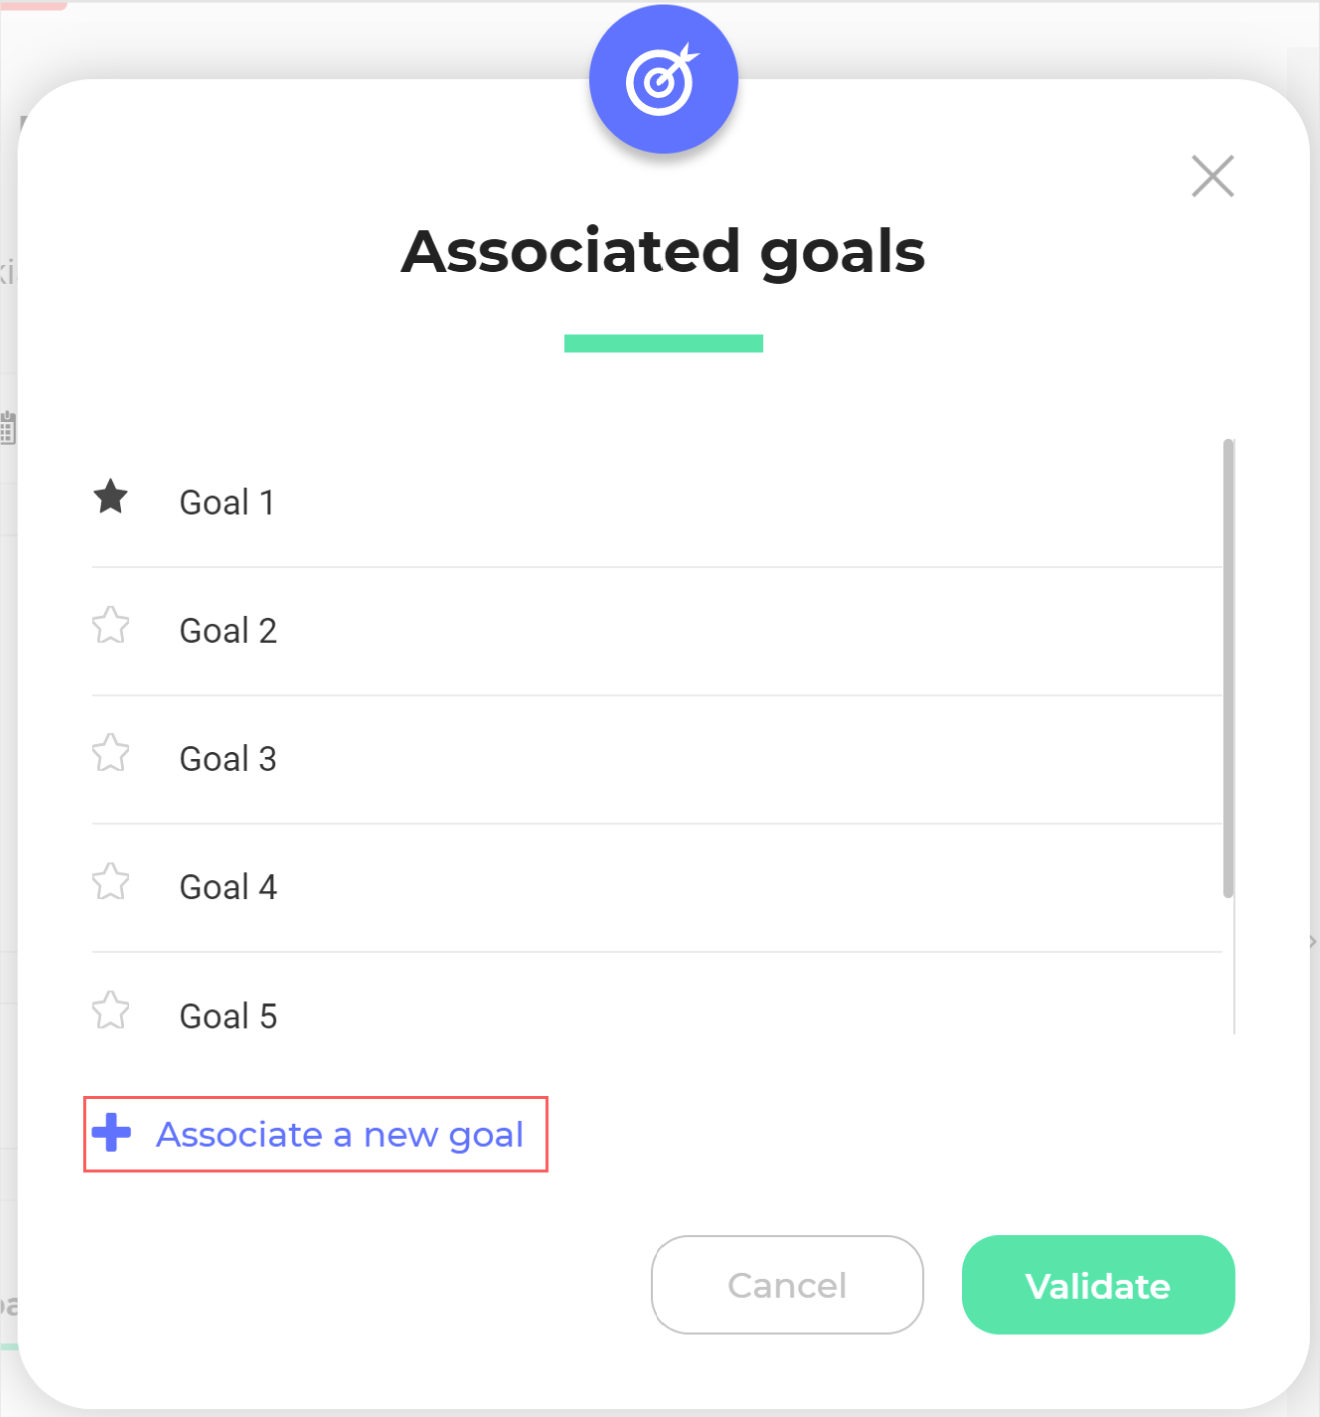
The button is then replaced by a drop-down menu containing the created goals set on this website that are not yet associated with the campaign.
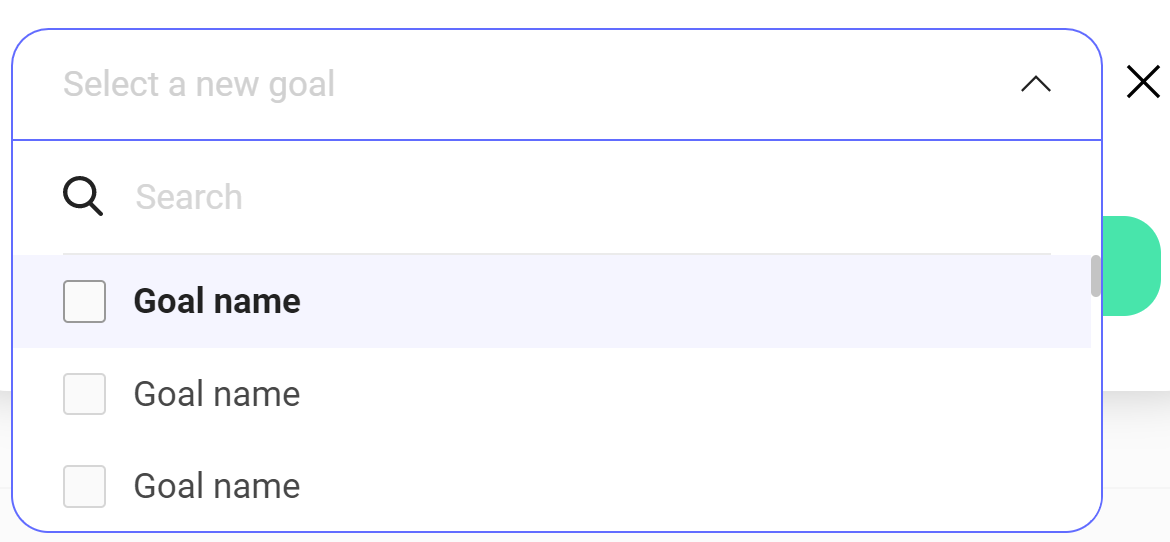
Select the goal(s) you want to associate with the campaign from those available in the list.
Click Validate to confirm the modifications or Cancel to close the pop-in without taking these modifications into account.

Variations (experiment)
The Variations tab allows you to view the main information about the variations of the experiment and to modify the allocation of the traffic.
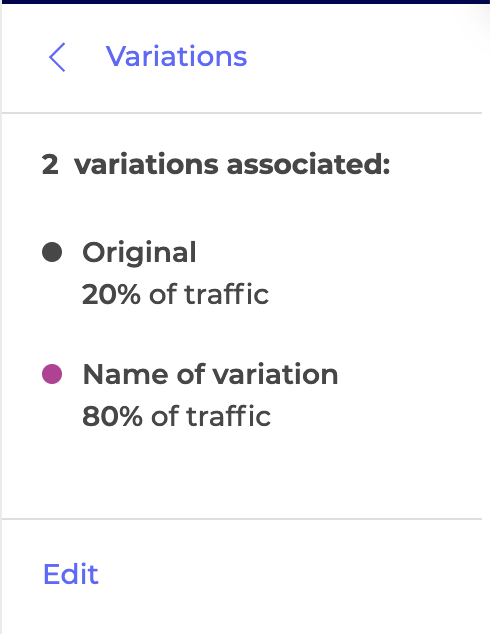
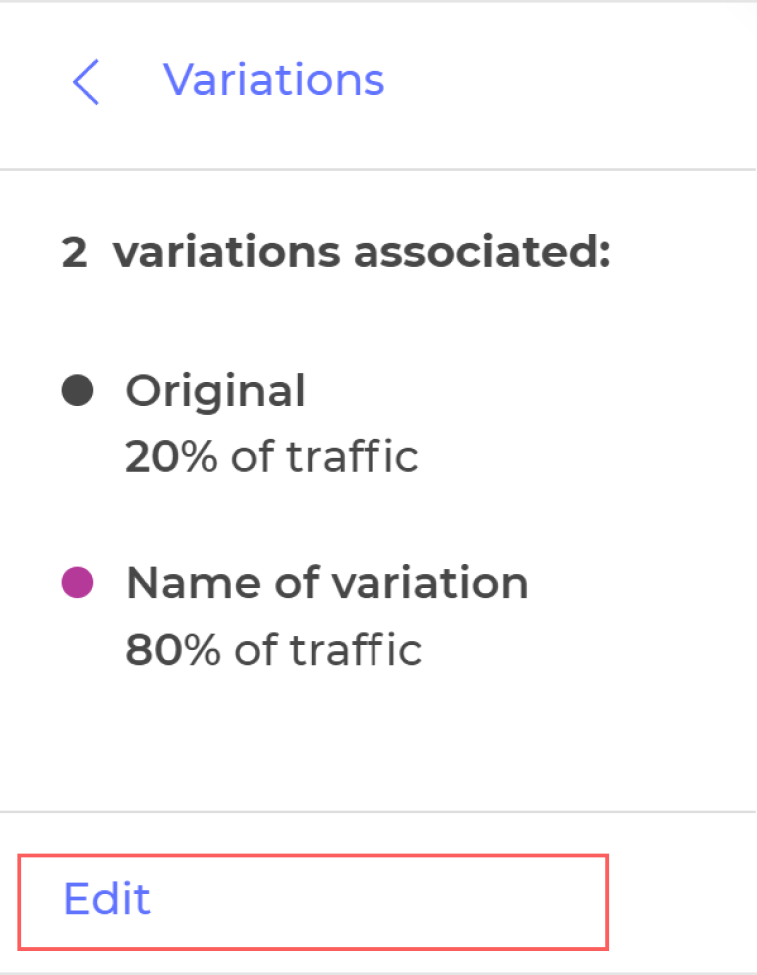
Variations associated
The set of variations created on the experiment are listed here and recognizable, as on the rest of the results page, by the colors associated to them.
The first variation of the list (black) is the original.
Under the name of each variation, you find the traffic rate allocated to it.

If you have hidden a variation (Actions on the results page) of the results page, it is indicated as hidden.
If you have disabled some variations, they appear after online ones.
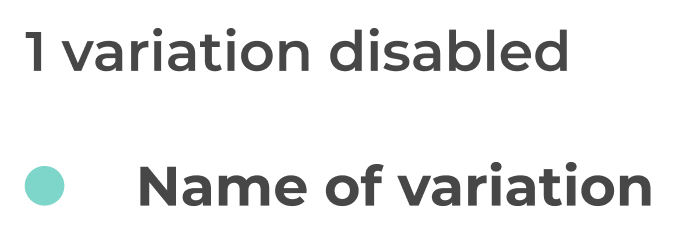
Note: A variation is considered disabled when it has been de-selected from the Graphic editor or when 0% of the traffic is allocated to it.
Unallocated traffic
The traffic excluded from the experiment is displayed at the bottom of the tab.
Change the traffic allocation
To change the allocation of traffic, click Edit.
A pop-in appears and allows you to change the traffic allocation for each variation associated with the experiment.
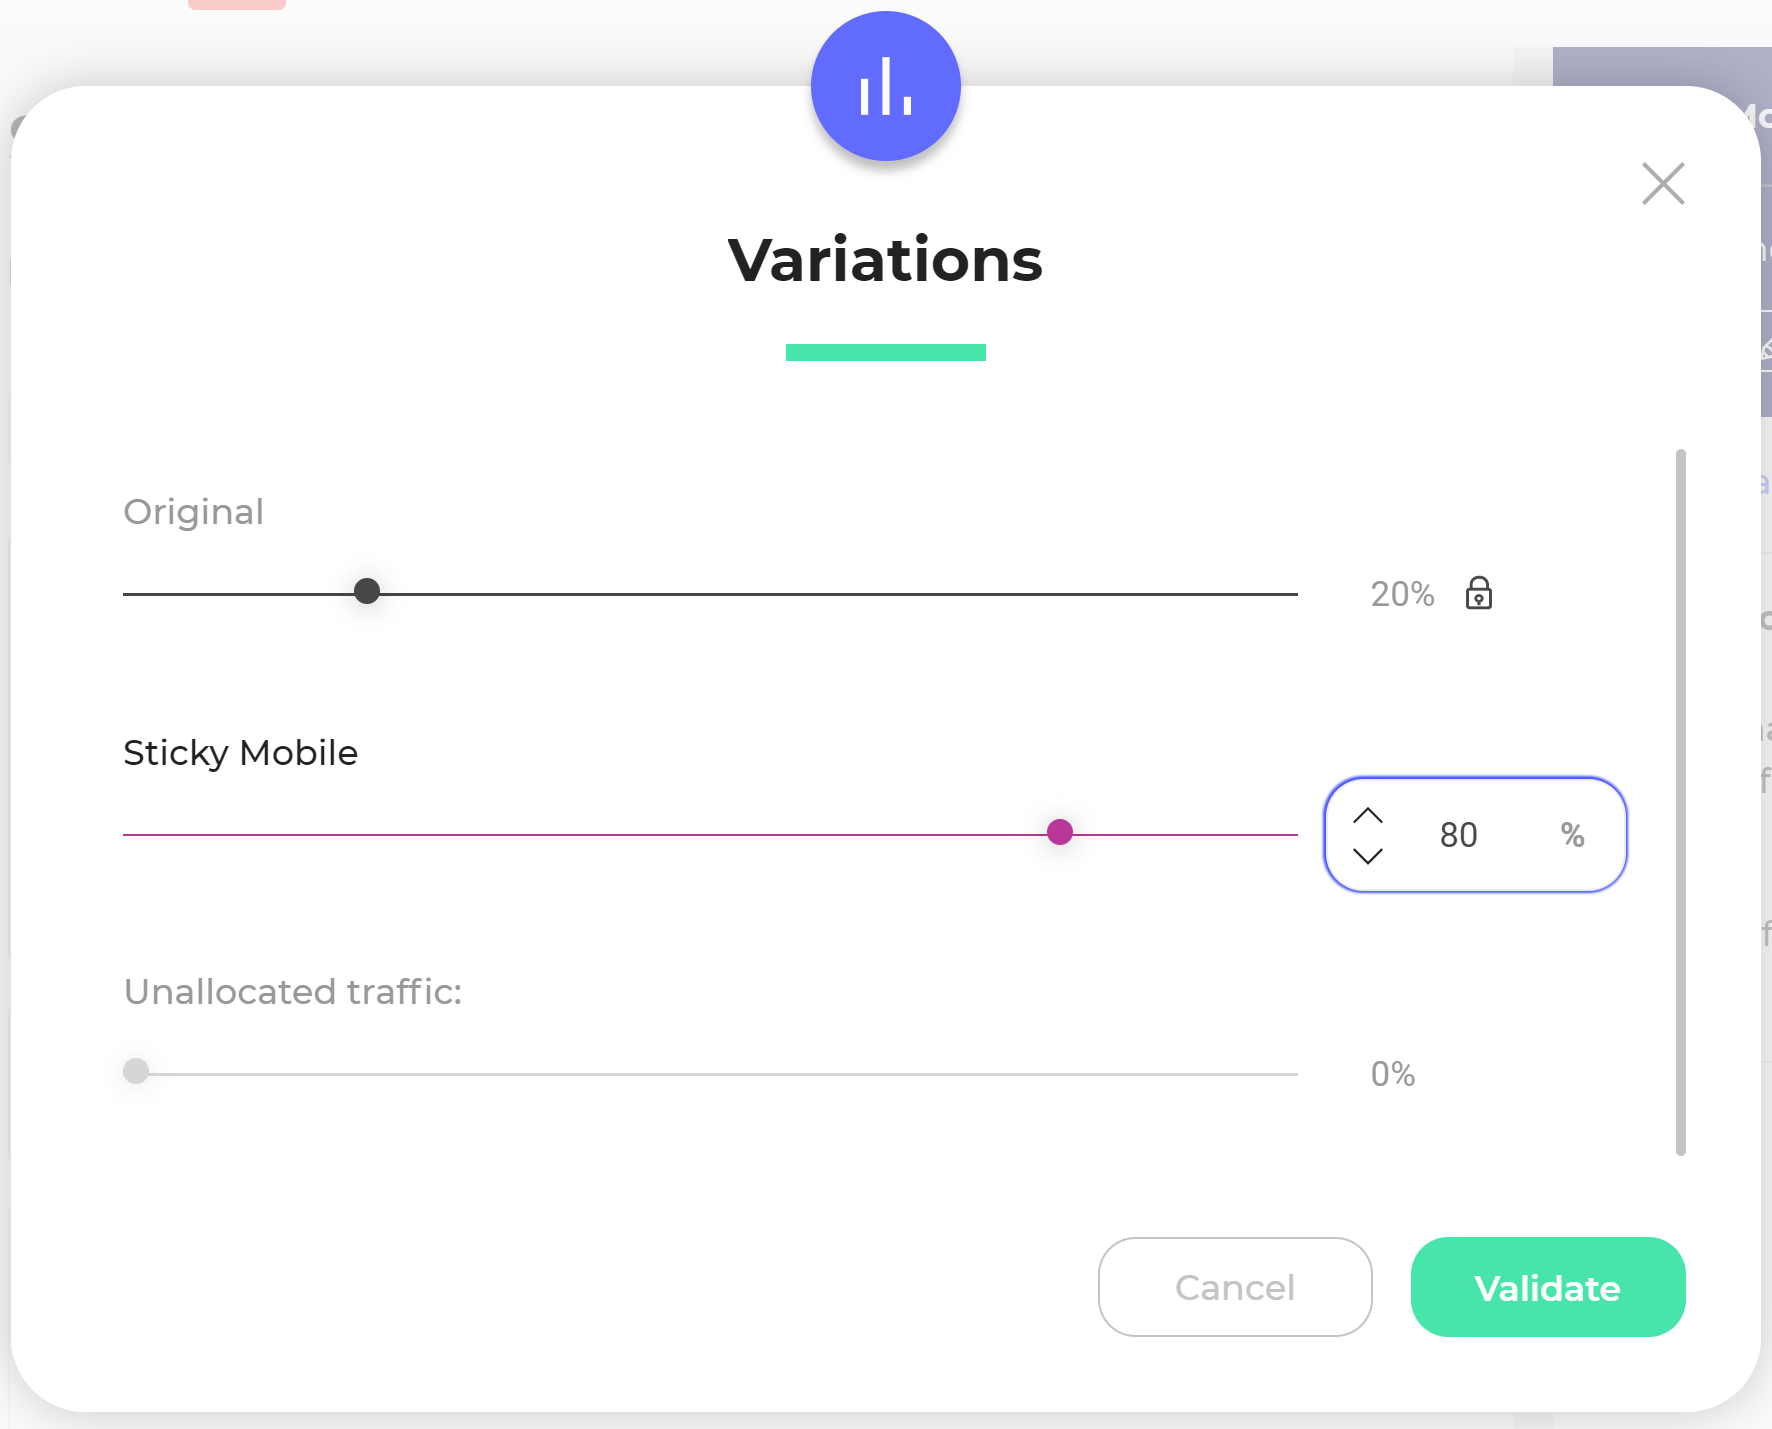
Define the distribution of traffic between variations in the same way as on the editor.
By hovering over a variation with the mouse, two icons appear:
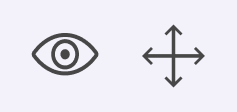
View variation

Click on the icon to view the variation in a new browser tab.
Reorder variations

The icon tells you that you can deplace it in the list of variations.
To change the display order of the variations, move them one by one by drag and drop: click on the variation you want to move and, while holding your click, drag it to the location you want. Then release the click.
In addition to changing their layout in the sidebar tab, rearranging the order of variations also changes their position in the results tables.
Targeting
The Targeting tab allows you to view the conditions for targeting your campaign and to modify them.
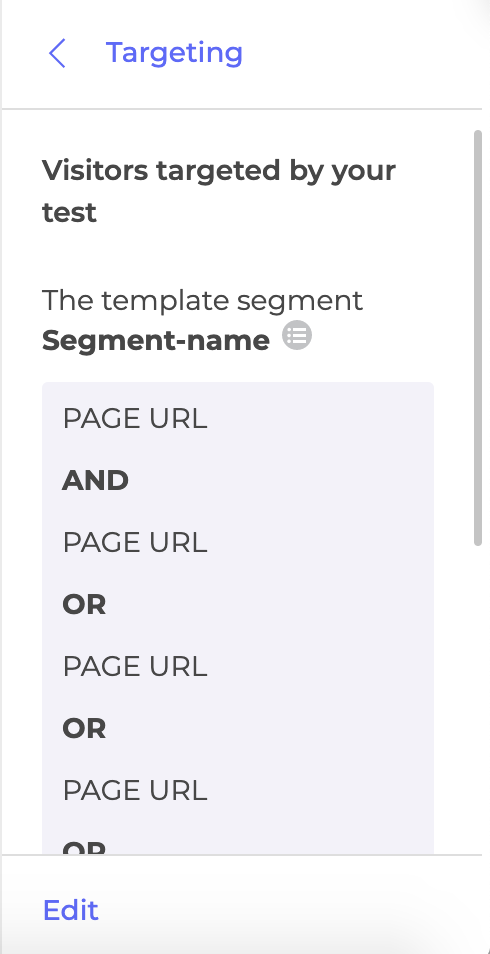
In the same way as in the step of finalizing your campaign, you find here the targeting conditions that apply to it.
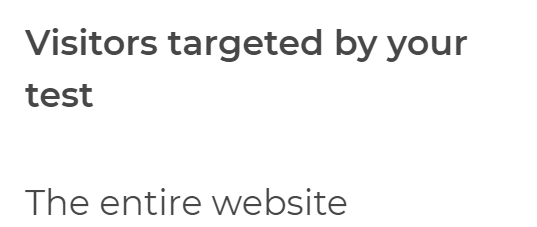
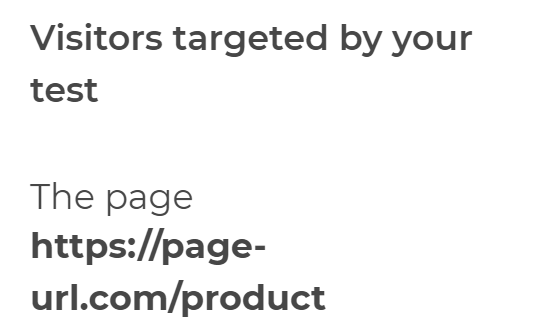
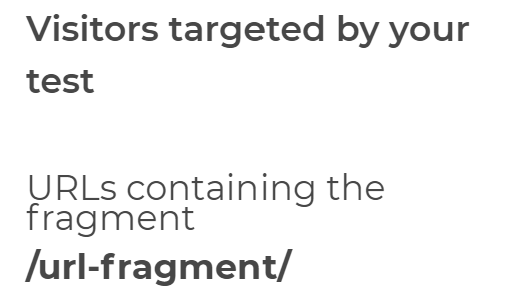
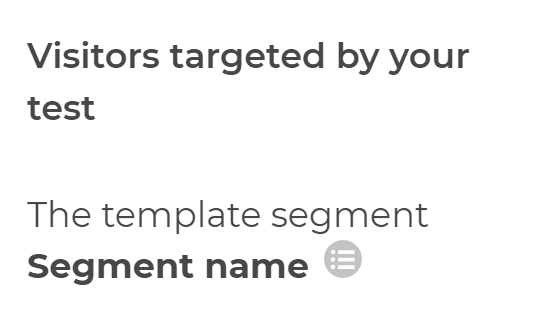
Will be displayed, as the case may be:
- The URL of the entire website to which the campaign applies;
- The URL of the page to which the campaign applies;
- The URL fragment that a site page must contain for the campaign to apply to;
- The specific segment you have assigned to the campaign and a summary of its conditions;
Change targeting conditions
To change the targeting conditions, click on Edit.

A pop-in containing the segment builder opens to change the targeting conditions in the same way as when you complete an campaign. To learn how to use the builder segment, see the dedicated article .
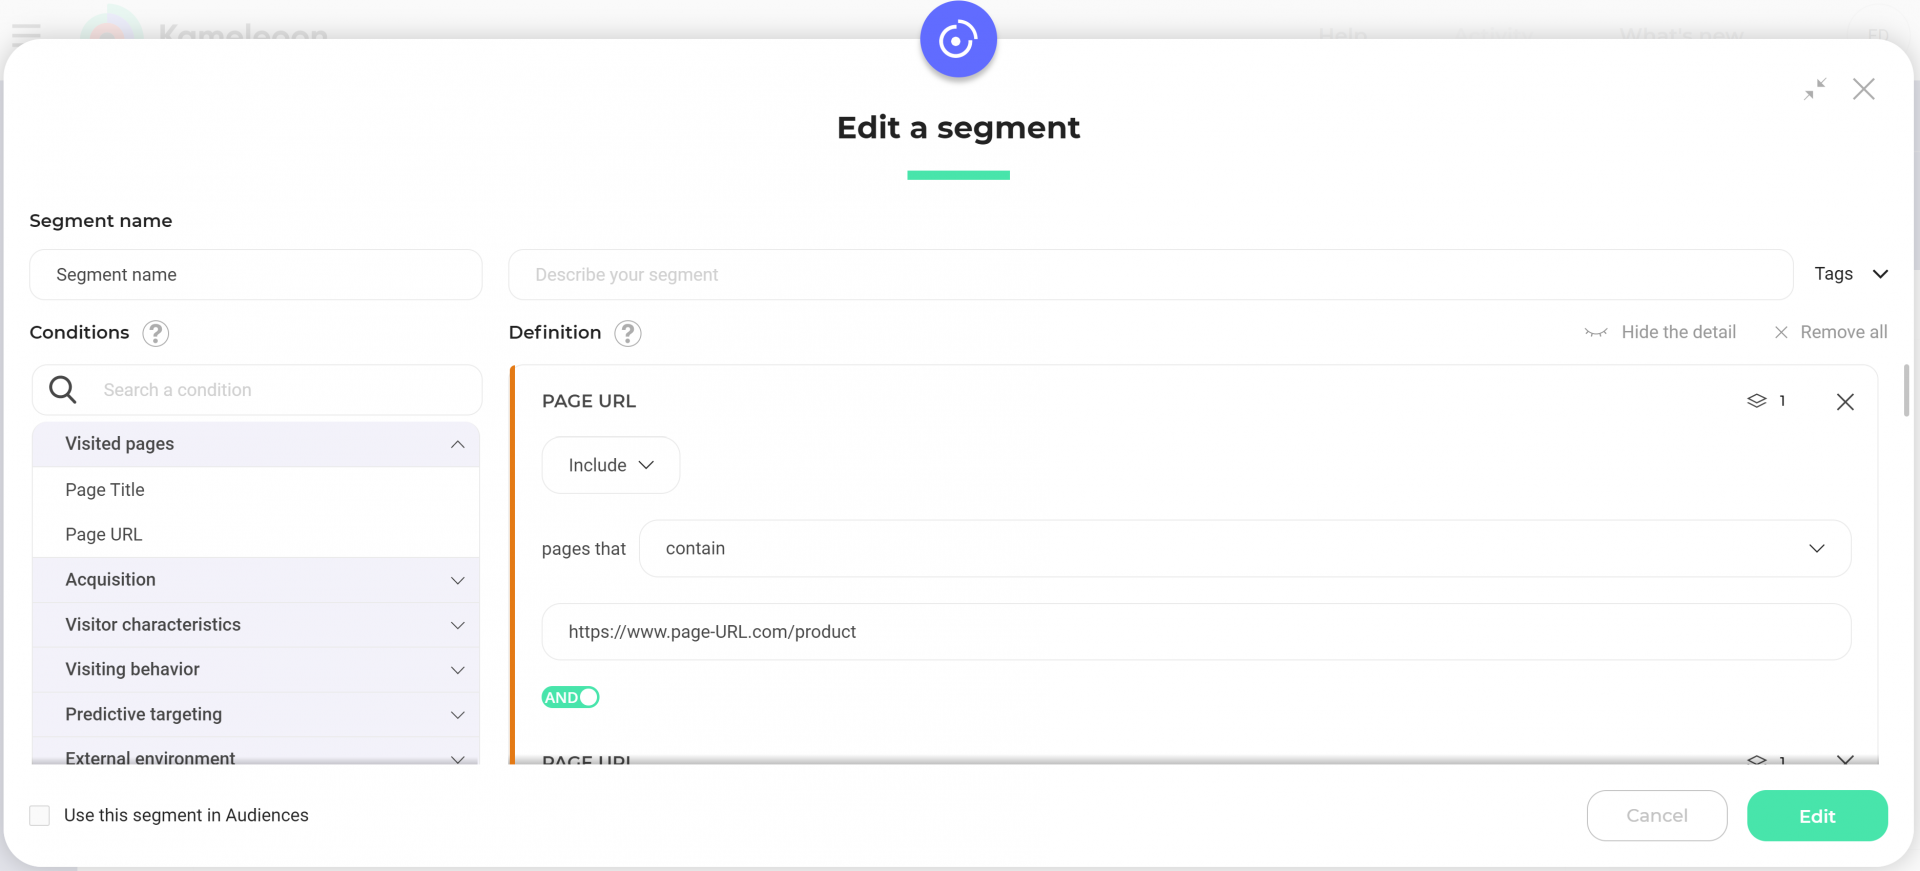
Note: If you modify a segment also used on another campaign, this one is duplicated so as not to disturb the other campaigns.In this case, an informative message appears at the bottom of the pop-in.
Reporting tools
The Reporting tools tab reminds you of the tracking tools you selected in step 3 of the finalization.
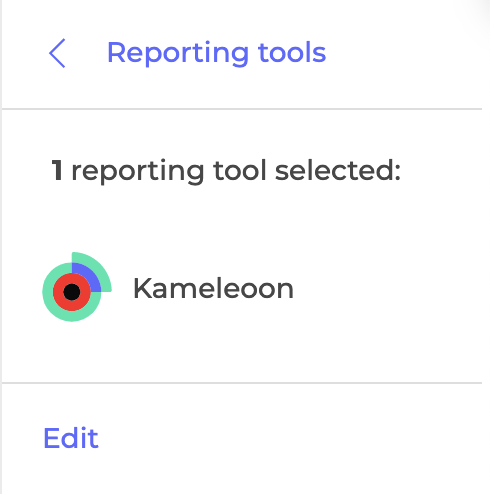
Add reporting tools
To add new reporting tools, click Edit at the bottom of the tab.

A pop-in opens with the list of reporting tools configured on your account.
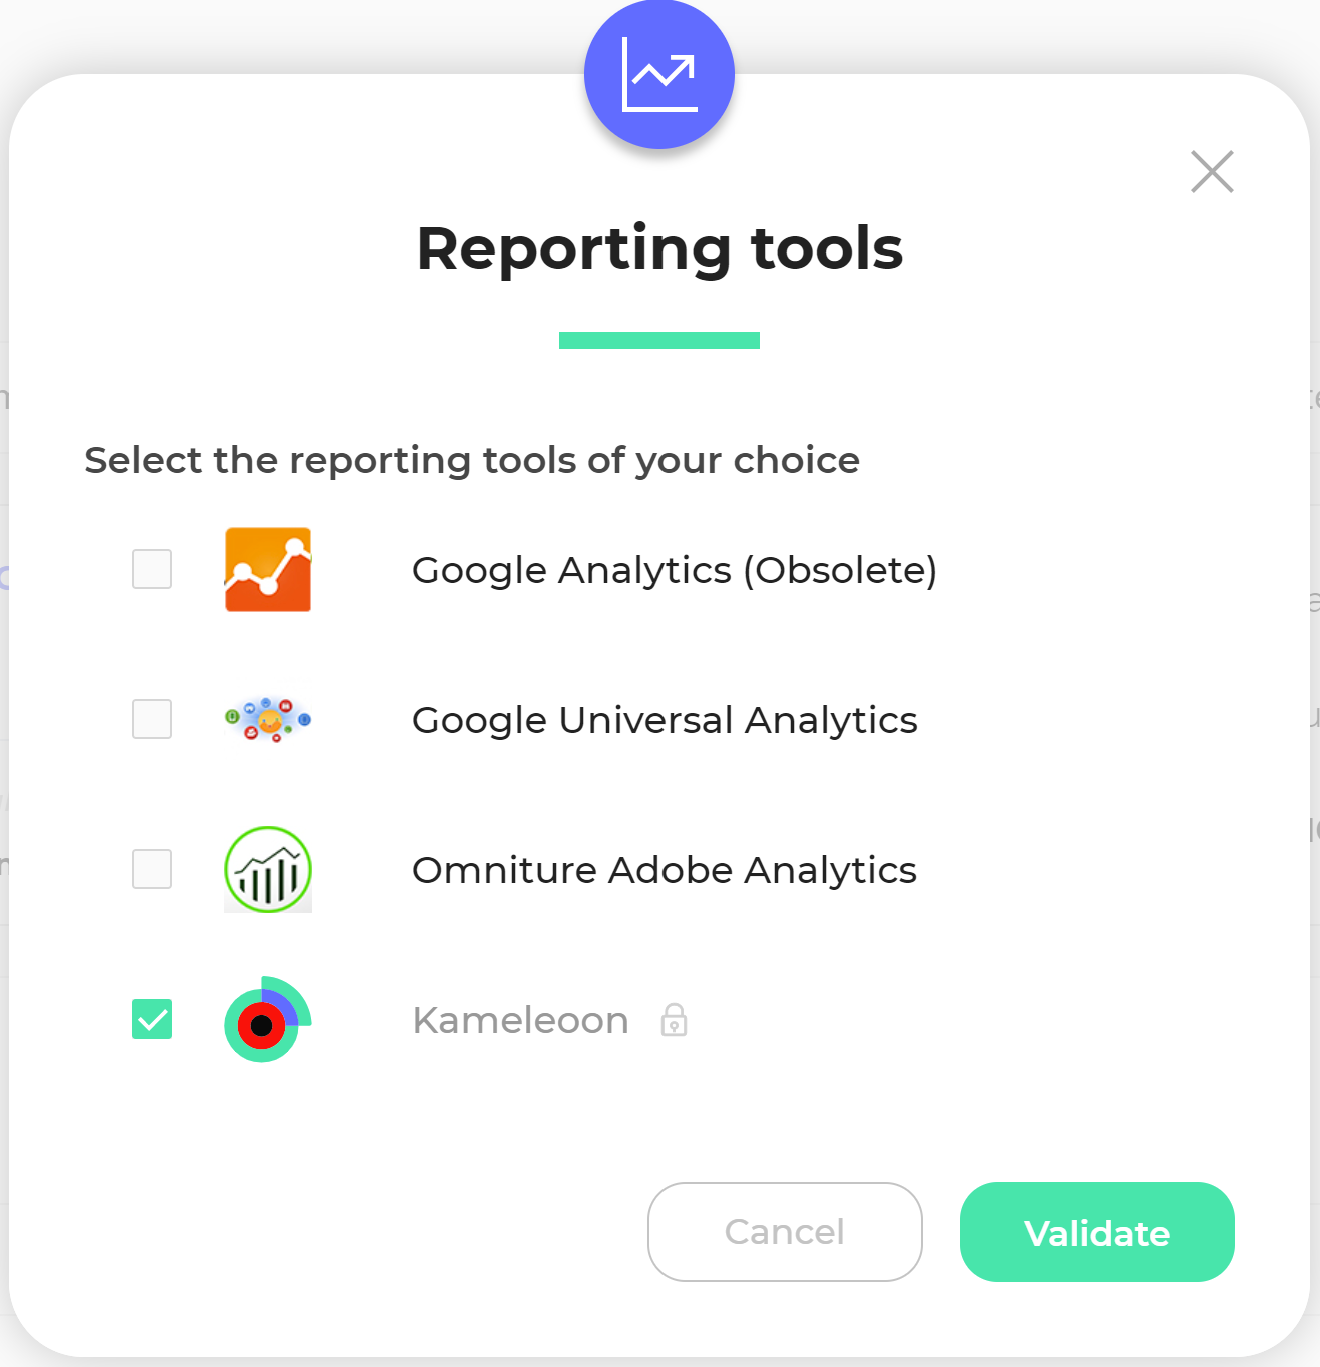
Note: Only reporting tools configured with your account are displayed.To set up new reporting tools, see the dedicated articles.
If the available tools are numerous, a search bar appears and allows you to easily find a particular tool.
Check the reporting tools you want to associate with your campaign and click Validate to confirm the modification.
History
The History tab keeps track of changes made to the campaign. The tab is similar to the Activity page in your Kameleoon App, with the difference that you will find here only the actions made on the campaign.

